Recently I found a how to for mosaic knitting how to for mosaic knitting and I’m thrilled!
I know slip stitches for some time but I never realized what you can do with them.
The point is two-colour knitting of fine patterns (no big areas!) but only using one thread at a time.
That’s a great relief as everybody knows who tried like me to do some intarsia knitting and was busy to detangle the yarns half of the time ;-)
 You can’t mosaic knit all patterns very easily, slants e.g. have their own difficulties.
I’m publishing two diagrams for rhombs further below which may be of help.
Anyway there remain enough patterns that are fun and can be knitted quite fast. I even found a mosaic knit alphabet chart, but didn’t try it. But you can see that mosaic knitting is different from normal two-coloured knitting like intarsia or fair isle knitting.
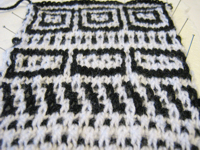
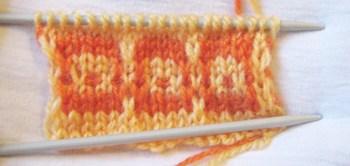
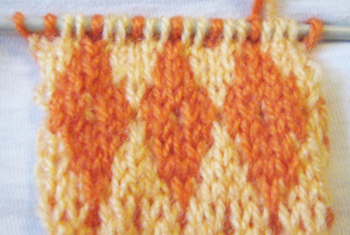
Here I’m showing my swatch all around ;-) I simply tried there which patterns I can knit and I really like it :)
What I like, too, is that the floats on the back (therefore only fine patterns) make the fabric more firm than I can ususally knit.
This way even I could knit mittens where the wind won’t go through ;-)
I didn’t find a German tutorial (which doesn’t mean that there is any!) and although the English tutorial on how to mosaic knit English tutorial on how to mosaic knit was of a great help I was so fascinated that I wrote a German instruction.
Which I now simply translate ;-)
That’s how to:
(Click pictures to enlarge)
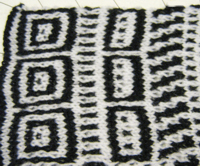
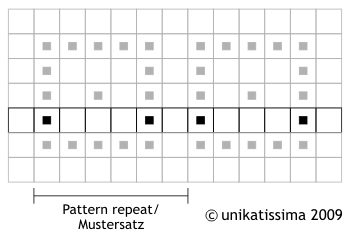
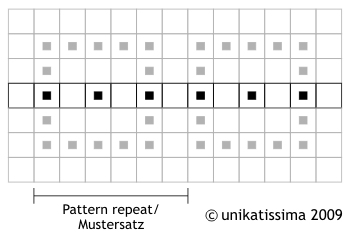
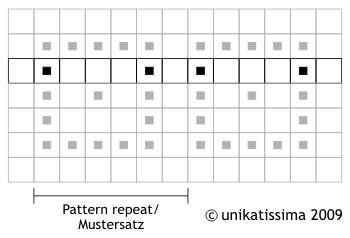
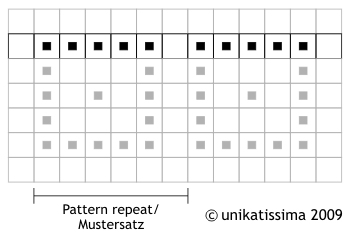
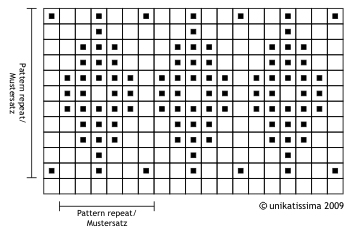
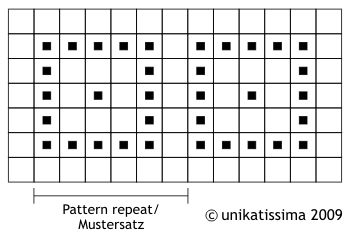 This is the patterns we will use to learn mosaic knitting.
Every row of this chart will be knitted to and fro, the colours will be alternating.
And this is how the symbols and photos are related:


First row of diagram:
 I will knit three of the little squares (= 19 st) and add two edge stitches (= 21 st).
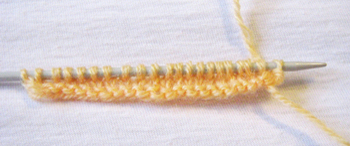
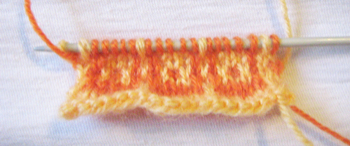
First cast on the desired number of stitches in light yellow (that is ) and then knit one row to and one row fro (i.e. knit the first row and purl the second).
Those two rows correspond to the lowermost row in the diagram.
Note: Apparently you can knit in garter stitch or partly in garter stitch, too. In the english tutorial english tutorial she knits e.g. the second colour in garter stitch, which means, that she works the four rows as follows: knit, purl, knit, knit.
Note: Always knit both edge stitches!
I’m knitting every first stitch of the row and slip the last, but you can knit other edge stitches, too.
Second row of diagram:
 I told before that we will knit two rows of every colour. Because the first two rows were light yellow, we’re working the next two rows with the orange thread, the yellow one simply stays where it is.
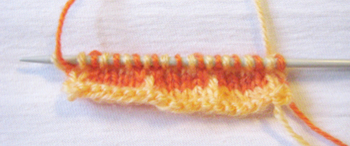
Following the diagram knit all in orange, all simply slip without knitting.
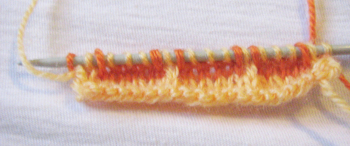
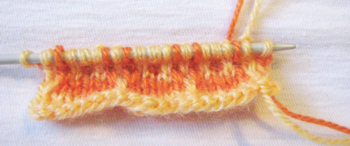
That’s how it looks after the first row in orange (left photo) and after the second row (right photo).
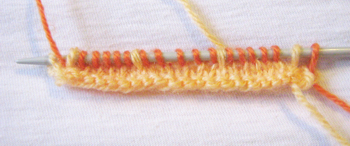
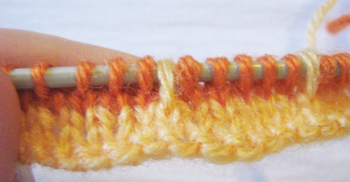
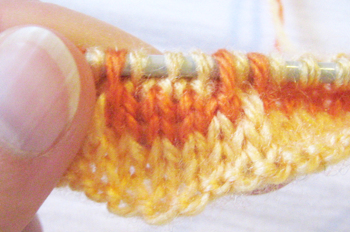
Because the fabric curls I made an extra photo. You can see very well the light yellow slip stich which reaches over both orange knitted rows.
Third row of diagram:
 We’re working the next two rows with the light yellow thread, the orange one simply stays where it is.
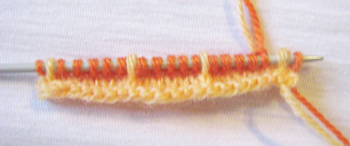
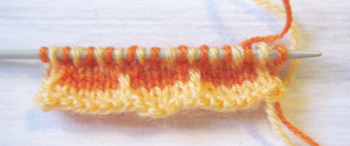
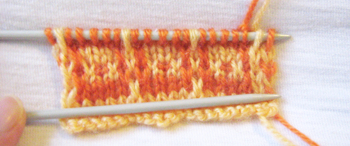
Following the diagram knit all in light yellow, all simply slip without knitting.
That’s how it looks after the first row in light yellow (left photo) and after the second row (right photo).
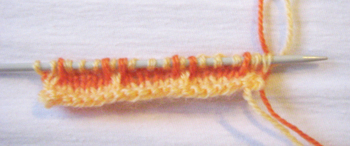
Here I made an extra photo, too, because the fabric curls.
This time you can see very well the orange slip stiches.
Fourth row of diagram:
 We’re working the next two rows with the orange thread again, the yellow one simply stays where it is.
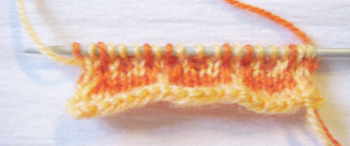
Following the diagram knit all in orange, all simply slip without knitting.
That’s how it looks after the first row in orange (left photo) and after the second row (right photo).
From now on I didn’t make no more extra photos.
Fifth row of diagram:
 Because we’re alternating the colours we’re working the next two rows with the light yellow thread, the orange one simply stays where it is.
Following the diagram knit all in light yellow, all simply slip without knitting.
That’s how it looks after the first row in light yellow (left photo) and after the second row (right photo).
Sixth row of diagram:
 We’re working the next two rows with the orange thread again, the yellow one simply stays where it is.
Following the diagram knit all in orange, all simply slip without knitting.
That’s how it looks after the first row in orange (left photo) and after the second row (right photo).
Seventh row of diagram:
 I simply added two knitted rows in light yellow and the pattern ends.
I confess that I’m not a very good knitter, but there’s no reason why your items shouldn’t look more evenly ;-)
Wrong side:
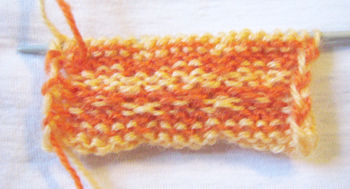 This is a photo of the back: You can see very well that we don’t have no long floats on the back with this technique, although we knitted 2 rows with groups of five in orange.
That is because we were alternating the colours: we were able to knit them in place of slipping them.
I’d always design a pattern in a way that I’d never have to slip more than 3 stitches but that’s purely a matter of taste.
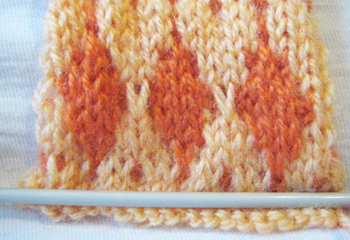
Rhombs:
I played around with rhombs to see if I can make general statements about slants, but although I managed to create two possible rhomb patterns (see the following pictures) I still don’t understand slants:
I find that silly!
The difference between both patterns is the middle part: the first pattern has just one middle row, the second three.
The little orange dots (stitches) in the first and last pattern rows as well as the yellow dots in the middle of the rhomb make sure that no more than 3 stitches are to be slipped and make the pattern a little more dynamic at the same time.

Links:
Mosaic Knitting – you can find the link to the tutorial as PDF-file (ca. 440KB) there in the first paragraph
On the same website you can find a tutorial for a cute bag in mosaic knit
The original site doesn’t exist any more and is now available through webarchive:
Mosaic Knitting – you can find the link to the tutorial as PDF-file (ca. 440KB) there in the first paragraph
On the same website you can find a tutorial for a cute bag in mosaic knit
Mosaic Knit Alphabet Chart – you can find there a link to the Mosaic Knit Alphabet Font which should mean (I didn’t download the font) that you can write any word in your word processing program, print and knit them after installation.
Here at unikatissima: Intarsia Knitting
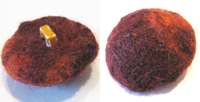
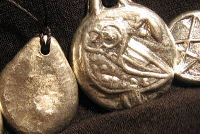
 I have lots of old buttons and as you can see on the photo not all look very nice.
 Admittedly a wine glass would look better, because the tea light is hidden then.
 Before I cut the lampshade I embellished it with some flourishes – looks cute, doesn’t it?
 Height H = 6 cm
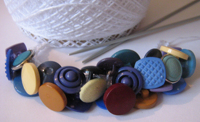
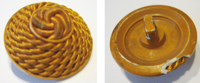
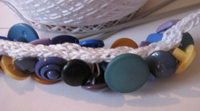 Because I only had seed beads I simply took some of my buttons and must say that I like the result, also.
 In fact I found the hole pattern around the lettering the most interesting.
 What I also liked was that the lower holes made a nice light pattern.