
I found a tutorial on how to make box dolls – stunning!
Something for my to-do-list! :)
Links:
Box Dolls by Catherine Moore
…compilation of tutorials
I found a tutorial on how to make box dolls – stunning!
Something for my to-do-list! :)
Links:
Box Dolls by Catherine Moore
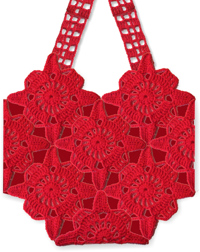
Via a craftster thread (Inga’s Häkelbeutel ~ German Granny Square Bag (CAL)) I found the tutorial for Inga’s Häkelbeutel (PDF ~140 KB).
The Granny square bag is to be found everywhere in internet and I understand why, because it is a brilliant idea.
On the photo I took my Lacy Crochet Square Margarethe from the day before yesterday and assembled it (digitally) to Inga’s Häkelbeutel – I haven’t had time yet to do it ‘for real’.
Looks good anyhow, doesn’ it?
Links:
At craftster: Inga’s Häkelbeutel ~ German Granny Square Bag (CAL) (‘CAL’ means ‘Crochet Along’: everybody crochet the same thing and later they compare the results)
Inga’s Häkelbeutel (PDF ~140 KB – Englisch)
Inga’s Häkelbeutel (PDF ~140 KB – German)
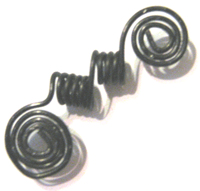
When stringing bead jewelry you sometimes need spacer bars to keep beads or strings of your jewelry items apart. You can buy them as a matter of course, but I like much better making the needed spacer bars myself.
On the photo you see a first attempt.
Both middle spirals are meant to pass strings of a necklace through, the outer spirals are ‘nothing but’ decoration.
Not bad for a start, isn’t? ;-))
Links:
Making Your Own Spacer Bars
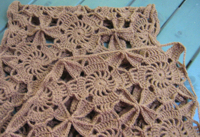
I proudly present my first self designed
Square ‘n’ Fair – Lacy Crochet Square Margarethe (PDF ~705 KB)!
It is a PDF-File that contains the diagram for the crochet square Margarethe that I designed (it is my first! ;-)).
On the photo you see a big scarf I made with this pattern (but I haven’t blocked it yet – it will look much more beautiful then ;-))
I also included several matching diagrams in the PDF-file to this square (‘elements’): a rectangular half square, a triangular half square, a ‘squeezed square’ and two patterns for matching ‘ribbons’.
Additionally I have inserted several ideas on how to combine the different elements and project ideas about what to do with the elements.
Because different terms are used for the same stitches in British and American English, you can find photo and text descriptions of the used stitches in order to easily identify them (not meant as a tutorial).
Best try it yourself:
Use different materials, as e.g. thick wool yarns, middle acryl yarns ;-), fine cotton yarns, embroidery floss, raffia, package string, gift ribbon/gift curling ribbon, yarn made from plastic bags…
Make different items, as e.g. sweaters, vests, tops, cardigans, scarves, shawls, headbands, hats, mittens, wristwarmers, skirts, purses, wallets, totes, scrunchies, collars, appliqués, insertions, book or journal covers, tablecloths, place mats, glass coasters, pillows, window or door decorations, bedthrows, ornaments for greeting cards …
If you want to make clothing, check again crochet patterns for/from square medaillons (you won’t need the medaillon patterns this time, but only the women clothing models ;-)) and the basic woman measurement charts for clothing patterns at the website of Jessica Tromp.
Links:
Square ‘n’ Fair – Lacy Crochet Square Margarethe (PDF ~705 KB)
Jessica Tromp:
Crochet patterns for/from square medaillons
Basic woman measurement charts for clothing patterns
At craftster: Curling Ribbon+Crochet Hook=Many Purses
At Marlo’s Crochet Corner: Cutting the plastic bag ‘yarn’
Here at unikatissima:
Plastic Bag Tote
Clothes From Crocheted Medaillons
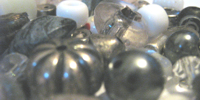
Take a look at the charm bracelets of Connie Fox, aren’t they beautiful?
I really love them!
She even wrote a tutorial on how to make charm bracelets, now everybody can make them.
I came until now only to a compilation of charms ;-))
Links:
Wire work and bead project by Connie Fox
Charm bracelets by Connie Fox
A ‘Freeform CAL’ is a ‘Freeform Crochet along’, viz., everybody works following the same specification and see, how (different) the results can be.
And I liked this Freeform CAL especially, because I find it often difficult/exhausting to think of a new stitch every time while working freeform.
Here are some specifications:
I find it great: this way you have a ‘pattern’ you can follow even when you work freeform and when you look at the pictures at the Freeform CAL thread you will see that every item looks different from the others.
I’m amazed!
Links:
Freeform CAL at craftster.org
Here at unikatissima: Freeform Needlework
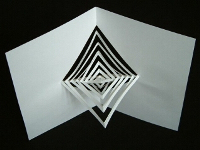
I found a tutorial for a great pop-up card! The center spins apparently when opening the card.
There is even an animation.
Unfortunately I haven’t had the time to make this card yet, but I will ;-)
Links:
Popup Spinner
Animation showing how the popup spinner works

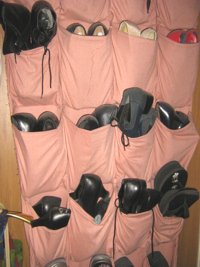
A Wire Jig is a kind of board with pins where you can wind the wire. It is used for making jewelry.
And now I know how to make my own wire jig.
As you can see on the photo I gathered the pins already, I only have to find a wooden plate ;-)
And when you gathered all the elements of the wire jig, you can begin to make beautiful wire jewelry.
Links:
Make your own Wire Jig
WigJig University of Making Jewelry with Wire and Beads
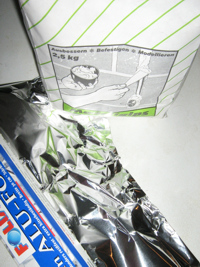
I found a tutorial on easy plaster casting.
The point is mainly to create the mold of a star or the like from aluminium foil and to cast it with plaster.
Even if it is filed under ‘kids crafts’, I find the idea interesting.
I did it once, but I can’t find back my item ;-(
At that time I made a mold with a rounded bottom.
To fix it thoroughly (to prevent the plaster to ‘run away’) I put the aluminium foil mold into a layer of flour.
Sand would be as well.
Links:
Special Shape Castings
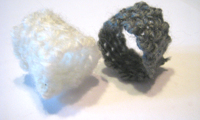
As said before, I like to play around with weaving.
The other day I thought: Why not weave a ring?
I think that it worked out amazingly good ;-))
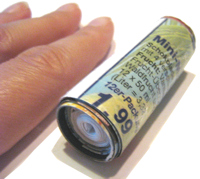
Material:
What to do:

Wind the yarn around the finger replacement and knot.
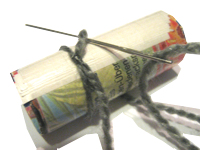
Then wind the next round, in doing so pass the yarn under itself.

Repeat the last step as long as you reach the ring’s width.
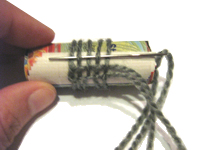
Now begin to weave: pass the yarn over and under the threads.
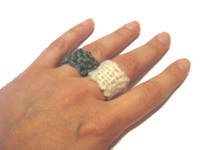
And that’s how the rings can look.
You have now a ring that you can embellish, e.g. with buttons or beads.
This technique surely can be enhanced, but it is fun already :)
Have fun!