Paper Beads Roller

unikatissima Paper Bead Roller

In a sense I always found paper beads great, but in another sense it always makes (made! ;-)) such a mess, so that I didn’t often made some.
Then I found the paper bead purses (ooooh…). (The link doesn’t work no more, look instead for the Google image search result for ‘paper bead purse’.)
And on the website of the paper bead purse designer I found a video showing how to use a paper beads roller that you can buy at her website (this link doesn’t work neither, but there’s still the video).
Great idea!
She also describes very good how to apply the glue and how to use the glue excess as varnish for the bead.

A little more research found me an instruction on how to build a self-made paper beads roller.
Another great idea! ;-))

I wasn’t sure whether I want to make sooo many paper beads and additionally I thought that I don’t need no crank, so I simply put everything together and the result is my spontaneously made paper beads roller ;-)

And that’s what you do:


unikatissima Paper Bead Roller
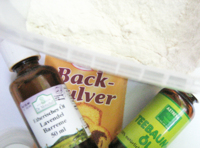
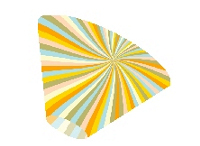
Cut your paper strips for the beads (I used a page from a travel brochure) and take two big needles, two toothpicks (they have to be smooth!) or – as I did – two little metal skewers.


unikatissima Paper Bead Roller
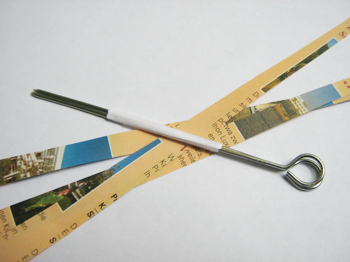
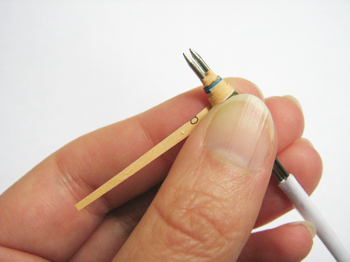
Join both needles (toothpicks, skewers…).
It would be enough to wrap some tape around, but I didn’t want to become my skewers sticky after taking away the tape, therefore I wrapped a broad strip of paper around and taped that.


unikatissima Paper Bead Roller
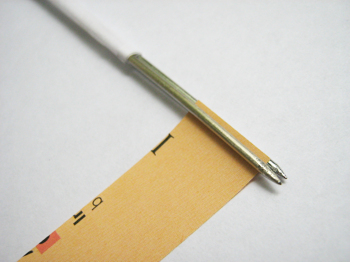
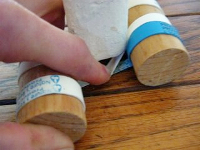
Slip the end of a paper strip between both skewers (if you use triangular ones, slip in the broad end) and begin to wrap on the bead.
On the photo you can see the paper strip that holds together my skewers.


unikatissima Paper Bead Roller
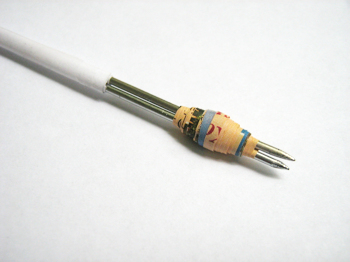
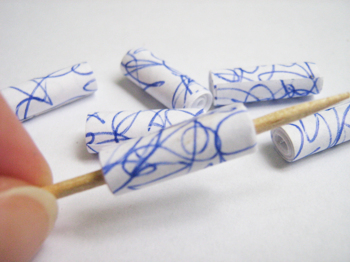
That’s how it looks shortly before you’re finished with wrapping.
You can’t see no glue on this photo because I can’t wrap with one hand and take photos with the other – at least not without dripping glue everywhere ;-)


unikatissima Paper Bead Roller
When your bead is done you can easily remove it.


unikatissima Paper Bead Roller
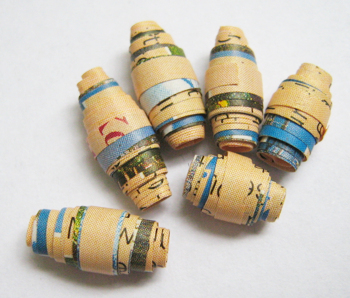
I was amazed at how fast and easy everything worked and I had much less mess than before ;-)


unikatissima Paper Bead Roller
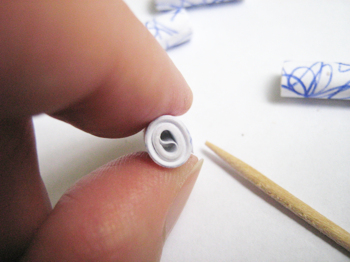
The hole of the bead is split into two holes because my bead roller consists of two halves.


unikatissima Paper Bead Roller
I then simply ‘stirred’ the hole with a toothpick so that only one big hole remained ;-)
(By the way, the instruction for this bead is scheduled for tomorrow ;-))


Have fun wrapping paper beads! :))
and if you want to try some other bead shapes check out the Paper University.


Links:
Paper Bead Purses
The link doesn’t work no more, look instead for the Google image search result for ‘paper bead purse’.
Paper Beads Roller Video
Self-made Bead Roller (How to use a bead roller) => scroll down to ‘Hand Made Bead Roller’

Different Paper Bead Shapes (Recycled Paper Beads)

Google search result for ‘paper bead howto’
Google image search result for ‘paper bead howto’
Google search result for ‘Papierperle Anleitung’
Google image search result for ‘Papierperle Anleitung’

Here at unikatissima: Entries containing the words ‘paper’ and ‘bead’

Seed Starters

Frugal Seed Starters

I’m a city kid with a brown thumb (all my plants have a very short life) and I don’t have the slightest idea whether I’m too late but I wanted to present it anyhow:

If you seed plants and need seed starters you can buy them.
But you can make them easily yourself: from newspaper, egg shells or egg carton.
Great, isn’t?


Links:
Newspaper Seedling Packs
Eggshell Seed Starters
Egg Carton Seed Starters

Google search result for ‘frugal seed starter’
Google image search result for ‘frugal seed starter’

Self-made Fabric Print Stamp Pad

jezze Fabric Print Stamp Pad

Somewhen I also want to try fabric printing and then the instruction on how to make a fabric print stamp pad will come handy.

I think that it should also be usable as ‘normal’ ink pad, I should try this sometime.


Links:
Self-made Fabric Print Stamp Pad (‘Tech’ update)

Here at unikatissima: Entries with the tag ‘stamping’

Little Improvised Knitting Helpers

Recently I knitted more often (mostly mazes and cellular automaton patterns) and got some little helpers together on the spur of the moment.

unikatissima Little Improvised Knitting Helpers
The first is a take-those-threads-away (I simply don’t know the name of this item!) for two-coloured knitting, that I made from a plain piece of wire: …


unikatissima Little Improvised Knitting Helpers … simply bend the wire twice around the finger, hook the threads into and begin knitting.


unikatissima Little Improvised Knitting Helpers The second are paper clips used as stitch markers…


unikatissima Little Improvised Knitting Helpers …that I hooked in every 10. stitch, everywhere where the decimal lines from the pattern are.
I selected a different coloured paper clip every five clips, that helps to orientate in the pattern faster.
For the partly chaotic cellular automaton patterns it can be a real help.


unikatissima Little Improvised Knitting Helpers And the last are my post-it notes I use to mark the row I’m working on.
Some people use rulers but the post-its stick better to the paper and if necessary I can take it with me without having to mark the last row.
However I noticed that I have to change the notes quite often because the glue gets weak from the constant tackling and untackling.


Links:
At unikatissima:
Entry concerning the maze pattern generator
Maze Pattern Generator

Entry concerning the pattern generator (cellular automaton)
Pattern Generator (Cellular Automaton)

Quick Natural Stick Deodorant

unikatissima Quick Stick Deodorant

I’m fascinated about what can be done at home!
Now I found a tutorial on how to make a natural stick deodorant that seems to be made quite quickly.
‘Natural’ means here that the only ingredients are baking soda, cornstarch and tea-tree oil.

However I don’t know whether every baking soda can be used, because Leo says that ‘baking soda’ means ‘Natriumbikarbonat’ whereas on my baking soda is written that it contains ‘Natriumhydrogenkarbonat’.
Well, it’s rather spring time than summer now, I still have a lot of time to find out ;-)


Links:
Quick Stick Deodorant

LEO German-English Dictionary
LEO Deutsch-Englisches Wörterbuch

Online Cone Calculator

My entry ‘Constructing a Cone’ was much to wordy ;-), therefore I wrote an online cone calculator.


Note: Unfortunately the online cone calculator seemingly doesn’t work under all circumstances and I don’t have the time to struggle through. That’s why I write the formula by all means behind.

Well, you have disabled javascript, which means that the online cone calculator doesn’t work anyway.

You have 2 options now:

  • enable javascript
  • calculate the cone data yourself using the following formula.


Formula:

The black cone is what we want to get.
small diameter = smaller desired diameter
large diameter = larger desired diameter
height = desired height
QT = small diameter / 2
RS = large diameter / 2
PQ = QT * height / (RS – QT)
PR = PQ + height

PT = √((PQ * PQ) + (QT * QT));
PS = √((PR * PR) + (RS * RS));
(√ is sqrt is square root)

angle to cut away =
360 * (1 – ((2 * π * RS) / (2 * π * PS)))

inner circle diameter = 2 * PT;
outer circle diameter = 2 * PS;

unikatissima Example Cone


And now proceed:
Draw two centered circles with the inner and outer diameter, draw the calculated angle and cut it away.
The result should be a template for a cone with the specified measurements ;-)
If you don’t have a protractor you can print and cut the degrees disk from the entry ‘Constructing a Cone’.

If you want to know more exactly what you’re doing here, check the entry ‘Constructing a Cone’ after all ;-)


Links:
Here at unikatissima: ‘Constructing a Cone’

Resin Knitting Needles

craftster Resin Knitting Needles

You must absolutely check this!
Up until now I knew resin only for making jewelry, but this tutorial on how to make resin knitting needles is ingenious and the needles are fantastic!
However I recommend strongly to check the (admittedly many) comments, because they’re discussing there their (also bad) experiences.

If you are a little scared by resin just as I am you can however try to make some self-made wooden knitting needles.
But the others are more beautiful ;-)


Links:
At craftster: Resin Knitting Needles

Here at unikatissima:
Resin Pendants
Self-made Crochet Hooks And Knitting Needles

Water Balloon Luminaries

candletech Water Balloon Luminaries

Aren’t those beautiful?
When finding the instruction on how to make water balloon luminaries I was thrilled.
It looks so easy (I haven’t tested it yet) and it’s worth to read the comments, too, to get the experience and more ideas:

  • several comments tell about their experience with this technique: some had problems with popping balloons while dipping them into the wax and hot wax got everywhere, so it seems that one has to be very careful;
  • somebody said that they saw poured sand at the bottom to prevent overheating/melting, somebody else suggested to put some water in the luminary for the same reason;
  • I’ve seen mentioned somewhere to cast some plaster of paris on the bottom for the same reason;
  • as Carol said for the geometric cut paper table lamp you can use battery operated tea lights;
  • suggestions were given to put something between the layers, like leaves and somebody else told their erperience with this;
  • I’ve seen somewhere that somebody glued (somehow?) the top layer of paper napkins on such wax luminaries;
  • someone wanted to make parts of the luminary opaque which didn’t work, but somebody else suggested to use different coloured wax for the layers with a dark colour as outer layer and then carefully carve out a pattern through the outer layers;
  • one comment even suggests to do a similar technique with chocolate syrup in place of wax to get chocolate bowls (hmmm! ;-));
  • and somebody gave a tip on what to use if you don’t have a double boiler.

I’m not quite sure if I want to play around with this, but the temptation is strong ;-))


Links:
Water Balloon Luminaries