I always liked the box :))
Links:
The original site doesn’t exist any more and is now available through webarchive: Color Swirl Box
…compilation of tutorials
I always liked the box :))
Links:
The original site doesn’t exist any more and is now available through webarchive: Color Swirl Box

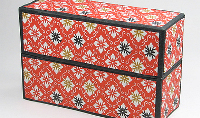
I find those rectangular folded boxes absolutely great!
Unfortunately I discovered them too late, but if you haven’t begun yet (oops! ;-)), they are great for an Advent calendar, too ;-)
But take your time, I once made an Advent calendar from similar, but square boxes (instructions from a book) and it took foreeever to finish it.
I use it nearly every year though and it is still beautiful ;-)
And apart from that you can still use them for the Christmas gifts, I think that it would look wonderful, too :)
Links:
Modular Rectangular Box , Version A
Here at unikatissima:
Entries with the tag ‘Advent calendar’
Entries with the tag ‘box’

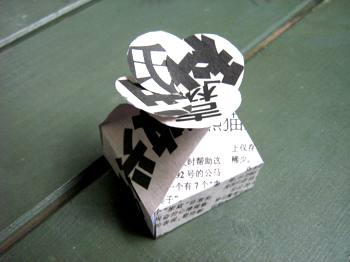
I presented some boxes already, the one of today is folded from old greeting cards.
On the photo you can see it folded from a calendar or magazin sheet as a gift wrapping for my hyperbolic pin.
I find both (gift and box) still great! :)
Links:
Little Boxes for Precious Presents
Here at unikatissima:
 Entries with the tag ‘box’
Hyperbolic Pin (TED Talk: Nature, Crochet and Geometry)
I saw somewhere (unfortunately I don’t remember where) such a box, but it was flat while I wanted the actual box (not the flaps) to be of about 2 cm height.
So I made me a template myself ;-))
And that’s what you do:
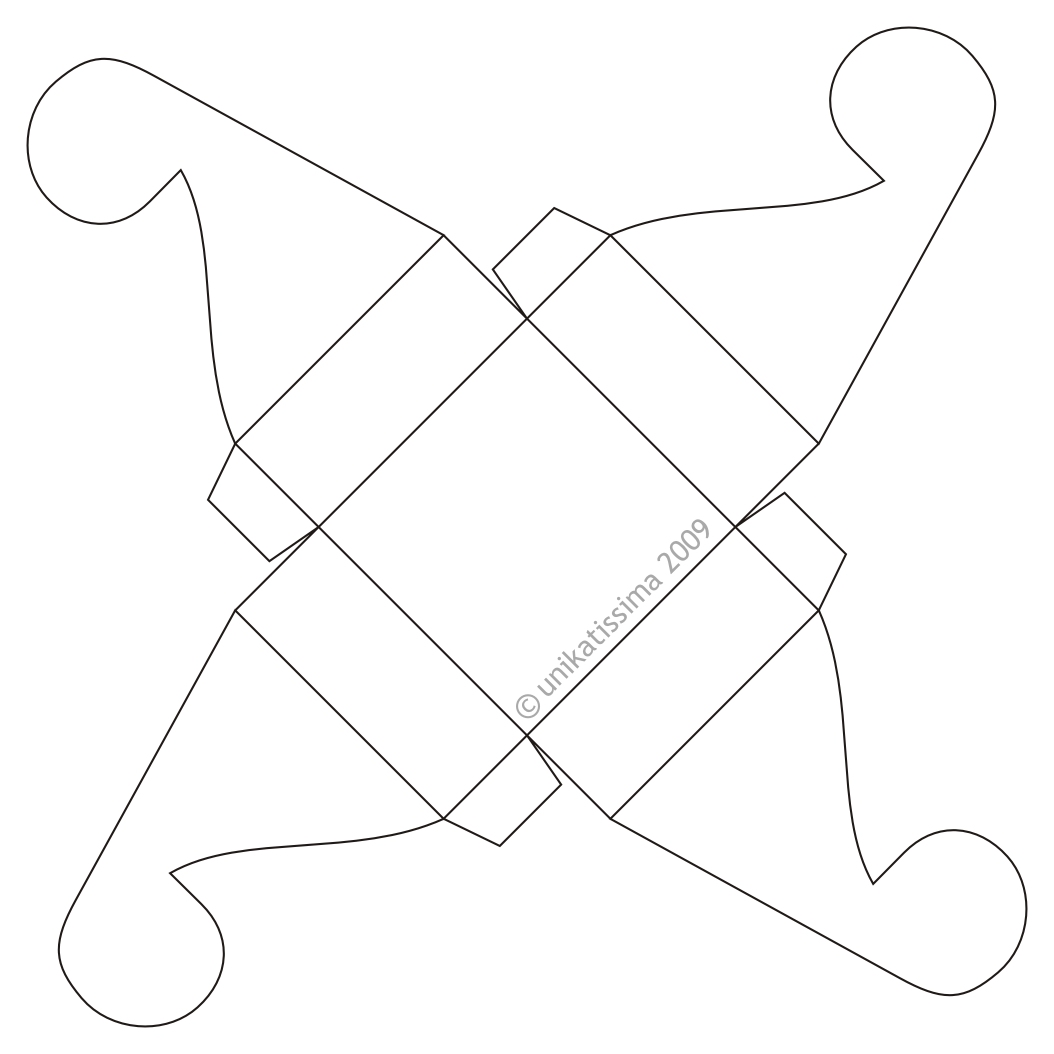 (Click to enlarge)
That is the template.
Instruction for first box: Pasted paper
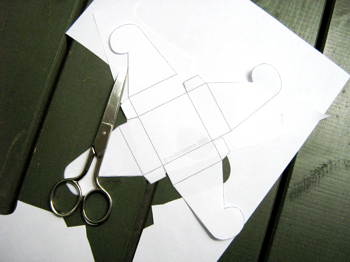
First print the template and cut it.

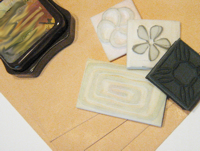
I wanted to have a Chinese box so I pasted the outside up with some Chinese newspapers that I stained with tea before (see links below).
Of course you can paste the paper up with gift wrapping, snippets from ads and so on, too.
I suggest to paste a second layer on the paper in any case to get it sturdier or to use thin cardboard.
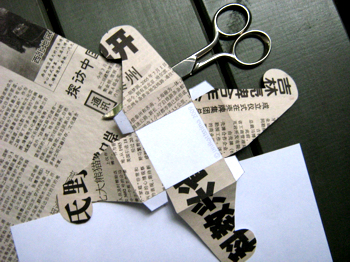
When having pasted up all four flaps you can pre-fold the box. This way it will be easier to glue the tags.
Here is the glue setting.
You can see that I didn’t paste up the inside.
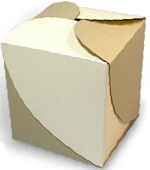
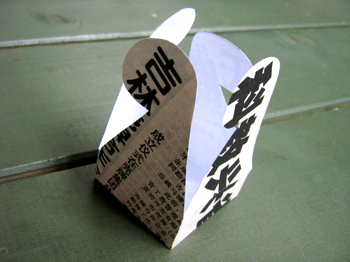
And that is the box in its full beauty ;-)
I suggest to let the glue set well because there will be some strain when you close the box and the tags can get unfixed.
Instruction for second box: Thin cardboard
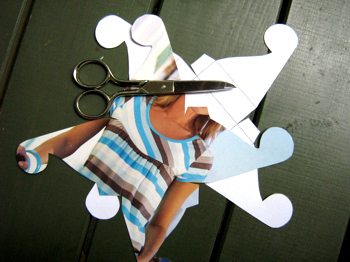
After the first box I felt like making a box from thin cardboard.
The cardboard is from the wrapping of a pair of trousers I bought and I liked the colours of the printed picture.
So I put my printed and cut template on the cardboard, copied it and cut the cardboard along the lines.
I pre-folded the folding lines to get better folds.
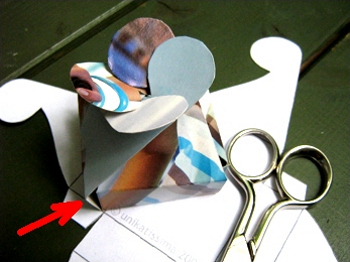
Then I simply folded the box without glueing the tags.
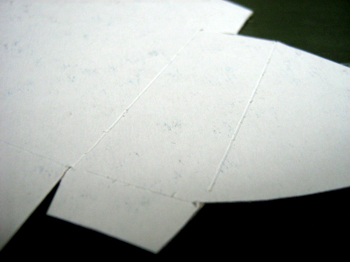
The red arrow shows that there originates a gap.
Depending on what you want you can leave the box at that, the tags make sure that in spite of the gaps nothing will drop ;-)
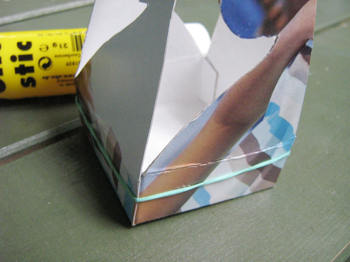
Here I glue the tags to see what happens.
The box always got apart until I fastened it with an elastic.
The glue could set this way better.
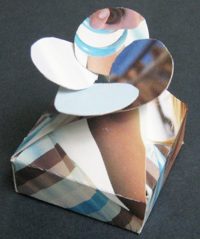
And that is my second little box.
You can see at the edges that it is a properly closed box now ;-)
Links:
Here on this site:
Instruction for first box: Pasted paper
Instruction for second box: Thin cardboard
Template to print
Stain paper with tea
Tea Staining Your Art Journal Pages
Tea Stain Paper

A great box, isn’t it?
I really want to fold it – but I must get some new printer toner before I can ;-(
Links:
Folded Tiki Box (Tiki Box)
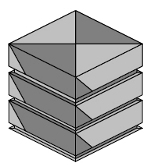
I like to fold Origami boxes but these are even better: you can stack them.
Once I folded them and used them for little beads but by now I have thrown them away.
Actually it’s a pity.
Links:
Mike’s Origami – Origami Diagram Links – Boxes and Containers => click ‘Tower Boxes’ (PDF, ca. 82 KB)
Here at unikatissima:
Entries with the tag ‘box’
Entries with the tag ‘origami’
Folded boxes:
Paper Matchbox Slide Box
Curved Box not only for an Advent Calendar
I found an instruction on how to make easy gift bags from envelopes. The result looks really nice and I already arranged my envelopes and stamps…
Links:
Very Easy Gift Bagalopes
Here at unikatissima:
Eraser Stamps
More entries with the tag ‘stamping’

Once I browsed flickr and found the Teabag Problem Box. He called it this way because some teas are packed in such boxes.
But what I liked best is the the fact that he ‘offers’ the creasing pattern directly (see links below).
On the photo you can see my first try. I burned some CD’s and used the paper where you write what’s on the CD and that I usually throw away for this box.
I think it’s not too bad for a first try ;-)
They can easily be used for an advent calendar.
I looked further for boxes usable for advent calendars and found the following:
Links:
At flickr: Teabag Problem Box
At The Fitful Flog: PDF file with the creasing pattern (ca. 10 KB)
Check also the Model Menu
More boxes that can be used in advent calendars:
And here at unikatissima:
Furthermore there are links on how to decorate in the entry Pattern Paper.
And what can you put into the boxes?
Here at unikatissima:
This week I will present more possible fillings.
I’ve seen those boxes in shops and was therefore amazed to find a tutorial on how to make a washi box.
This box stands quite high on my just-try-it-list ;-))
Links:
At evil mad scientist: How to Make Japanese Papercraft Boxes

I found a tutorial on how to make cute, fast, self-made packages. They are self painted, respectively self stamped boxes like the recycled card pillow box I presented some time ago.
Concerning the stamping I even found an instruction on how to mass produce greeting cards (it is no real mass production, but she’s making a good many beautiful greeting cards ;-))
I had no reason yet to make this, but it is not soo long until Christmas ;-))
On the photo I already arranged my (for a good deal self carved) stamps ;-)
Links:
Decorating Boxes for Special Occasions
Pattern Paper & Mass Produced Cards
At unikatissima:
Recycled Card Pillow Box
Eraser Stamps