Doesn’t the pin look wonderful?
‘Simply’ decorate several sheets of translucent polymer clay with a pattern, layer them and you get a piece of jewelry with real depth!
One day…
;-)
Links:
Layered Illusions
…compilation of tutorials
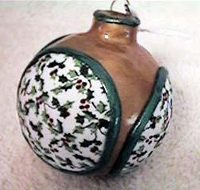
Doesn’t the pin look wonderful?
‘Simply’ decorate several sheets of translucent polymer clay with a pattern, layer them and you get a piece of jewelry with real depth!
One day…
;-)
Links:
Layered Illusions
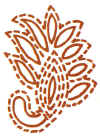
Recently I surfed the internet and found the Kantha embroidery.
It remembered me of the Sashiko embroidery but there you only embroider the outlines.
I find it beautiful: shapes are filled with simple stitches and yet it looks elegant.
Links:
Kantha Embroidery (Kantha Work)
Kantha Embroidery (quilting – a stitch directory of kantha)
Google search result for ‘Kantha’
Here at unikatissima: Sashiko Embroidery

I told already that want to lose weight before I will crochet the bolero but I don’t find it easy.
How much better must it be if the scales tell me that my weight is ‘perfect’?
;-)
She made the scales with glass mosaic tiles but I think that it should be possible with selfmade mosaic tiles from polymer clay or glass paints or from plaster, resp. Or of course with a paper collage, best as paper crazy quilt. Or with eggshells.
;-))
Links:
Scales (Perfect Scale: Mosaic)
More scales (Perfect Scale Commision)
Here at unikatissima:
 Crocheted Bolero
Mosaic from Plaster
Mosaic Table Light
Paper Crazy Quilt
Eggshell Mosaics
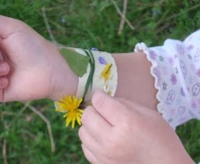
What a cute idea: Before going for a walk you take a piece of tape around your wrist (sticky side at the outside! ;-)) and while walking you stick on a lot of beautiful leaves and flowers.
When you’re coming home you have a wonderful nature bracelet.
She seems to have done this in springtime but the fall leaves also look great.
And by the way you can cut open the tape at home and use it for a card ;-))
Links:
nature bracelets
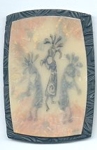
A really long tima ago I found the carved plaster plaques and found the idea great.
But because I still don’t know what exactly to do with them I haven’t tried it yet.
Nevertheless I never forgot those carved plaster plaques ;-)
Links:
Carved Plaster Plaques
One thing I want to try one day, too, is to apply fabric on polymer clay.
Sigh.
;-)
Links:
Fabric on Polymer Clay (Fun with Fabric)
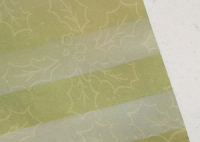
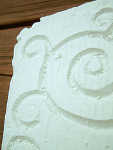
‘Whitewash paper’ sounds strange, but that’s exactly what she does in her tutorial with the decorative paper: she tints stripes of the decorative paper so that the original pattern shows through.
I find it very elegant.
I think that should be possible with gesso, too (as are so many other things: Wow!) – but I still have to try it out.
If you have experience with this I’d be pleased if you post it in a comment (by the way I’d always be pleased if you comment ;-))
Links:
Alter Your Paper with Krylon’s Whitewash Paper Finish
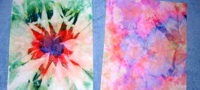
I found a tutorial on how to tie-dye paper that is similar to my self coloured tissue papers but with the advantage that you dye proper stiff paper.
I have to try this, too ;-)
Links:
Tie-Dye Paper
Here at unikatissima: Self Coloured Tissue Papers

(Click photo to enlarge)
Recently I needed a birthday card and that is the reason why I played around with stencilling again ;-)
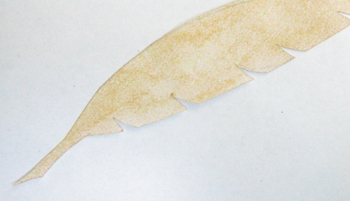
I wanted to have a negativ stencilled feather and sketched and cut therefore a feather.
Here I’ve made my first tests already.
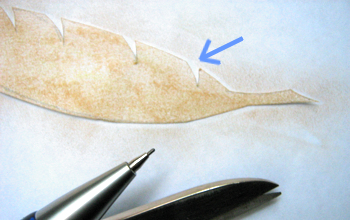
I covered my feather with light brown chalk and smeared the chalk with my fingers outwards.
This way I got white areas around my stencil which made the quill of my feather much too broad for my liking (see arrow).
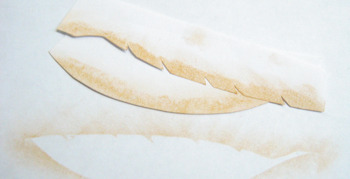
Therefore I cut two half-stencils and used them.
It worked great!
Another advantage of this half-stencil method is the fact, that the really narrow quill of my feather can’t slip or even tear anymore.
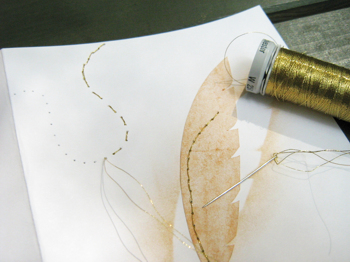
I glued a cut-out feather shifted on my stencilled feather and because I thought that something is missing, I embroidered some lines with golden thread.
I used a running stitch back and forth as I always do.
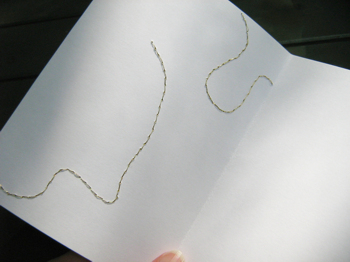
That’s how the inside of the card looks – I left it this way and wrote on the right side of the card.
(Click photo to enlarge)
And that’s how the finished card looks: I liked it ;-) and the adressee liked it, too :)
Admittedly the card looks still a little bumpy here because I fixed the chalk with hair spray. After everything was (really!) dry I put it under a heavy book and afterwards it was beautifully flat again.
Links:
Instruction on how to make the Running Stitch (English)
Instruction on how to make the Running Stitch (Vorstich) (German)
Here at unikatissima:
Entries with the tag ‘stencil’
Entries with the tag ’embroidery’
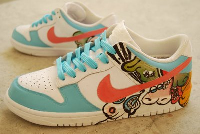
Somehow I really love painted shoes and so I was thrilled about the tutorial for self customized sneakers.
As much fun as spraypainted shoes ;-)
I think that I won’t do this because first I have too much shoes already and second they somehow don’t match my style, but who knows? ;-)
Links:
Sneaker Customizing Tutorial
Part 1 and part 2
Here at unikatissima: Spraypainting Accessories