Online Pythagoras Calculator

unikatissima Pythagoras Calculator

I decided to crochet a Bolero from self-designed crochet motives and selected the Bolero 1 as pattern (see the links below on how to find the pattern).


Jessica Tromp Bolero Patterns With Bolero 1 the square crochet motives are worked standing on their tip and I knew the width of the back of my Bolero.
So then I ‘only’ had to find out how long the edges of my crochet motives have to be and it’s Pythagoras who’s responsible for ;-)
And then I thought that I’m surely not the only one with such questions. You can get the same problem e.g. if you want to knit Entrelac and want to find out the size of the individual squares. I suppose that there are more uses for this when crafting or needleworking.
For all those people I wrote my Online Pythagoras Calculator ;-)


Links:
unikatissima’s Online Pythagoras Calculator

Jessica Tromp Bolero 1 Pattern (Bolero and shrug patterns, for women, knitting and crochet) => scroll down to ‘Bolero’s with squares, sorted by type’ and there ‘Bolero 1’

Here at unikatissima:
Bolero and Shrug Patterns
Clothes From Crocheted Medaillons
entrelac 2.0 knit-purl

Knitted Lace from Charts

unikatissima Knitted Lace
(Click for an overall picture)


I’ve begun to knit a summer lace shawl for myself – and because astonishingly I don’t find it boring there’s a little chance that I will finish it ;-)
But the chance is little and so I present it already ;-))

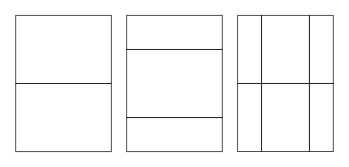
What I like best is that the base is a black-and-white chart that I designed myself (PDF file below at the links) and that most people would connect with filet crochet or cross stitch :)
It reads soo much easier ;-)

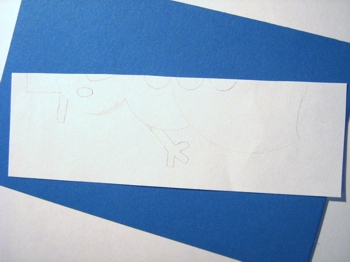
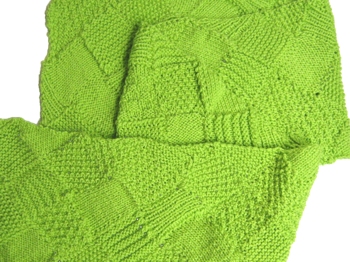
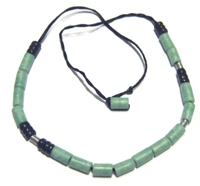
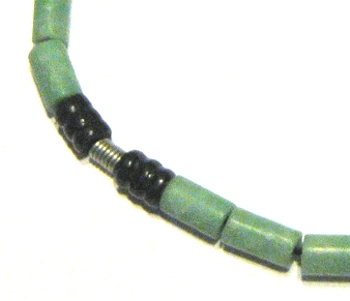
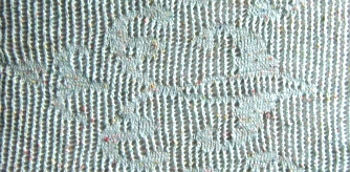
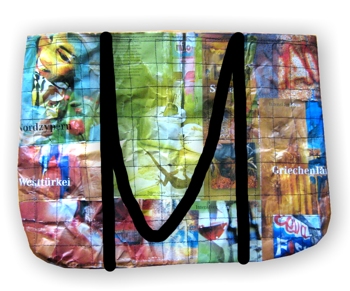
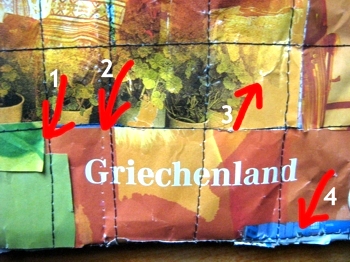
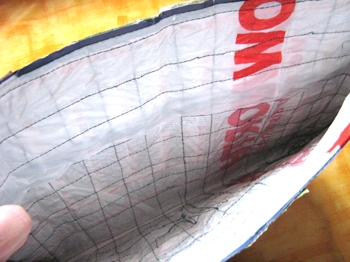
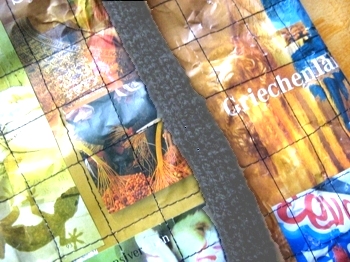
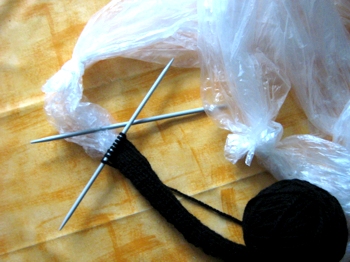
Please click the photo at the top to marvel at the still unfinished shawl: I’m working it up from the narrow side, the orange thread at the side marks the point where the pattern from my chart ends.
I want to knit the pattern three or four times.


unikatissima Knitted Lace
The lace patterns tends to slant, the item therefore has to be blocked very carefully.
But of course not until finished ;-)


How-to:
The chart only shows the rows on the right side.
I worked the filled squares from the chart with two knit stitches,
for the empty squares I knitted two stitches together and made a yarn over.
The rows on the wrong side are purled, even the yarn overs.

Note: The last yarn over has to be maintained, therefore you need edge stitches, i.e. add a stitch on both sides of the row.
The edge stitch will be slipped if it is first of the row and knitted if it is last.

And that’s all there is to it ;-)


Other methods: Eehm, after I’ve written all this I found the article about filet knitting while surfing, where she presents and compares different methods to make the pattern with the holes.
So if you don’t like mine try this one ;-)


Another pattern:
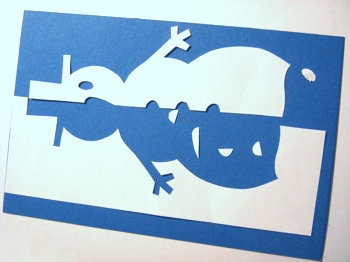
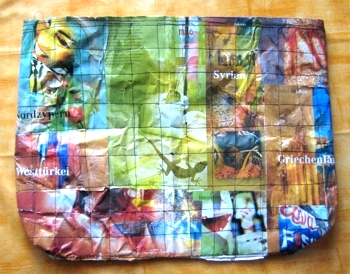
Before beginning something big as a shawl needless to say that I played around and tried another self-designed chart (PDF file below at the links).


unikatissima Knitted Lace That is the pattern (if you want to work it you can download the PDF file (see links below)).


unikatissima Knitted Lace
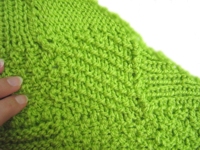
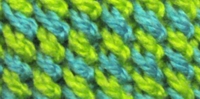
Here I worked the filled squares of the chart as two knit stitches and the empty ones as two stitches knitted together and a yarn over (= the hole ;-)).


unikatissima Knitted Lace
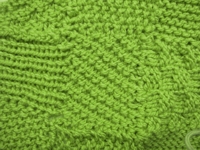
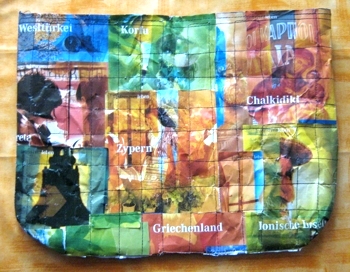
And here I worked it the other way around to see what I like better: I worked the filled squares of the chart as two stitches knitted together and a yarn over and the empty ones as two knit stitches.


But of course you can do a lot of different things from these charts, you can e.g. really filet crochet or cross stitch, but also bead weave, colour knit etc.
Best if you look again at my former blog entry concerning this topic ;-)


Links:
unikatissima diagram ‘flourishes’ (PDF, ~210 KB) (the chart for the lace shawl)
unikatissima diagram ‘skopje’ (PDF, ~60 KB)

Filet Knitting

Here at unikatissima:
What Can You Do With Filet Crochet/Cross Stitch Embroidery Charts?
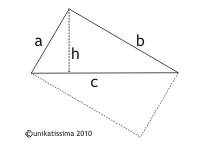
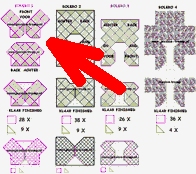
Cabled I-cord (Kind of)

unikatissima Cabled I-cord (Kind of)


I’ve seen everywhere the beautiful cabled bags and thought that a filled I-cord isn’t so suitable. And then two ideas collided in my head again, this time the I-cord and cabling ;-)

The result is a kind of I-cord which is cabled on both sides but is made with only two needles (plus an auxiliary needle for the cabling).

I created a PDF file (ca. 400 KB) with a photo tutorial that you can download.

Have much fun with it!


Links:
Cabled I-cord (Kind of): PDF file (ca. 400 KB)

Google search result for ‘cabled bag pattern’
Google image search result for ‘cabled bag pattern’

Here at unikatissima:
Clothesline Knitting or Filled I-cord
Knitting Pattern ‘Little Berries
Entries containing the word ‘cable’
Entries containing the word ‘I-cord’

Paper Shopping Bag

unikatissima Paper Shopping Bag


At craftster started the ‘Craft Challenge #47 – Reusable Shopping Bag Challenge 2’ and I had the idea of making a shopping bag from paper (see also the other entries).
In principle I really like it, but some things didn’t work the way I wanted them to (see also below) so that I didn’t finish the handle but only show how it can be made.


unikatissima Paper Shopping Bag
That’s how my shopping bag looks from one side…


unikatissima Paper Shopping Bag
… and so from the other.
I used clippings from a travel brochure, so my bag is not only multicoloured but gives me even wanderlust ;-)


That’s what you do:


unikatissima Paper Shopping Bag
That’s what you need:

  • paper to strengthen (here an old TV guide)
  • paper for the outside (here clippings from a travel brochure)
  • plastic bag to strengthen the inside and make it possible to wipe it with a damp cloth (right top in picture)
  • some tape and a glue stick (which I forgot to take a photo from ;-))
  • scissors
  • sewing thread and best a sewing machine
  • possibly transparent plastic foil or plastic bag (non-adhesive or you can get bad problems with your sewing machine!)
 

unikatissima Paper Shopping Bag
First I layered three layers of my TV guide pages.
I used them askew as shown in the graphic so that they don’t always touch in the same place (every large rectangle is a page from the TV guide, the smaller ones are pages cut into halves in one or the other direction).
I taped them rarely so that the whole doesn’t fall apart.

On the future outside I laid on the clippings from the travel brochure and glued them on rarely to fix them slightly.

Note: Don’t use too much tape or glue because you can get bad problems with your sewing machine.

I laid the cut white plastic bag on the backside of my large paper rectangle with meanwhile four layers and begun to sew.

Note: It pays to fix the plastic bag somehow, too ;-)


unikatissima Paper Shopping Bag
Then I just started sewing (did I mention that I’m completely unexperienced in sewing? ;-))).

I wanted to sew (and have somehow sewn ;-)) lines but it was much more difficult than I thought.
Therefore I made a mental note of some points for the next bag:

  1. The paper for the outside should be better joined.
    I think it even best to lay and sew on a layer of transparent (non-adhesive!) foil or plastic bag, then it is also possible to wipe it on the outside with a damp cloth.
  2. Practise sewing before, so that 1st my thread doesn’t tear and I’ll be 2nd hopefully able to sew straight lines ;-)
  3. The crinkling happened when I rolled up my large paper rectangle several times this way and the other to be able to sew it.
    Paper that is crinkled often get fabric-liker, so I didn’t find it bad.
  4. I laid the clippings from the travel brochure so that they all meet on the underside of the bag – with the effect that it looks scruffy.
    Next time I’d put a broad stripe of coloured paper over the folding line of the bag.
  • I’ve sewn the side seams on the wrong side because I wanted to turn it after just like a fabric bag.
    Next time I will sew them from the right side because the turning was incredibly difficult and I simply couldn’t turn the corners completely.
    That’s why it has these chic rounded corners ;-))
 

unikatissima Paper Shopping Bag
That’s how my bag looks at the inside.


unikatissima Paper Shopping Bag
Actually I wanted to make a shoulder-long black with plastic bags filled I-cord as handle (I post-worked the photo to show you the knitting, originally it’s been completely black just as in the next photo ;-)) …


unikatissima Paper Shopping Bag
…but I don’t want to make it for a bag with lots of defects.
You can see here anyhow how I knotted the plastic bags together and knitted a little bit already.


unikatissima Paper Shopping Bag
The bag seems to be quite robust and I wanted to try out what it can carry.
Therefore I stuffed 1 l juice, half a kilo of bread, 2 appels, an orange and 5 tangerines in – in short a little shopping ;-)


unikatissima Paper Shopping Bag
Here I’m holding the bag with the content of the previous picture – no problems at all ;-)


Links:
Craft Challenge #47 – Reusable Shopping Bag Challenge 2
Entries for the Craft Challenge #47

Here at unikatissima:
Clothesline Knitting or Filled I-cord

Knitting Pattern ‘Little Berries’

unikatissima Knitting Pattern Little Berries

I always like to look for (among other things! ;-)) knitting stitches and lately two stitches ‘collided’ in my head: mosaic (slip-stitch) knitting and cabling.
When I tried it out I was hooked ;-))


unikatissima Knitting Pattern Little Berries 
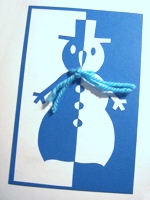
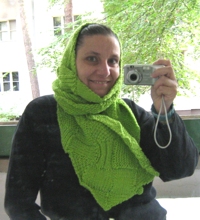
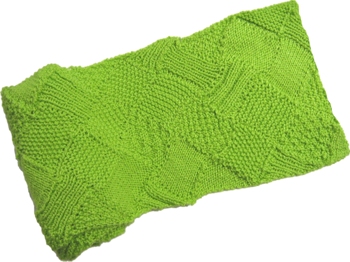
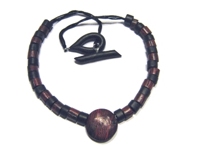
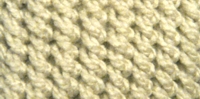
By the way, I also like it single coloured :))


I created a PDF file (ca. 350 KB) for you to download so that you can amuse yourself with this stitch, too.
The file contains unikatissima’s knitting pattern ‘little berries’, a photo step-by-step instruction for one of the stitches, some ideas about increasing and decreasing the pattern and some project ideas.

Have much fun knitting it!

P.S.: If you’re knitting the pattern you implicitly agree to my terms of use which you can find in the PDF file.
Mainly it says that you may sell products knitted with my pattern but not give away the file itself.


Links:
unikatissima’s Knitting Pattern Little Berries (English) – PDF file (~ 350 KB)
unikatissimas Strickmuster Little Berries (deutsch) – PDF filei (~ 355 KB)

Here at unikatissima:
Mosaic (Slip-stitch) Knitting
Entries containing the word ‘cable’

Drinking Straw Jewelry and Ornaments

unikatissima Drinking Straw Jewelry and Ornaments

When I saw the drinking straw pin I thought: ‘Oh yes, I want!’ ;-)


unikatissima Drinking Straw Jewelry and Ornaments 
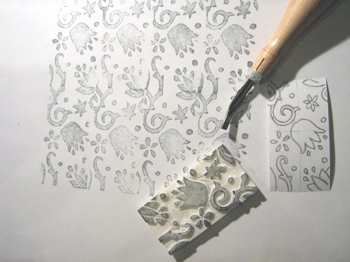
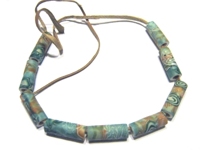
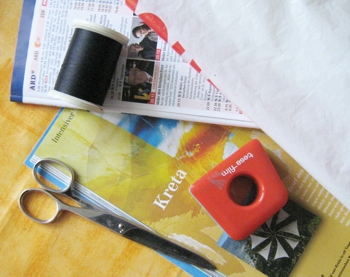
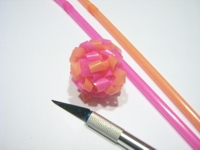
It is quite easy: I took two different coloured drinking straws, cut them (veeery carefully!) into spirals with an X-acto knife und knotted them (not too firm) together.
This way my little ball stays in form without glue, sewing or the like.
I wanted to cut them first with scissors but I got ugly edges, the cut must be made with a really sharp cutting tool.

I find it cute as well as jewelry as well as tree ornament ;-)


Links:
Drinking Straw Pin (curly elastic brooch)

Repeated Pattern Eraser Stamp

unikatissima Repeated Pattern Eraser Stamp


Lately two ideas crashed in my head and I like the result ;-)
One was the eraser stamp, the other the repeating patterns.
I marked the size of my eraser on paper, designed there a pattern following the technique of the repeating patterns, carved it from my eraser (it was mirrored but that’s no problem with this pattern) and begun stamping.
It is great to make repeating patterns on cards or the like, but when I’ll need to stamp a bigger area I’LL prefer to use the rolling pin print (here and here).


Links:
Here at unikatissima:
Eraser Stamps
Repeating Patterns
Rolling Pin Prints
Rolling Pin Prints II

Positive-Negative Card

unikatissima Positive-Negative Card

While searching my instructions I found Positive – Negative Pumpkin! back and thought: ‘Yes, that’s exactly right for a snowman’.
It’s cute, isn’t ist??


unikatissima Positive-Negative Card
You need a coloured card for the background, white paper, pencil and scissors (or X-acto knife).
I always need an eraser, too ;-))


unikatissima Positive-Negative Card
First I trimmed the paper to the right size.
I left a small border to the edge of the actual card because I like it better this way.


unikatissima Positive-Negative Card
Then I sketched my snowman.
I made a PDF file (~ 55 KB) from my snowman template, so you can make your own snowman card :))


unikatissima Positive-Negative Card
Here I just layed the elements out – they still have to be glued on.


unikatissima Positive-Negative Card Finally I pricked two holes in the card left and right of the neck and pulled two threads of wool through, that I knotted under the snowman’s ‘chin’.
I still like him everytime I see him ;-))


Links:
Template for snowman PDF file (~ 55 KB)

Positive – Negative Pumpkin! – scroll down to ‘Kid’s Korner’

entrelac 2.0 knit-purl

unikatissima entrelac 2.0 knit-purl

I really love entrelac patterns, but when working them I get bored much too fast to be able to knit an item in entrelac pattern (usually after the first two rows ;-)).
Then I thought: ‘Who says that I have to knit stockinette or garter stitch only?’ and designed an entrelac pattern (PDF ~670 KB) with 12 different, mostly traditional knit-purl patterns.

I’ve even been able to knit a whole scarf in this pattern which never happened before ;-))

entrelac 2.0 knit-purl (PDF ~670 KB) looks beautiful from both sides, and because most of the proposed patterns don’t curl it works wonderfully ;-)


unikatissima entrelac 2.0 knit-purl
Here you can see that the scarf has a very dynamic look and it was absolutely not boring because I considered for every square anew which of the 12 patterns to use.
Additionally you can see very well that the same pattern looks a little different, depending on the fact that you knit it in a forth or back entrelac row (there are e.g. two garter stitch squares, two stockinette squares and two seed stitch squares).


unikatissima entrelac 2.0 knit-purl
On this photo I folded the scarf in another way – you see how proud I am about ;-))


unikatissima entrelac 2.0 knit-purl
Here you can see how good the patterns match.

In the instruction I added for every of the 12 patterns a diagram, a text description and a photo to show how it should look.


unikatissima entrelac 2.0 knit-purl
Doesn’t look bad, does it? ;-)


Links:
entrelac 2.0 knit-purl (PDF ~670 KB)

Entrelac tutorials:
Google search result for ‘entrelac tutorial’: there are lots

German Entrelac tutorial
via: this (German) entry
via: Google search result for ‘Entrelac Anleitung’.
I’m sure that there are more.

Polymer Clay Skewer Beads

unikatissima Polymer Clay Skewer Beads

Some time ago I presented the Skinner blend beads necklace, the ‘skewer’ beads shown here are made in the same way.
I call them ‘skewer’ beads because I made them by rolling polymer clay sheets which I wrapped around wooden skewers. Then I cut the sheets in sections before baking.


unikatissima Polymer Clay Skewer Beads
For the beads on the photo I

  • used a rest of white polymer clay as support,
  • mixed some green and blue rests and used as base,
  • cut razor-thin slices of my canes and added them as decoration and
  • smoothed the surface carefully with a glass rod (it was meant to stir one’s tea ;-) But after I used it for polymer clay it won’t touch food anymore!).

Afterwards I threaded the beads on a simple leather string that matches wonderfully the colour of the beads.
The used polymer clay canes are mostly transparent just as for the egg and the flower canes of the polymer clay box.


unikatissima Polymer Clay Skewer Beads
I still enjoy this necklace.
I really wanted to play around a little with ‘jade’, especially because this is a wonderful way of using up rests of coloured, perhaps self-mixed polymer clay ;-)
As for the subject ‘jade’: Glassattic was a great help to me.


unikatissima Polymer Clay Skewer Beads
For the beads on the photo I

  • mixed transparent polymer clay with a little blue green polymer clay to get ‘jade beads’,
  • made black polymer clay beads that I carved slightly with the back of a knife after cutting them (but before baking them!) and
  • made wire beads by wrapping the wire tightly around a metal rod (a metal kebab skewer) and cutting it with sharp wire cutters in regular intervals.
    If necessary you must file the ends a little bit!
 

unikatissima Polymer Clay Skewer Beads
For this necklace I

  • used up the ‘rest jade’ of the carved candle holder and
  • made silver coloured mica beads (metallic polymer clay) that I carved slightly with a credit card (the dent is larger than for the black beads further up).
 

unikatissima Polymer Clay Skewer Beads
But of course you can embellish the tubular beads that are made on skewers with other techniques and in other widths, also (as you can see at the Skinner blend beads necklace ;-)).


unikatissima Polymer Clay Skewer Beads
Here I varnished the black polymer clay sheet to be wrapped around the skewer (with I don’t remember what) in red, let it dry and pushed then the whole sheet through the pasta machine to let the varnish crack.
Additionally I made some black-only beads of the same width.
I still find this combination beautiful ;-)


Links:
On the topic of ‘faux jade’: Glassattic — Faux many => click there on ‘jade’

Here at unikatissima:
Skinner Blend Beads Necklace
Transparent Polymer Clay
Polymer Clay Flower Canes
Carving Polymer Clay
Entries containing the word ‘cane’