DIY Fisheye Lens

unikatissima DIY Fisheye Lens

Another great idea: to make a fisheye lens for your camera with old glasses!
Because I had no suitable glasses I cheated just a little bit by creating the fisheye effect with my graphics program.

But one day…
;-)


Links:
At photojojo: The DIY Fisheye Lens — Using Nothin’ But a Pair of Old Glasses and Some Tape

At flickr: examples for photos made with the fisheye

Paper Flower Ornaments

unikatissima Paper Ornament

Soon you will need nice ornaments for New Year’s Eve and I find the paper flower ornaments cute.
On the photo you see a snap try (very fast, but not very accurate ;-)) with plain wrapping paper which is coloured at one side only: I suggest that you do no such thing!
First the paper is much too thin, therefore the ornaments don’t look so beautifully rounded as the originals.
Second is the fact, that the paper is printed on one side only silly: If you follow the instruction properly you get half a coloured and half a white flower.
Third it helps to work accurately, then the flower doesn’t look so messed up ;-))


Links:
Paper flower ornaments

Actinia

unikatissima Actinia Wristwarmers

Once I saw the Worm Scarf and having read the instruction for the ‘worms’ I thought that you can knit great fringes this way.
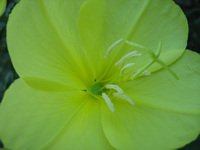
I begun with wristwarmers and after having finished them they looked like the sea anemones called Actinia.

Then I was hooked and knitted an Actinia headband, an Actinia ring and an Actinia brooch (see pictures below).
It is soooo much fun ;-)

And for all this items I wrote a tutorial. You can find the link below at the links.


unikatissima Actinia Headband 
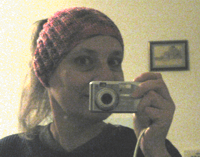
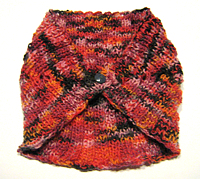
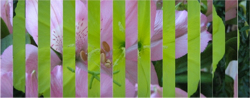
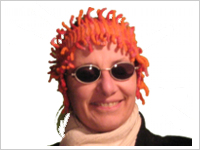
This is the headband.
It is just possible that there are slightly too much fringes!?
;-)


unikatissima Actinia Ring 
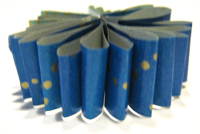
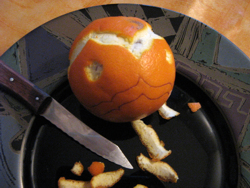
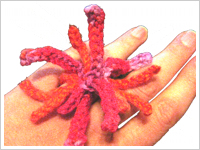
My Actinia ring – cute, isn’t it?


unikatissima Actinia Brooch 
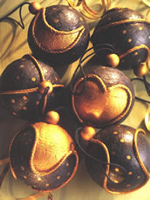
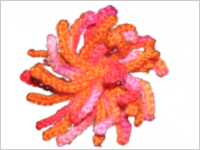
That is the brooch. It looks great on my black overcoat.


unikatissima Actinia 
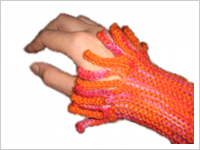
The Actinia wristwarmers and ring can easily be worn over woollen gloves if it’s really cold.


unikatissima Actinia Anklewarmer 
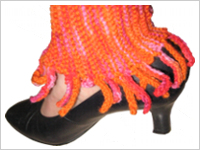
I haven’t done the Actinia anklewarmer yet, I made the picture with my not yet sewn wristwarmer.
Looks great, doesn’t it?


Links:
unikatissima’s Englisch tutorial for Actinia (PDF – ca. 400 KB)
(with explaining photos)

unikatissima’s German tutorial for Actinia (PDF – ca. 400 KB)
(with explaining photos)

There you find instructions on how to
knit items with fringes,
add knitted fringes to finished items,
knit the wristwarmers,
knit the headband,
knit the ring,
knit the brooch and
knit an I-cord.
I also added ideas for more ways to befringe items.

Worm Scarf

Wikipedia: Sea anemones

Pillow Beads

bighugelabs Pillow Beads

I once tried to make such hollow pillow beads, but they collapsed. One day I will try it again, but I think I’ll better make filled beads, they seem to be easier ;-)


Links:

Hollow Beads:
clayfulmingles: Pillow Bead Lesson
Polymer Clay Polyzine: Pillow Beads by Carissa Nichols

Filled Beads:
Polymer Clay Central: Barb’s Pillowbeads
Fire Mountain Gems and Beads: Creating Pillow Beads – scroll down

Google image search result for ‘polymer clay pillow bead’

I made the mosaic with the Mosaic Maker of Big Huge Labs.
The images are:
First row:
Polymer clay Mokume Gane Pillow Beads by Beadazzle Me
Polymer Clay Pillow Beads * Winter Garden by Kellee’s Beaded and Clay…

Second row:
Polymer Clay Grape/Lime Pillow Beads by Beadazzle Me
Polymer Clay Teal Damask Pillow Beads by Beadazzle Me

flickr: search result for ‘pillow beads’

Here at unikatissima: entries with the tag ‘fimo’ – with some of them you can make beautiful pillow beads

Paperless Origami

unikatissima Paperless Origami

If you’re folding origami figures they often come undone, are collapsing or sagging.
That’s especially vexing if they were meant to be a holiday decoration.
But now I found a very good solution to avoid sagging origami figures: fold the origami figures from fusible interfacing.
I must say that I find the photos of the tutorial persuasive.
Something more to try one day ;-))
(P.S.: On the photo you can see my iron for a start, I still have to purchase fusible interfacing ;-))


Links:
Paperless Origami

Calorimetry Headband

unikatissima Calorimetry

I really wanted to have a hat, but with my ponytail I don’t like them.
The Calorimetry Headband was the solution and I knitted it in a very short time.
You can see it on the photo ‘in action’.
(To take a photo of myself is not as simple as I thought ;-)))

I find the Calorimetry Headband brilliant.
First: a hat is for people with long hair often difficult to wear and the headband put all those problems away.
Second: I like the short rows pattern.
And third: because it can be done in a really short time it is a very good gift for the (ok, last but one) minute.
And it can even be knitted by impatient people ;-))

unikatissima Calorimetry
I had to adapt the size and the number of stitches, because I used totally different yarn, but I’m really pleased with it ;-)


Links:
At knitty: Calorimetry

Wikipedia entry: Calorimetry


String Decorated Ornaments

crealic String Decorated Ornament

A nice method to create beautiful Christmas tree ornaments (and much more) shows this tutorial on how to make string decorated ornaments (French).

It’s very easy:

  1. You choose the element to be decorated ((foam) sphere, box, paper bag etc.).
  2. Paint the pattern on with PVA glue (if necessary after sketching them with a pen).
  3. Put the string on the glue and fix with pins. The glue dries transparently.
  4. After the glue has dried, take away the pins and paint your ornament (or box or what ever you decorated). You can paint the string in another colour than the element. Additionally you can paint some little decorative patterns to lighten the background.

Best if you check the photos of the instruction, they explain every thing very well.


Links:
String Decorated Ornaments (Décors divers en ficelle) (French)

Lenticular Images from Your Photos

photojojo Lenticular Image

A lenticular image is an image that looks different depending on how you look at it.
photojojo published a tutorial on how to make such an image.


I already did the first steps:
From those images
unikatissima Lenticular Image unikatissima Lenticular Image


I created this one ;-)
unikatissima Lenticular Image


I just have to print the picture, to cut it, fold it, stuff it into the frame … ;-))

By the way, I ‘cut’ the pictures in stripes with the help of Splitz, a little freeware program. That was faster ;-) (Links see below)


Links:
4 Easy Steps to Making Old-Fashioned Lenticular Images from Your Photos

Wikipedia entry: Lenticular image

Google search result for ‘splitz software’

Citrus Fruit Ornament

unikatissima Citrus Fruit Ornament

Long ago I found (German) instructions for ornaments made from citrus fruit. They seem to be fragrant.
Last time I checked the site they didn’t show the images, but it is very easy.

That’s what you have to do:

  1. Sketch the pattern onto the citron or the orange (e.g. with a ball pen).
  2. Cut the pattern (it is the same technique as with the eraser stamps: cut the pattern diagonally).
  3. Subsequently you can decorate your ornament with cloves.

On the photo you see my first try. I tried to cut a too broad pattern, I doesn’t really like it.
Fortunately I can continue experimenting and when making faults, I can ‘nibble’ some delicious orange ;-))


Links:
Citrus-Schmuck

Here at unikatissima: Eraser Stamps