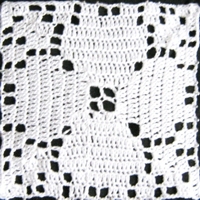
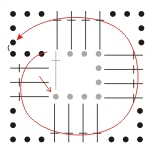
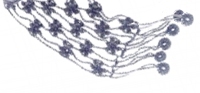
Filet crochet in rounds? What for?
Well, I find that it looks simply better with symmetrical patterns like those of the random squares pattern generator :)
It can that you don’t see any difference from far away, but from close I find it more beautiful if the stripes pattern made from the double crochets radiates from the center.
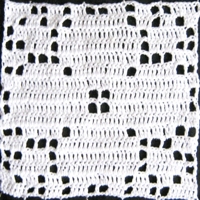
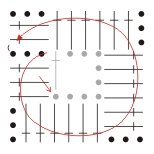
And that’s how the same pattern looks if filet crocheted the normal way.
The other one is much more beautiful, isn’t it?
;-)
Actually it’s another form of crochet medaillons, that you simply join.
That’s how it works:
The start:
 You can have a filled or empty middle square…
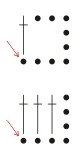 …that you crochet the normal way:
You crochet the empty middle square from 4 ch for the ‘bottom’, 3 ch for the right side, 2 ch for the ‘lid’ and 1 dc for the left side (that are 9 chains and one double crochet in the first chain) and
you crochet the filled middle square from 4 ch for the ‘bottom’, 3 ch for the right side, 3 dc for the ‘filling’ (these are 7 chains and three double crochets in the first three chains).
 Or you can have four filled or empty middle squares.
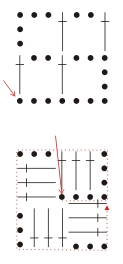 You can crochet the empty middle squares the normal way, too (7 ch for the bottom of two squares, 3 ch for the right side, 2 ch for the ‘lid’, 1 dc for the side, 2 ch for the ‘lid’ of the left square and 1 dc for the left side), then turn and add two more squares on top.
You should begin the filled middle squares in the center: 4 ch for the bottom of the 1st square, 3 ch for the side of the 1st square, 3 dc for the filling and the other side of the 1st square, then 3 ch for the side of the 2nd square, 3 dc for the filling and the other side of the 2nd square in the last dc of the 1st square, continue this way until you have crocheted all four squares.
The rest:
 Here you see using the example of an empty middle square from the top how to continue: you crochet 3 ch for the side of the 2nd square(!) of the 2nd round, 3 dc to fill and finish the 2nd square. For the empty corner square you crochet ‘around the corner’: simply 5 ch and a filled square again by crocheting 4 dc. Continue this way until you join the round with a slip stitch at the end.
 For filled corner squares you always(!) crochet it to be the first of the side by crocheting 3 ch as for the empty square but then you crochet the following two dc in the last dc of the previous square.
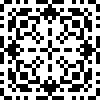
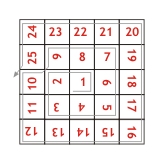 Here you can see again how a filet crochet square worked in rounds with one middle square is constructed (I turned the numbers so that you also can see the work direction of the actual square).
You can see at squares 2 und 10 that you begin a round always in the same column.
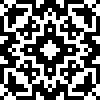
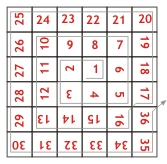 And here you can see how a filet crochet square worked in rounds with four middle squares is constructed (here again I turned the numbers so that you also can see the work direction of the actual square).
You can see at squares 5 und 17 that you begin a round always in the same column.
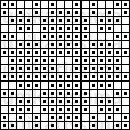
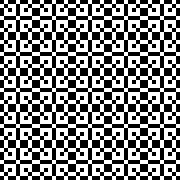
The used pattern:
That’s the pattern I used for the swatches, I let it generate with the Random Squares Pattern Generator.
Of course ;-)
(To save the pictures click them with the right mouse button and select ‘Save image as…’ or similar)
The pattern:

The quarter pattern:

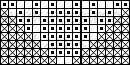
The border:

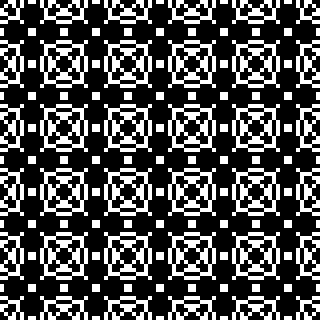
The repeated pattern:
And perhaps the whole as a summer shawl, straight or triangular:
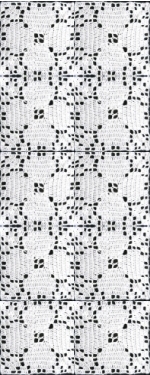
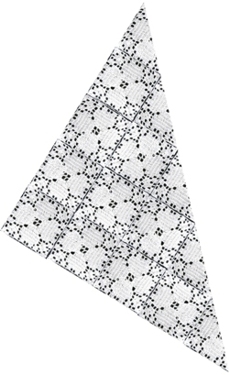
Well, the whole thing is ‘cheated’ from photos of my swatches, especially ‘cheated’ because a single square is crocheted from cotton thread and has only a side length of about 10 cm. As per Pythagoras Calculator the triangular shawl was about 70 cm at the longest side and therefore rather a kerchief ;-))
Links:
Here at unikatissima:
Random Squares Pattern Generator
Clothes From Crocheted Medaillons
Entries containing the word ‘medaillon’
Online Pythagoras Calculator
Instructions for filet crochet:
Filethäkel-Anleitung (CROCHET TUTORIAL) (English)
Filethäkeln-Grundanleitung (German)
At both tutorials there are instructions for increasing and decreasing, too, which you can use e.g. for the triangular half squares of the triangular shawl on the photo.
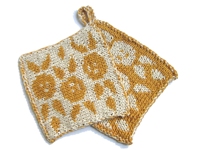
 The potholders have – as double knitted items always have – the pattern on one side …
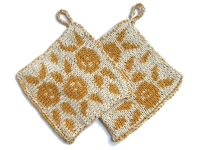 … and the inverted pattern on the other.
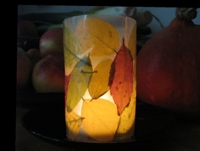
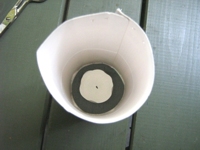 Tape the cardboard to a cylinder that has to be wider than the tealight but not especially beautiful.
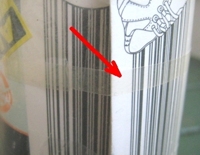 Put the transparent tape around the cardboard cylinder with the sticky side outside(!).
 Now simply tape on colurful leaves. They may even overlap.
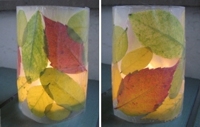 When you’ve finished you can decide whether you want to wrap everything with another layer of tape – this time sticky side inside ;-), then you simply pull your votive from the cardboard cylinder and put a tealight inside.
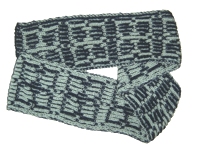
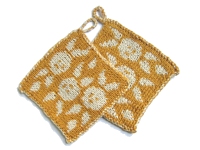
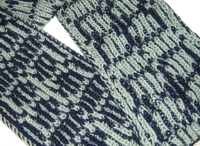 As you can clearly see the pattern is ‘normal’ on one side and inverted on the other.
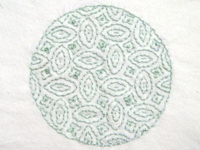
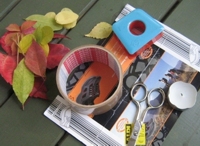
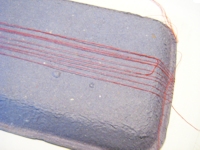
 Although I liked the item on the photo on top I wanted to see how it looks if I decrease the colour contrast of fabric and embroidery.
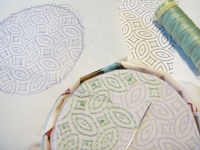 Here I’m at work: in the foreground you can see my
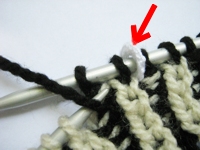
 I did it a little differently:
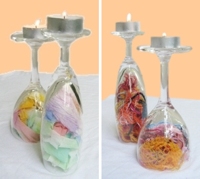
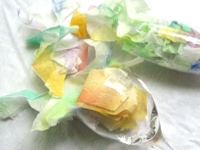 … with hand-dyed paper scraps or…
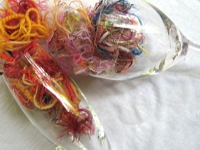 … with yarn and thread scraps that I kept for reasons I can’t understand anymore ;-)
 I’ve completely forgotten about the
 And here I began another one that I make with the


