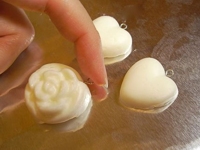
I presented an air-drying clay that was called cold porcelaine before, here is another, similar cold porcelaine recipe.
I have absolutely to try it!
Links:
Cold Porcelaine (How to Make Cold Porcelain)
Here at unikatissima:
Cold Porcelaine
…compilation of tutorials
I presented an air-drying clay that was called cold porcelaine before, here is another, similar cold porcelaine recipe.
I have absolutely to try it!
Links:
Cold Porcelaine (How to Make Cold Porcelain)
Here at unikatissima:
Cold Porcelaine
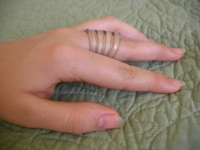
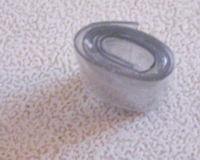
After you have transformed all your spoons to spoon pendants you want perhaps to work on your forks now?
Because what she’s doing here with the plastic forks must surely work with ‘real’ forks, too?! (Although not with a heat gun, I suppose ;-))
Links:
Clear Plastic Fork Ring
Here at unikatissima:
Spoon Pendants
Still got some plastic bottles? ;-)
Then try to make some earrings or a simple yet striking necklace!
Links:
DIY Eco-Hip Accessories
Here at unikatissima:
Entries containing the word ‘plastic bottle’
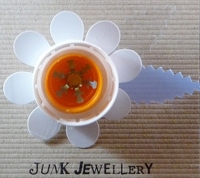
Such a pin from old plastic bottles and the like can look really cute, can’t it?
Now I’m debating with myself on whether I should collect these, too.
;-))
Links:
white brooch
via: Jewellery made from recycled stuff – a mini-round-up
via: art for housewives – pin cushions and junk jewellery

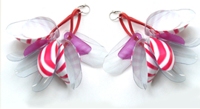
When I saw the drinking straw pin I thought: ‘Oh yes, I want!’ ;-)
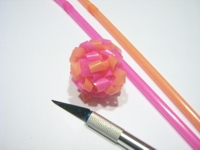 It is quite easy: I took two different coloured drinking straws, cut them (veeery carefully!) into spirals with an X-acto knife und knotted them (not too firm) together.
This way my little ball stays in form without glue, sewing or the like.
I wanted to cut them first with scissors but I got ugly edges, the cut must be made with a really sharp cutting tool.
I find it cute as well as jewelry as well as tree ornament ;-)
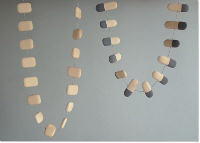
I find this a really cute idea: Eraser necklaces.
Since then I’m always looking for cheap erasers: to use the funny ones for necklaces and from the not so funny ones I simply cut stamps ;-))
Links:
Eraser Necklaces (Radiergummiketten) (German)
via: siebensachen
Here at unikatissima:
Eraser Stamps
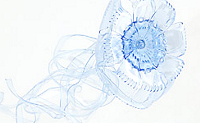
I wrote several entries about crafting with plastic bottles (see links below), this one is more of an inspiration: I’d like to present the PET-project and the wonderful PET jewelry.
Fantastic, aren’t they?
Links:
PET-Project
Flower with sash
Here at unikatissima:
 Knitted/Crocheted Bangles
Plastic Bottle Beads
Plastic Bottle Box
Knitting Loom from Plastic Bottle
DIY Shrinky Dinks
Box from woven PET stripes
Recently I wanted to make some knitted napkin rings as a gift and looked for a way to 1. keep their shape and 2. make them washable.
And I really found a solution which is also great for making bangles ;-)): use a core of recycled plastic bottle and a knitted or crocheted all over cover.
That’s what you do:
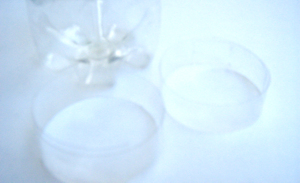 Cut rings in the desired width from a plastic bottle.
I cut here two rings because the circumference of the bottle was too small for a bangle for me.
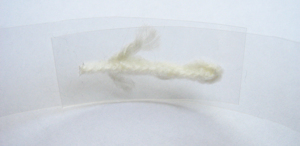 Where the rings are to be joined you need an overlap of about 2 cm.
I pricked 3 holes with a pointy needle and threaded the yarn I used later for knitting through them to fix both sides. The big advantage is that you don’t see anything of this later.
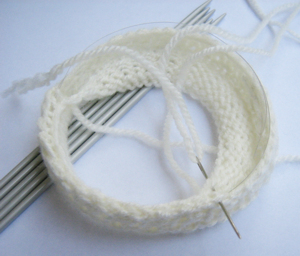 Then knit the ‘cover’. I worked with quite thick acrylic yarn and began with a stocking stitch part for the inside whereas outside I used a moss stitch pattern.
Depending on the used yarn the inside diameter can get a good deal narrower, in this case make the plastic rings a little bit larger.
When the cover is finished sew the sides together.
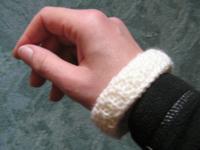
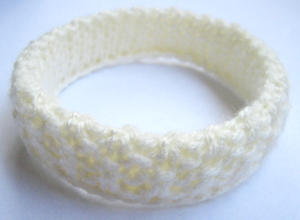 That’s how the finished bangle looks.
Originally I wanted to have the seam at the inside of the bangle but I ‘produced’ always a thick bulged seam. Therefore I knitted the ‘folding line’ between both patterns with purls and sew at the rim (which is much easier, too ;-)).
The bulged seam looks similar to the purled row and now I like it.
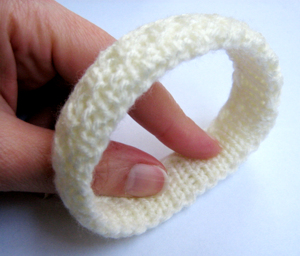 The plastic ring core has more advantages (besides the fact that it is cost-saving): the bangle keeps its shape but is flexible so that it doesn’t interfere with writing (usually I don’t wear bangles for just this reason).
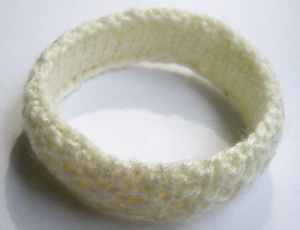 What is more I can wash it: That’s how my bangle looks after I machine-washed it at 30°C together with dark(!) cloths.
No problem there ;-)
But this depends strongly from the used yarn.
I used thick acrylic yarn here and find that it looks like a winter bangle, but it can surely be crocheted as well with fine cotton thread or knitted in stocking stitch with variegated sock yarns or simply be wrapped with fun yarns, possibly even be wrapped with a sewn fabric cover…
If you try something like this I would appreciate if you’d link it in the comments!
Have much fun.
plastic bottle bracelet
There remained some leftovers from our cut plastic bottle, from which we already made a knitting loom and a plastic box and we can use them to make some beads.
In the instruction on how to make plastic bottle beads they roll up the plastic strip and melt it together with a heat gun.
I don’t have no heat gun and I’m a little afraid of possibly developing fumes, therefore I did it in a different way:
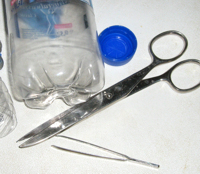 I brought water to the boil in my craft pan (which I don’t use for food preparation anymore!).
Then I cut a stripe from the plastic bottle and rolled tightly using some tweezers.
Look out, it always try to uncoil!
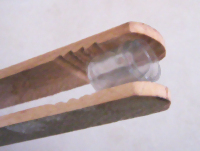 I hold the rolled ‘bead’ with my craft wooden pliers (also not used for food preparation anymore) into the simmering water and in seconds the bead was finished.
I don’t know if I could have coloured the bead with permanent markers, I’ve forgotten to test this.
Besides the end doesn’t fuse with the bead, but it doesn’t open neither.
 Because it always wanted to uncoil I hold it quite firm with my wooden pliers and the bead became a little flat.
Pressing it in the other direction and dipping into the simmering water again didn’t make the bead round.
But 1. I like the shape and 2. I think it’s only a matter of practice.
Links:
Plastic Bottle Beads

I’ve often seen bowls made from old vinyl records, but I find the bracelets from vinyl records nevertheless special.
Even so I won’t make none because I won’t be able to ‘batter’ the vinyl records like that ;-)
Links:
At craftster: Vinyl Record Bracelets
