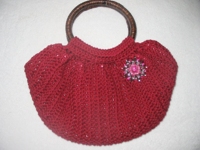
I really like knitted and crocheted bags but I never knew how to line them.
Now I found a tutorial on how to line a bag as on the photo.
Let’s see what I’m gonna make of it ;-))
Links:
Line a fat bottom bag
…compilation of tutorials
I really like knitted and crocheted bags but I never knew how to line them.
Now I found a tutorial on how to line a bag as on the photo.
Let’s see what I’m gonna make of it ;-))
Links:
Line a fat bottom bag

Recently we wrapped recycled gift tags, now washers.
And why not, most of us have enough stash yarn at any rate it looks cute ;-)
Links:
How to Make a Washer & Yarn Pendant
Here at unikatissima:
Recycled Gift Tags

Well, isn’t it a great idea making salt and pepper shakers from film containers?
It would be quite the right thing if you want to have salt and pepper at a picnic, isn’t it?
Although it gets now much to cold here for such events ;-))
Links:
Salt & pepper
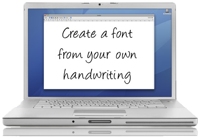
Sometimes it would be great, if you could enter your own hand writing by keyboard, e.g. when creating greeting cards.
You have the chance now: you print a form, enter the appropriate letters, scan the sheet and upload it at fontcapture.
Then you should get back your handwriting as font.
I didn’t let make it yet because my handwriting is so botched at the moment that I don’t want to get it ;-))
As a matter of principle you should be able to ‘put a lot on the keyboard’, even little sketches.
I really have to try it on occasion!
The gift tags on the photo aren’t ready yet: I simply can’t decide with which yarn I should wrap them.
But I find the idea really great: flatten the cardboard tube, cut it in strips and wrap the pieces with yarn.
I think that it could look beautiful, too, when wrapped in a piece of beautiful polymer clay and worn as necklace, earring or pin.
Hm.
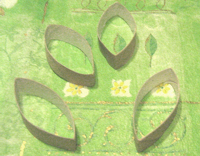
When reading the instructions for the gift tags I had to think somehow at the surprise ball gifts ;-)
But she had other ideas, too, about what to make with these paper shapes, namely a cute tealight and an interesting lamp decoration.
I presented before entries about recycled cardboard tubes here in this blog, namely the beaded amulet bag, the plaster photo holder and the knitting loom from a plastic bottle.
But there the cardboard tube was ‘only’ a tool.
Links:
recycling project no. 19 – yarn gift tag
recycle project no. 12 – tealight decoration
recycle project no. 16 – hurricane cover
Here at unikatissima:
Surprise Ball Gifts
Beaded Amulet Bag
Plaster Photo Holder
Knitting Loom from Plastic Bottle
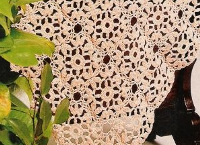
Recently I presented the crocheted bolero, now a tablecloth (or afghan) made of crocheted squares. Even if the magazin where the instruction comes from seems to be a little oldfashioned I really like the pattern.
Sigh.
;-))
Links:
Lacy Floral Crochet Square – photo
Lacy Floral Crochet Square – instruction
Overview
Here at unikatissima:
 Crocheted Bolero
Clothes From Crocheted Medaillons
Square ‘n’ Fair – Lacy Crochet Square Margarethe
Crochet Joining
Beverage Carton Crochet
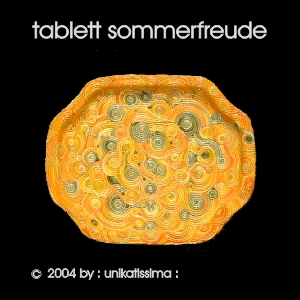
When working with polymer clay there is a technique called ‘Filigree’ where you press long ‘noodles’ from polymer clay to be laid in (e.g.) spirals.
That’s what I did on my Tray Sommerfreude (see photo) and the Coasters Sommerfreude: I had a lot of fun making these!
Usually the strands of polymer clay are made with a so-called clay gun but I found an instruction which uses successfully a garlic press (the garlic press may not be used for food afterwards!).
If you feel like working with filigree then take a look at the links where I listed some tutorials.
And if you don’t feel like working with filigree then take a look at the Google image search results, I’m sure that you will change your mind ;-))
Links:
Making Clay Strands With a Garlic Press
Tutorials about Filigree:
Beaded Filigree – that is the page succeeding ‘Noodling’ polymer clay with a garlic press
Blended Filigree Egg
Rainbow Filigree Lesson
Fold Over Beads – Polymer Clay Filigree Bead Project – here she doesn’t cover items in filigree but makes crescent-shaped beads from the polymer clay spirals
By the way all tutorials present polymer clay strands in gradient colours, the first tutorial also talks about single-colured strands.
Google image search result ‘polymer clay filigree’
Google search result ‘polymer clay filigree’
Google image search result ‘clay gun’
Here at unikatissima:
Tray Sommerfreude
Coasters Sommerfreude
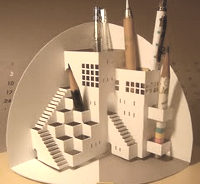
Looks great, doesn’t it really?
I always thought about what to make from pop-ups apart from cards – now I know ;-))
Links:
Origamic Architecture Pencil Holder
Here at unikatissima: Entries containing the word ‘pop-up’
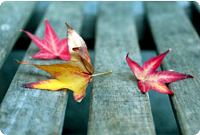
As said before, fall has begun and perhaps you like to make some really beautiful photos.
Then the fall photo tips will be perfect for you.
They forgot though that you have to look out for ground squirrels if you want to make good photos ;-)
And possibly you can take even better pictures with a self-made fisheye lens.
And if you don’t know what to do with the photos, simply browse this blog and make you a DIY photo silhouette t-Shirt with beautifully photographed leaves, Kaleidoscope pictures that you can use on greeting cards, candle lit photo stands for a good ambience, photo pencils that one likes to put in a row, a mailable mosaic for good friends, a photo bookmark where the leave overlaps a little, a Crazy Quilt photo frame that you embroider beautifully, a photo stamp for card making, too, and if you only want to display the pictures, you can make a plaster photo holder or a Jacob’s Ladder for yourself.
And if you have done all this you will already need the tips ‘Photograph the Holidays’ again ;-))
Links:
12 Fantastic Fall Photo Tips – Our Extra-Crunchy Guide to Leaf Peeping
Here at unikatissima:
Making Good Photos
DIY Fisheye Lens
DIY Photo Silhouette T-Shirt
Kaleidoscope Pictures
Candle Lit Photo Stands
Photo Pencils
A Mailable Mosaic
Photo Bookmarks
Crazy Quilt Photo Frame
Photo Stamps
Plaster Photo Holder
Jacob’s Ladder
Photograph the Holidays
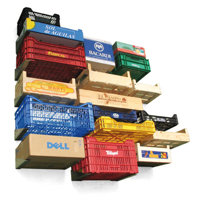
What about a really individual storage solution?
Simple, expressive and easily to be adapted to your needs.
Or something like this ;-)
Anyway it’s different than buying, isn’t it? ;-))
I can imagine how this ‘shelf’ would look hanging directly beside the juice rack ;-))
Links:
DIY : storage
Here at unikatissima:
Juice Rack