Tea Bag Envelopes

unikatissima Tea Bag Envelopes

I’m collecting nearly everything (and that’s how it looks here, too ;-)) and from now on I will collect used tea bags, too, to make beautiful envelopes from.
I’m really curious about it. ;-))
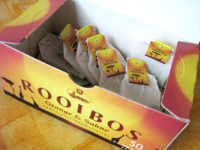
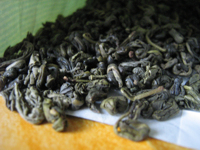
On the photo you see my Rooibosh tea bags. I find that the Rooibosh tea gives the most beautiful colour, a very warm red-brown :)

By the way it must look great, too, if the tea bags are sewn together and/or if they are embellished after assembly, e.g. by embroidering, painting or stamping them.


Links:
Recycling Tea Bags into Art Projects: How to Create Tea Bag Envelopes

“Tea Ceremony” – sewn tea bags
(via Wewer Keohane)
Sas Colby Teabag Art Discourse – stamped tea bags
T-Bag – Tea Bag Designs – painted tea bags

Here at unikatissima: Paper Crazy Quilt – embroidered paper

5 Minute Chocolate Cake

unikatissima 5 Minute Chocolate Cake

Recently I found the recipe for the 5 minute chocolate cake and it really worked! ;-))
Ok, ok, the something on the photo may not look soo mouth-watering but it was very tasty.
Anyway I adjusted the recipe slightly: instead of 4 tablespoons of sugar I used 2 tablespoons and because I didn’t have vanilla extract I added a sachet of vanilla sugar. This was nearly too sugary for us, it could be less.
What is more I only had olive oil at home and I thought that this wouldn’t taste so good, therefore I only took 1 tablespoon.
That is possibly the reason why it became a little too solid. Next time I’d melt and use some margarine. And then I had the cake in the microwave for 3:30 min because we ‘only’ have 800 W.


unikatissima 5 Minute Chocolate Cake
That’s how it looked when it was still in the bowl, but I tipped it out for eating.
I wanted to know how it looks from the other side ;-)
I already bought a jar of cherries, next time I want to add some.


Links:
5 Minute Chocolate Mug Cake

Embellished Oranges

unikatissima Embellished Orange

This time it’s no ‘real’ instruction but an inspiration: Embellished Grapefruits Embellished Grapefruits. (Click there for the actual pieces on the thumbnails and see e.g. Two Pods Two Pods.)
Because I’m always impatient I preferred to use a piece from an orange – grapefruits are so big ;-)

While working I had a lot of fun.
I like the embroidery of orange peels nearly as much as embroidery on paper. The most uncommon thing I had to do was to give my needle a wash ;-))


unikatissima Embellished Orange 
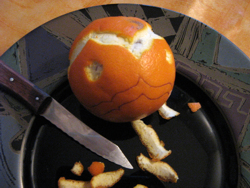
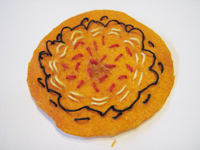
After the embroidery I put the orange peel between several layers of tissue paper in an old telephon book and let it dry ‘flat’.
Actually I had hoped that I can coat it with medium gel afterwards and wear as a pendant, but I don’t really like the ‘flat version’ of my orange peel.


unikatissima Embellished Orange 
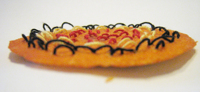
I find worst that the threads now stand up now like croquet wickets, I really don’t like this.


At the next opportunity I will see if I can make it better.
If it works I will perhaps embroider beads on, that should be interesting, perhaps Paisleys or simply Freeform.


Links:
Grapefruit – click there for the actual pieces on the thumbnails and see e.g. Two Pods
The original site doesn’t exist any more and is now available through webarchive:
Grapefruit – click there for the actual pieces on the thumbnails and see e.g. Two Pods

Embroidery stitch descriptions (English)
Embroidery stitch descriptions (German)

Here at unikatissima:
Paper Crazy Quilt
Freeform Bead Embroidery
Bead embroidered Paisleys

Bubble Gum Roses

unikatissima Bubble Gum Roses

I know that it sounds – strange about the bubble gum roses, but she says that children love them.
Anyhow, I found that they looked beautiful on the photos and the technique surely applies as well when working with polymer clay or play dough, if you really can’t bring yourself to use bubble gum ;-)

This here on the photo is no bubble gum rose, but a fabric rose which looks quite similar to those from the tutorial.
I didn’t make any bubble gum rose yet, because first I only have a pasta machine for polymer clay that I can’t use for food anymore and second I don’t seem to have some pink bubble gum here at the moment ;-))


Links:
Bubble Gum Roses
via Every kind of rose you could want

Fun Recycled Food Package Lights

unikatissima Recycled Food Package Lights

I found an instruction on how to make fun lights from ‘silly’ food packages.
I really like them and wanted to try them immediately.
Therefore I took a look at my kitchen and found the joghurt cup. I thought that the light should shine through and I began with pricking some ‘test holes’.
Looks interesting, doesn’t it?


unikatissima Recycled Food Package Lights 
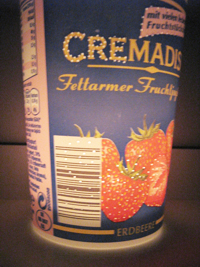
In fact I found the hole pattern around the lettering the most interesting.


unikatissima Recycled Food Package Lights What I also liked was that the lower holes made a nice light pattern.


Links:
Fidgety Fingers: Fun Recycled Food Package Lights
via Junk Mail Gems – DIY Christmas Gifts from Inhabitat

Self-made Cookie Cutters

unikatissima Self-made Cookie Cutters

Fancy some camel cookies? ;-)
I found the instruction great, especially because you can make all sorts of shapes.
For me, a simple flower is enough – hoping that spring will come swifter ;-)
But I haven’t begun yet…
By the way, I assume that you can use the cookie cutters for needle felting, too.


Links:
Make your own cookie cutter from clip-art and a foil pan
via Inhabitat » GREEN GIFT GUIDE: Make Your Own DIY Gifts
via Junk Mail Gems – DIY Christmas Gifts from Inhabitat

Here at unikatissima: Needle felting with cookie cutters

Citrus Fruit Ornament

unikatissima Citrus Fruit Ornament

Long ago I found (German) instructions for ornaments made from citrus fruit. They seem to be fragrant.
Last time I checked the site they didn’t show the images, but it is very easy.

That’s what you have to do:

  1. Sketch the pattern onto the citron or the orange (e.g. with a ball pen).
  2. Cut the pattern (it is the same technique as with the eraser stamps: cut the pattern diagonally).
  3. Subsequently you can decorate your ornament with cloves.

On the photo you see my first try. I tried to cut a too broad pattern, I doesn’t really like it.
Fortunately I can continue experimenting and when making faults, I can ‘nibble’ some delicious orange ;-))


Links:
Citrus-Schmuck

Here at unikatissima: Eraser Stamps