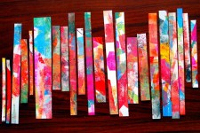
I found a fantastic tutorial on how to colour (more or less) haphazardly stripes of cardboard!
I put it at the top of my try-it-list (and it pushes other things down the list ;-)).
Links:
Psychedelic Batik Cardstock
…compilation of tutorials
I found a fantastic tutorial on how to colour (more or less) haphazardly stripes of cardboard!
I put it at the top of my try-it-list (and it pushes other things down the list ;-)).
Links:
Psychedelic Batik Cardstock
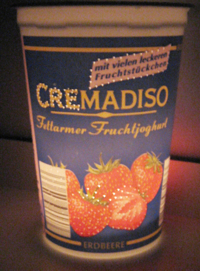
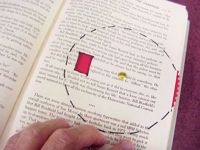
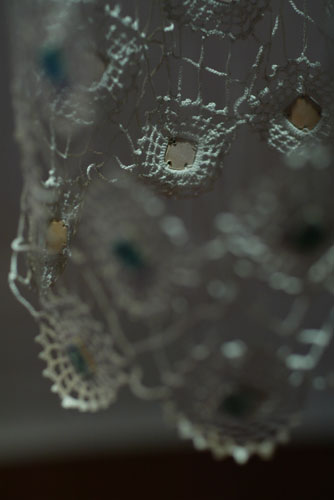
I found an instruction on how to make fun lights from ‘silly’ food packages.
I really like them and wanted to try them immediately.
Therefore I took a look at my kitchen and found the joghurt cup. I thought that the light should shine through and I began with pricking some ‘test holes’.
Looks interesting, doesn’t it?
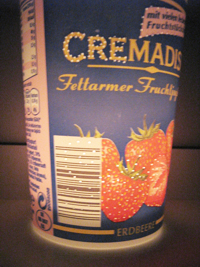 In fact I found the hole pattern around the lettering the most interesting.
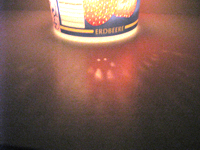 What I also liked was that the lower holes made a nice light pattern.
Links:
Fidgety Fingers: Fun Recycled Food Package Lights
via Junk Mail Gems – DIY Christmas Gifts from Inhabitat
(Click photo to enlarge)
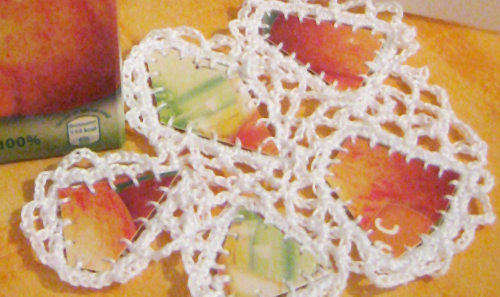
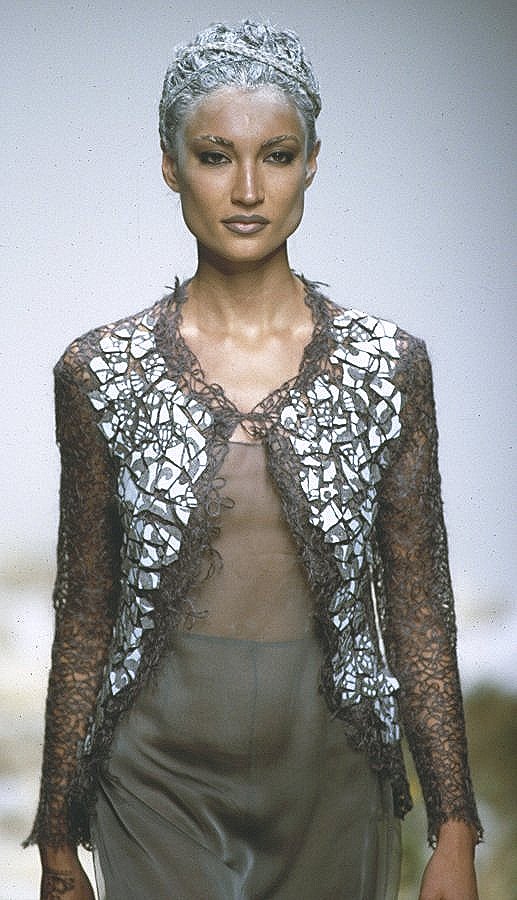
Once I’ve seen a fashion photo where I’ve been really impressed by the garment.
Recently, when I drank my apple juice, I thought: ‘Yes, that’s the right material in the right colour for this!’
Therefore I figured out how to make it.
And that’s what you do:
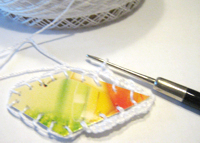
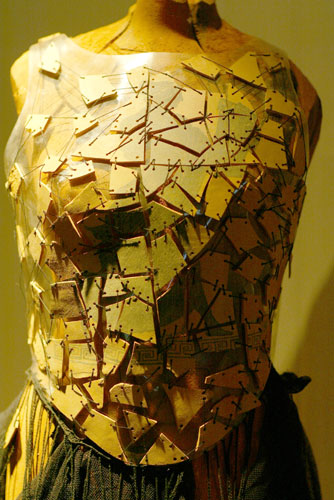
First cut the (washed! ;-)) beverage carton in pieces and, if you like, you can arrange the pieces in a pattern that suits you best (best done on a stiff pad, then you can carry it away carefully, if necessary).
I cut my pieces just as I liked to (there is another garment), but regular shapes, square e.g. are not bad either. They were used in yet another garment (here a detail photo).
 I didn’t arrange anything and on this photo I’m checking whether the piece fits at this place.
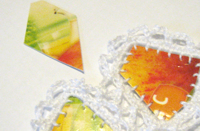
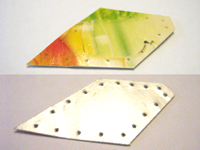
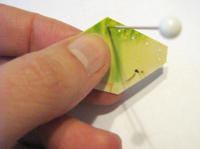 Subsequently prick holes into the cardboard. Try to get a regular spacing between the holes.
Please note that the holes may not be placed too closely to the edge!
I had to throw away some of my snippets because the thread ripped the hole.
 That’s how my snippet looked like after the piercing from both sides.
The cardboard has a nice silver coloured internal coating which makes also the backside look good.
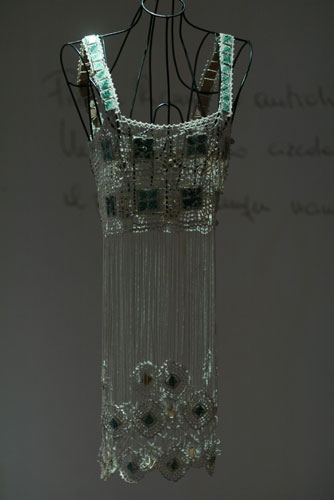
 Afterwards I took my pierced snippet and surrounded it using a tapestry needle with button hole stitches with cotton thread.
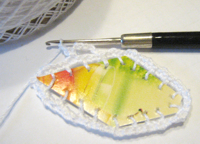
 The surrounding is finished.
I worked quite loosely to 1. get on easier with the crochet (see next step) and 2. keep my snippet in shape.
 Afterwards I crocheted
 single crochet stitches single crochet stitches around the surrounding thread with the same thread.
Mostly I crocheted 2 single crochet stitches, sometimes even 3.
At the corners I crocheted 1 to 2 chain stitches chain stitches between the single crochets.
 I then worked
 chains chains of about 5 stitches into the single crochets.
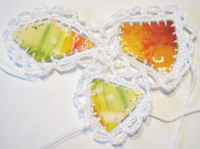 I joined the
 chains chains with the chains of the already finished item immediately when crocheting.
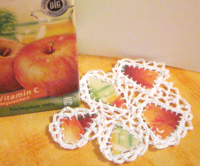 That’s what I’ve done until now.
I can imagine making a sommer vest from it, a belt or the top flap of a cute purse.
But I haven’t decided yet ;-))
Links:
My inspiration at Marella Ferrera Alta Moda:
Fall/Winter 98/99 – L’Isola dei Ciclopi
Fall/Winter 03/04 – Isola di Terracotta
Fall/Winter 03/04 – Isola di Ceramica
Fall/Winter 03/04 – Isola di Ceramica – Detail
Embroidery stitches:
Button hole stitch instruction (English)
Button hole stitch instruction (German)
Crochet stitches:
Chain (English)
The original site doesn’t exist any more and is now available through webarchive:
Chain (English)
Chain (German)
Single crochet (English)
The original site doesn’t exist any more and is now available through webarchive:
Single crochet (English)
Single crochet (German)
Here at unikatissima:
Crochet Joining
Clothes From Crocheted Medaillons
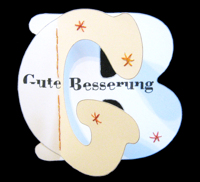
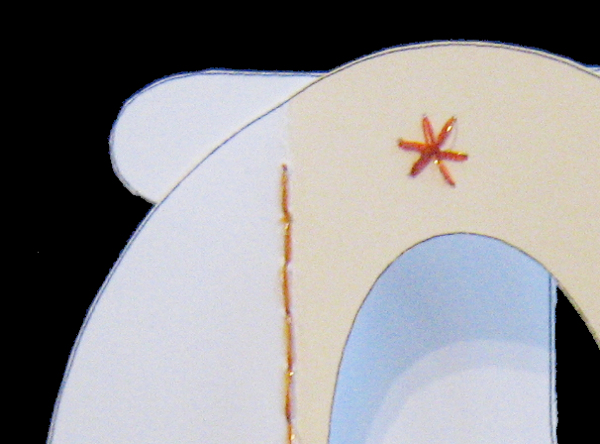
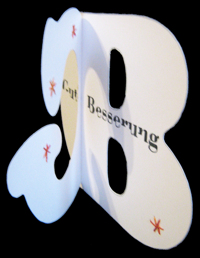
I found an instruction on how to make shaped cards.
I really liked the flower cards e.g., but I’m more one for thinking in words than in pictures. All I could think about when needing a ‘Get well soon card’ was therefore making a card from the letters G and B (in German, ‘Get well soon’ is ‘Gute Besserung’) ;-)
 (Click picture to enlarge)
I joined them with an embroidery stitch (running stitch back and forth) and embroidered some little ‘flowers’ ( I looove embroidery on paper ;-)).
I like it and I hope that it ‘helps’ ;-)

Links:
Creating Shaped Cards
via Nuttnhoney Great Tutorials
Instruction on how to make the Running Stitch
Instruction on how to make the Running Stitch (Vorstich) (German)
Here at unikatissima: Paper Crazy Quilt

Valentine’s Day makes everything more heart-ily somehow ;-))
Besides I wanted to show what you can do else with the heart template of the day before yesterday (Beaded Square Stitch Heart), viz. a really nice cross stitch heart.
I didn’t have any Aida fabric or similar, besides I always prefer to embroider on paper or fine cardboard ;-)
I therefore glued some plain gift wrap paper on fine cardboard, pre-pricked the holes (which you should always do when embroidering on paper) and embroidered my heart with metallic sewing threads (instructions on how to embroider the cross stitch see links below).
Subsequently I connected the border holes, cut the cardboard into a nicer shape and glued it on a greeting card.
I really like it ;-)
 Click picture to enlarge and then simply print.
Links:
Kids Stitch Diagrams and Instructions Part I
Tutorial moved to: Kids Stitch Diagrams and Instructions Part I => scroll down
At Embroiderers’ Guild: Cross Stitch
What else you can do with cross stitches (at Embroiderers’ Guild also):
Pattern Making with Cross Stitch
Flinkhands Kreuzstichanleitung (German)
At crossstitch.about.com: About Aida fabric
At Wikipedia: Stramin (German)
Here at unikatissima: entries with the words ’embroidery on paper’,
especially the Paper Crazy Quilt and the Crazy Quilt Photo Frame
Because it’s not long to Valentine’s Day any more I’d like to offer a template for you to bead a heart with square stitch (for instructions on how to do the square stitch see links below).
It’s great to make a card but can be made into a piece of jewelry as well.
Click picture to enlarge and then simply print.
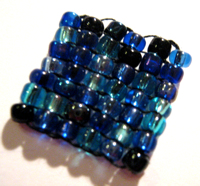 And here you can see easily where the name ‘square stitch’ comes from ;-))
Links:
Standard Square Stitch Beading Tutorial
Making Square Stitch Samples Part I – shows also the ‘Circular Flat Square Stitch’
Perlenhobby Anleitungen (German) => click ‘Anleitungen’ in the left navigational bar => click ‘Quadratstich’
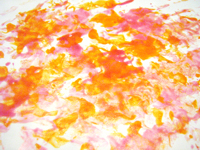
A long time ago I found an instruction for encaustic for poor.
On the photo you see one of the tries I made – I like it ;-))
I think that I will have to do it once more.
Links:
Encaustic für Arme (German)
English: Read the section ‘Ironing Crayon’. On this site you find more ideas for melted crayons.
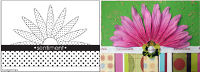
I presented before a website where you can find card sketches.
This time it’s a website which shows sketches for cards, for scrapbooking and more.
Some of them are soo beautiful!
What I like most are the added photos which show how you can realize the sketched card.
Links:
Page|Maps
The sketches of this day (CardMaps)
Archive of sketches (not only cards) – JPGs
Archive of sketches (not only cards) – PDFs
Here at unikatissima: Sketch for Card
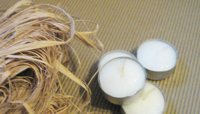
Ok, slowly the days become lighter but you can always do with a nice tea light holder.
In the instruction on how to make a tea light holder form corrugated cardboard they are meant for Halloween, but by simply selecting other colours you can actually fit them to everything.
Because you have to wrap the tea light several times I think that they are quite robust.
I already have prepared my stuff ;-)
Today I present a tutorial on how to make a spinner tutorial on how to make a spinner, which actually is meant for an Altered Book, but which can be used as well for a greeting card.
You can e.g. make a card for Valentine and write ‘I love you’ in different languages or make a gift coupon card with pictures of different plants and the beneficiary may select one of them, etc.
Links:
Spinner How-To: unfortunately the link isn’t available no more.