Recently I wanted to make some knitted napkin rings as a gift and looked for a way to 1. keep their shape and 2. make them washable.
And I really found a solution which is also great for making bangles ;-)): use a core of recycled plastic bottle and a knitted or crocheted all over cover.
That’s what you do:
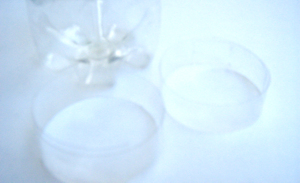 Cut rings in the desired width from a plastic bottle.
I cut here two rings because the circumference of the bottle was too small for a bangle for me.
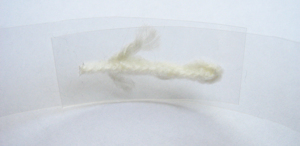 Where the rings are to be joined you need an overlap of about 2 cm.
I pricked 3 holes with a pointy needle and threaded the yarn I used later for knitting through them to fix both sides. The big advantage is that you don’t see anything of this later.
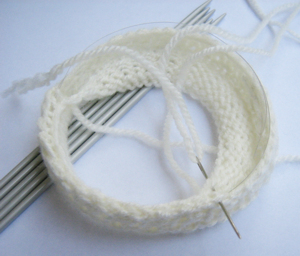 Then knit the ‘cover’. I worked with quite thick acrylic yarn and began with a stocking stitch part for the inside whereas outside I used a moss stitch pattern.
Depending on the used yarn the inside diameter can get a good deal narrower, in this case make the plastic rings a little bit larger.
When the cover is finished sew the sides together.
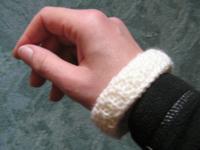
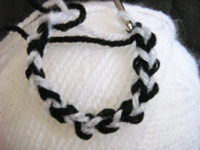
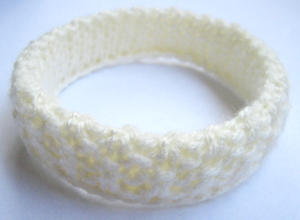 That’s how the finished bangle looks.
Originally I wanted to have the seam at the inside of the bangle but I ‘produced’ always a thick bulged seam. Therefore I knitted the ‘folding line’ between both patterns with purls and sew at the rim (which is much easier, too ;-)).
The bulged seam looks similar to the purled row and now I like it.
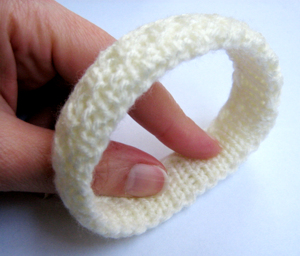 The plastic ring core has more advantages (besides the fact that it is cost-saving): the bangle keeps its shape but is flexible so that it doesn’t interfere with writing (usually I don’t wear bangles for just this reason).
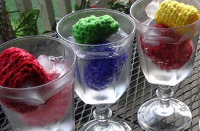
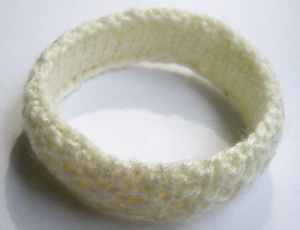 What is more I can wash it: That’s how my bangle looks after I machine-washed it at 30°C together with dark(!) cloths.
No problem there ;-)
But this depends strongly from the used yarn.
I used thick acrylic yarn here and find that it looks like a winter bangle, but it can surely be crocheted as well with fine cotton thread or knitted in stocking stitch with variegated sock yarns or simply be wrapped with fun yarns, possibly even be wrapped with a sewn fabric cover…
If you try something like this I would appreciate if you’d link it in the comments!
Have much fun.
plastic bottle bracelet


 I didn’t arrange anything and on this photo I’m checking whether the piece fits at this place.
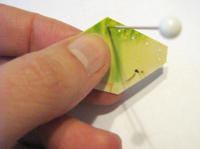 Subsequently prick holes into the cardboard. Try to get a regular spacing between the holes.
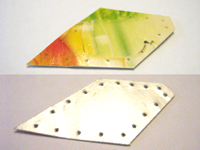 That’s how my snippet looked like after the piercing from both sides.
 Afterwards I took my pierced snippet and surrounded it using a tapestry needle with
  The surrounding is finished.
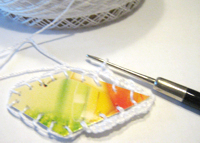 Afterwards I crocheted
 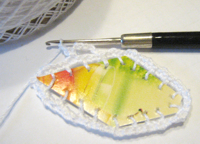 I then worked
 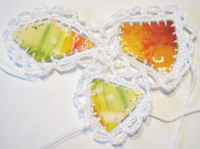 I joined the
 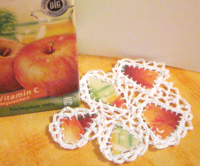 That’s what I’ve done until now.

 You take a Crazy Daisy (instructions see
  In this case I made and attached a simple, single-coloured