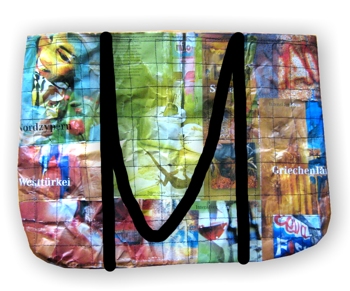
At craftster started the ‘Craft Challenge #47 – Reusable Shopping Bag Challenge 2’ and I had the idea of making a shopping bag from paper (see also the other entries).
In principle I really like it, but some things didn’t work the way I wanted them to (see also below) so that I didn’t finish the handle but only show how it can be made.
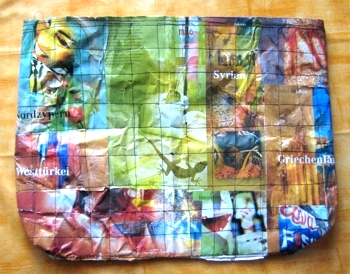
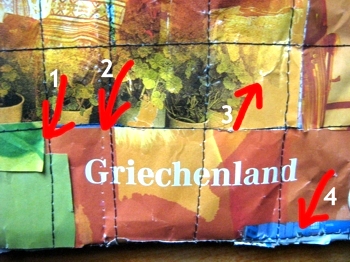
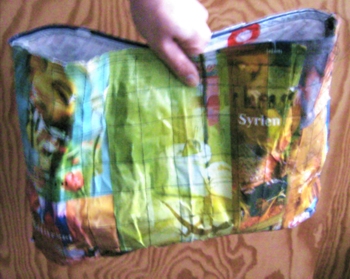
That’s how my shopping bag looks from one side…
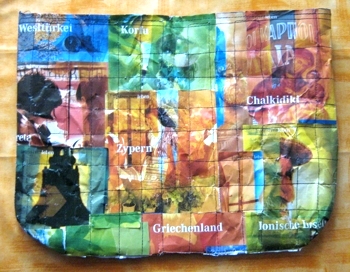
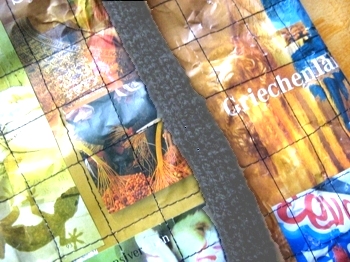
… and so from the other.
I used clippings from a travel brochure, so my bag is not only multicoloured but gives me even wanderlust ;-)
That’s what you do:
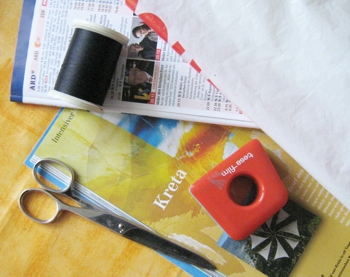
That’s what you need:
- paper to strengthen (here an old TV guide)
- paper for the outside (here clippings from a travel brochure)
- plastic bag to strengthen the inside and make it possible to wipe it with a damp cloth (right top in picture)
- some tape and a glue stick (which I forgot to take a photo from ;-))
- scissors
- sewing thread and best a sewing machine
- possibly transparent plastic foil or plastic bag (non-adhesive or you can get bad problems with your sewing machine!)
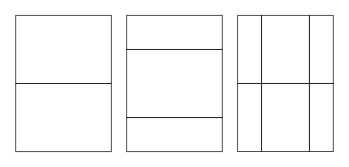
First I layered three layers of my TV guide pages.
I used them askew as shown in the graphic so that they don’t always touch in the same place (every large rectangle is a page from the TV guide, the smaller ones are pages cut into halves in one or the other direction).
I taped them rarely so that the whole doesn’t fall apart.
On the future outside I laid on the clippings from the travel brochure and glued them on rarely to fix them slightly.
Note: Don’t use too much tape or glue because you can get bad problems with your sewing machine.
I laid the cut white plastic bag on the backside of my large paper rectangle with meanwhile four layers and begun to sew.
Note: It pays to fix the plastic bag somehow, too ;-)
Then I just started sewing (did I mention that I’m completely unexperienced in sewing? ;-))).
I wanted to sew (and have somehow sewn ;-)) lines but it was much more difficult than I thought.
Therefore I made a mental note of some points for the next bag:
- The paper for the outside should be better joined.
I think it even best to lay and sew on a layer of transparent (non-adhesive!) foil or plastic bag, then it is also possible to wipe it on the outside with a damp cloth.
- Practise sewing before, so that 1st my thread doesn’t tear and I’ll be 2nd hopefully able to sew straight lines ;-)
- The crinkling happened when I rolled up my large paper rectangle several times this way and the other to be able to sew it.
Paper that is crinkled often get fabric-liker, so I didn’t find it bad.
- I laid the clippings from the travel brochure so that they all meet on the underside of the bag – with the effect that it looks scruffy.
Next time I’d put a broad stripe of coloured paper over the folding line of the bag.
- I’ve sewn the side seams on the wrong side because I wanted to turn it after just like a fabric bag.
Next time I will sew them from the right side because the turning was incredibly difficult and I simply couldn’t turn the corners completely.
That’s why it has these chic rounded corners ;-))
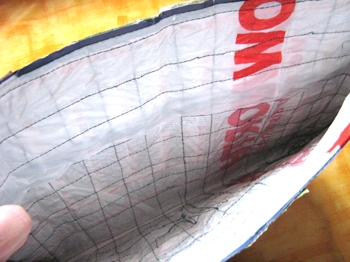
That’s how my bag looks at the inside.
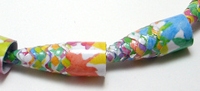
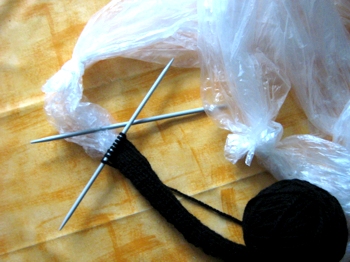
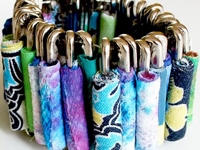
Actually I wanted to make a shoulder-long black with plastic bags filled I-cord as handle (I post-worked the photo to show you the knitting, originally it’s been completely black just as in the next photo ;-)) …
…but I don’t want to make it for a bag with lots of defects.
You can see here anyhow how I knotted the plastic bags together and knitted a little bit already.
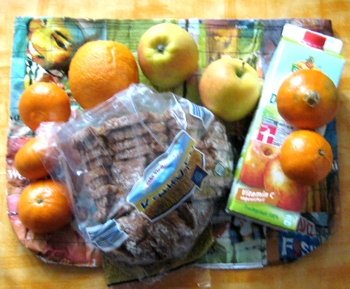
The bag seems to be quite robust and I wanted to try out what it can carry.
Therefore I stuffed 1 l juice, half a kilo of bread, 2 appels, an orange and 5 tangerines in – in short a little shopping ;-)
Here I’m holding the bag with the content of the previous picture – no problems at all ;-)
Links:
Craft Challenge #47 – Reusable Shopping Bag Challenge 2
Entries for the Craft Challenge #47
Here at unikatissima:
Clothesline Knitting or Filled I-cord
 Paper Bead Bracelet