I find the ‘Scrapheap Background’ very interesting and put it on my just-do-it-once-list.
It made me think a little about the plaster relief …
Links:
The Friday Tut >>> *Scrapheap Challenge*
Here at unikatissima: Plaster Relief
…compilation of tutorials
I find the ‘Scrapheap Background’ very interesting and put it on my just-do-it-once-list.
It made me think a little about the plaster relief …
Links:
The Friday Tut >>> *Scrapheap Challenge*
Here at unikatissima: Plaster Relief
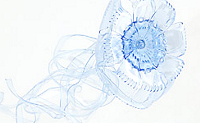
I wrote several entries about crafting with plastic bottles (see links below), this one is more of an inspiration: I’d like to present the PET-project and the wonderful PET jewelry.
Fantastic, aren’t they?
Links:
PET-Project
Flower with sash
Here at unikatissima:
 Knitted/Crocheted Bangles
Plastic Bottle Beads
Plastic Bottle Box
Knitting Loom from Plastic Bottle
DIY Shrinky Dinks
Box from woven PET stripes
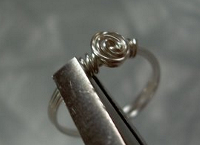
I already presented several tutorials for rings and the wire wrapped ring wire wrapped ring matches great.
I find it beautiful.
If you don’t have a ring mandrel to wrap the wire around you can possibly use the solid paper roll from the woven ring.
I’m still determined not to buy some wire, too.
We will see how long I hold out ;-)
Links:
‘Rosette’ Wire Wrapped Ring
Tutorial moved to: ‘Rosette’ Wire Wrapped Ring
Here at unikatissima:
Woven Ring for the solid paper roll
More tutorials for rings
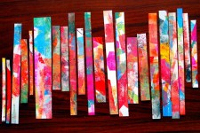
I found a fantastic tutorial on how to colour (more or less) haphazardly stripes of cardboard!
I put it at the top of my try-it-list (and it pushes other things down the list ;-)).
Links:
Psychedelic Batik Cardstock

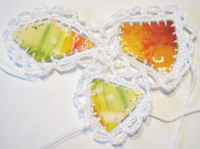
This time it’s no ‘real’ instruction but an inspiration: Embellished Grapefruits Embellished Grapefruits. (Click there for the actual pieces on the thumbnails and see e.g. Two Pods Two Pods.)
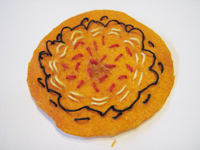
Because I’m always impatient I preferred to use a piece from an orange – grapefruits are so big ;-)
While working I had a lot of fun.
I like the embroidery of orange peels nearly as much as embroidery on paper. The most uncommon thing I had to do was to give my needle a wash ;-))
 After the embroidery I put the orange peel between several layers of tissue paper in an old telephon book and let it dry ‘flat’.
Actually I had hoped that I can coat it with medium gel afterwards and wear as a pendant, but I don’t really like the ‘flat version’ of my orange peel.
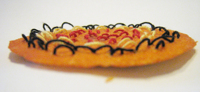 I find worst that the threads now stand up now like croquet wickets, I really don’t like this.
At the next opportunity I will see if I can make it better.
If it works I will perhaps embroider beads on, that should be interesting, perhaps Paisleys or simply Freeform.
Links:
Grapefruit – click there for the actual pieces on the thumbnails and see e.g. Two Pods
The original site doesn’t exist any more and is now available through webarchive:
Grapefruit – click there for the actual pieces on the thumbnails and see e.g. Two Pods
Embroidery stitch descriptions (English)
Embroidery stitch descriptions (German)
Here at unikatissima:
Paper Crazy Quilt
Freeform Bead Embroidery
Bead embroidered Paisleys

I found the umpteenth instruction on how to cut a snowflake from paper, but this time the snowflake looked so much more beautiful than usually.
I made immediately a card with non winterly coloured advertising junk mail paper :)
Links:
Fidgety Fingers: Magazine Manifesto – Paper Snow
Here at unikatissima: Kirigami Flower
(Click photo to enlarge)
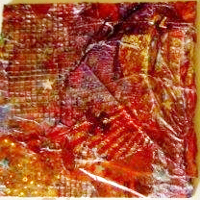
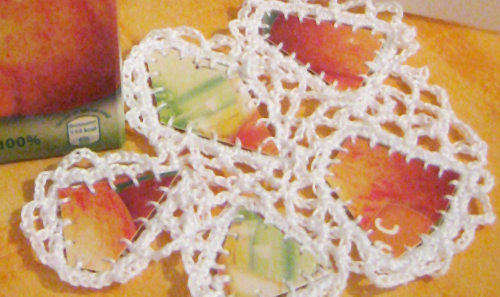
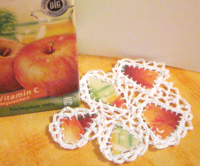
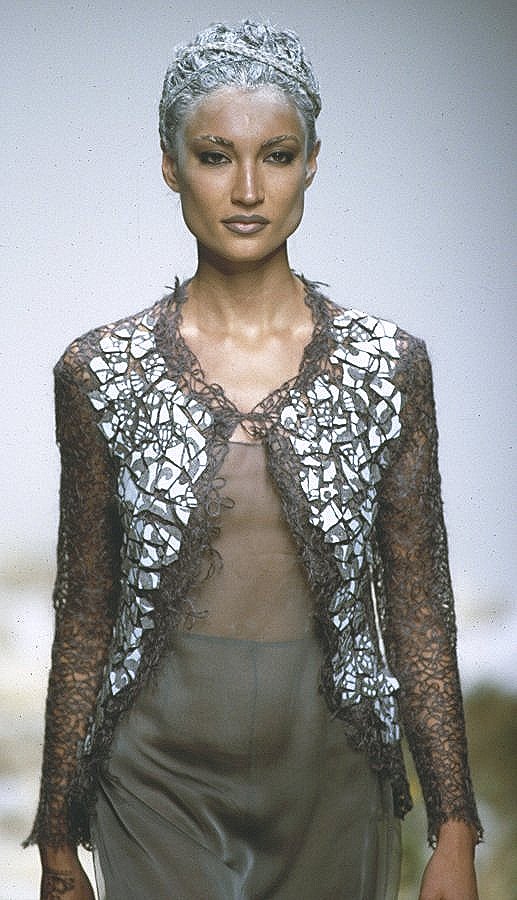
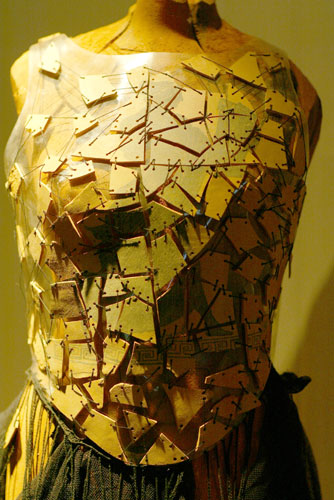
Once I’ve seen a fashion photo where I’ve been really impressed by the garment.
Recently, when I drank my apple juice, I thought: ‘Yes, that’s the right material in the right colour for this!’
Therefore I figured out how to make it.
And that’s what you do:
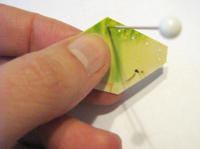
First cut the (washed! ;-)) beverage carton in pieces and, if you like, you can arrange the pieces in a pattern that suits you best (best done on a stiff pad, then you can carry it away carefully, if necessary).
I cut my pieces just as I liked to (there is another garment), but regular shapes, square e.g. are not bad either. They were used in yet another garment (here a detail photo).
 I didn’t arrange anything and on this photo I’m checking whether the piece fits at this place.
 Subsequently prick holes into the cardboard. Try to get a regular spacing between the holes.
Please note that the holes may not be placed too closely to the edge!
I had to throw away some of my snippets because the thread ripped the hole.
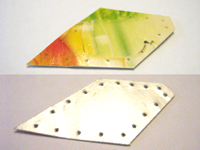 That’s how my snippet looked like after the piercing from both sides.
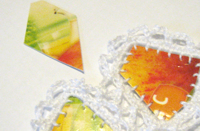
The cardboard has a nice silver coloured internal coating which makes also the backside look good.
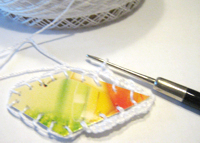
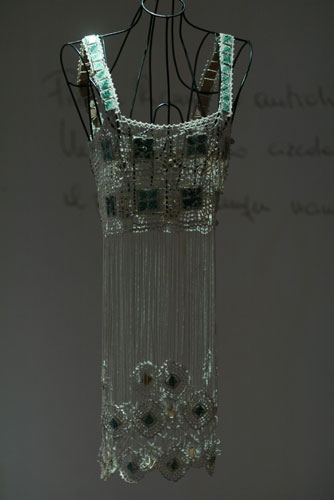
 Afterwards I took my pierced snippet and surrounded it using a tapestry needle with button hole stitches with cotton thread.
 The surrounding is finished.
I worked quite loosely to 1. get on easier with the crochet (see next step) and 2. keep my snippet in shape.
 Afterwards I crocheted
 single crochet stitches single crochet stitches around the surrounding thread with the same thread.
Mostly I crocheted 2 single crochet stitches, sometimes even 3.
At the corners I crocheted 1 to 2 chain stitches chain stitches between the single crochets.
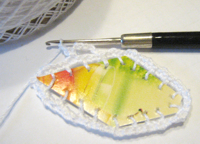 I then worked
 chains chains of about 5 stitches into the single crochets.
 I joined the
 chains chains with the chains of the already finished item immediately when crocheting.
 That’s what I’ve done until now.
I can imagine making a sommer vest from it, a belt or the top flap of a cute purse.
But I haven’t decided yet ;-))
Links:
My inspiration at Marella Ferrera Alta Moda:
Fall/Winter 98/99 – L’Isola dei Ciclopi
Fall/Winter 03/04 – Isola di Terracotta
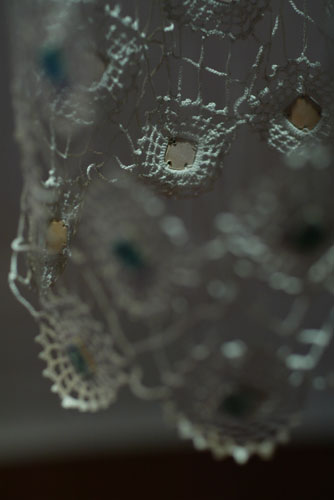
Fall/Winter 03/04 – Isola di Ceramica
Fall/Winter 03/04 – Isola di Ceramica – Detail
Embroidery stitches:
Button hole stitch instruction (English)
Button hole stitch instruction (German)
Crochet stitches:
Chain (English)
The original site doesn’t exist any more and is now available through webarchive:
Chain (English)
Chain (German)
Single crochet (English)
The original site doesn’t exist any more and is now available through webarchive:
Single crochet (English)
Single crochet (German)
Here at unikatissima:
Crochet Joining
Clothes From Crocheted Medaillons

Fancy some camel cookies? ;-)
I found the instruction great, especially because you can make all sorts of shapes.
For me, a simple flower is enough – hoping that spring will come swifter ;-)
But I haven’t begun yet…
By the way, I assume that you can use the cookie cutters for needle felting, too.
Links:
Make your own cookie cutter from clip-art and a foil pan
via Inhabitat » GREEN GIFT GUIDE: Make Your Own DIY Gifts
via Junk Mail Gems – DIY Christmas Gifts from Inhabitat
Here at unikatissima: Needle felting with cookie cutters
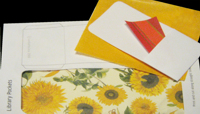
I found a tutorial on how to make a wonderful library pocket book.
Though our library doesn’t have such library pockets and I don’t feel like buying them in internet.
That is why I designed some pockets myself. If you like you can download my library pocket template (link see below).
I’m planning to make a book where the pockets are made from patterned paper, the flower paper on the photo e.g.
For that purpose I will print the template, glue the paper so, that it is patterned on both sides and then cut the pockets from the template.
And then I will begin to embellish ;-))
Links:
Library Pocket Book
Here at unikatissima: unikatissima’s Library Pocket Template (PDF – ca. 80 KB)

I found a short but good tutorial on how to make beautiful jewelry from wire and polymer clay.
At the moment I don’t have any jewelry wire at home and I’m not working with polymer clay anymore, but this tutorial made me feel like beginning once more!
Links:
At flickr: Tutorial Wire Work and Polymer Clay (photos only)