I found a tutorial on how to tie-dye paper that is similar to my self coloured tissue papers but with the advantage that you dye proper stiff paper.
I have to try this, too ;-)
Links:
Tie-Dye Paper
Here at unikatissima: Self Coloured Tissue Papers
…compilation of tutorials
I found a tutorial on how to tie-dye paper that is similar to my self coloured tissue papers but with the advantage that you dye proper stiff paper.
I have to try this, too ;-)
Links:
Tie-Dye Paper
Here at unikatissima: Self Coloured Tissue Papers
Recently the term ‘Bento‘ (a single-portion meal to take away) came up again and I decided to present today the tutorial on how to make ‘cloudy sky’ rice.
Up until now I have never made such a beautiful meal because it’s much too time-consuming for my liking. Instead I spent hours on looking at photos of Bento’s of other people ;-))
I don’t think that I will make the blue rice because I guess that it wouldn’t look so appetizing when served with green and red pappers and brown fish sticks.
But perhaps in pale yellow? ;-))
Links:
Tie-dye Rice (tutorial- tie-dye/rainbow rice)
Wikipedia entry for ‘Bento’ (English)
Wikipedia entry for ‘Bentō’ (German)
Flickr group ‘bento boxes’
Google image search result for ‘bento boxes’
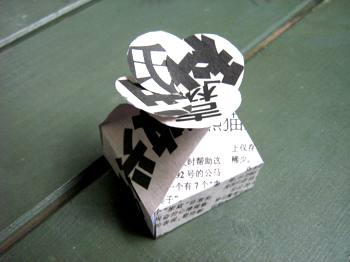
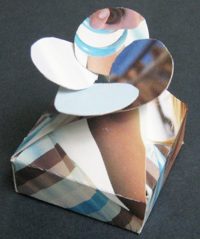
I saw somewhere (unfortunately I don’t remember where) such a box, but it was flat while I wanted the actual box (not the flaps) to be of about 2 cm height.
So I made me a template myself ;-))
And that’s what you do:
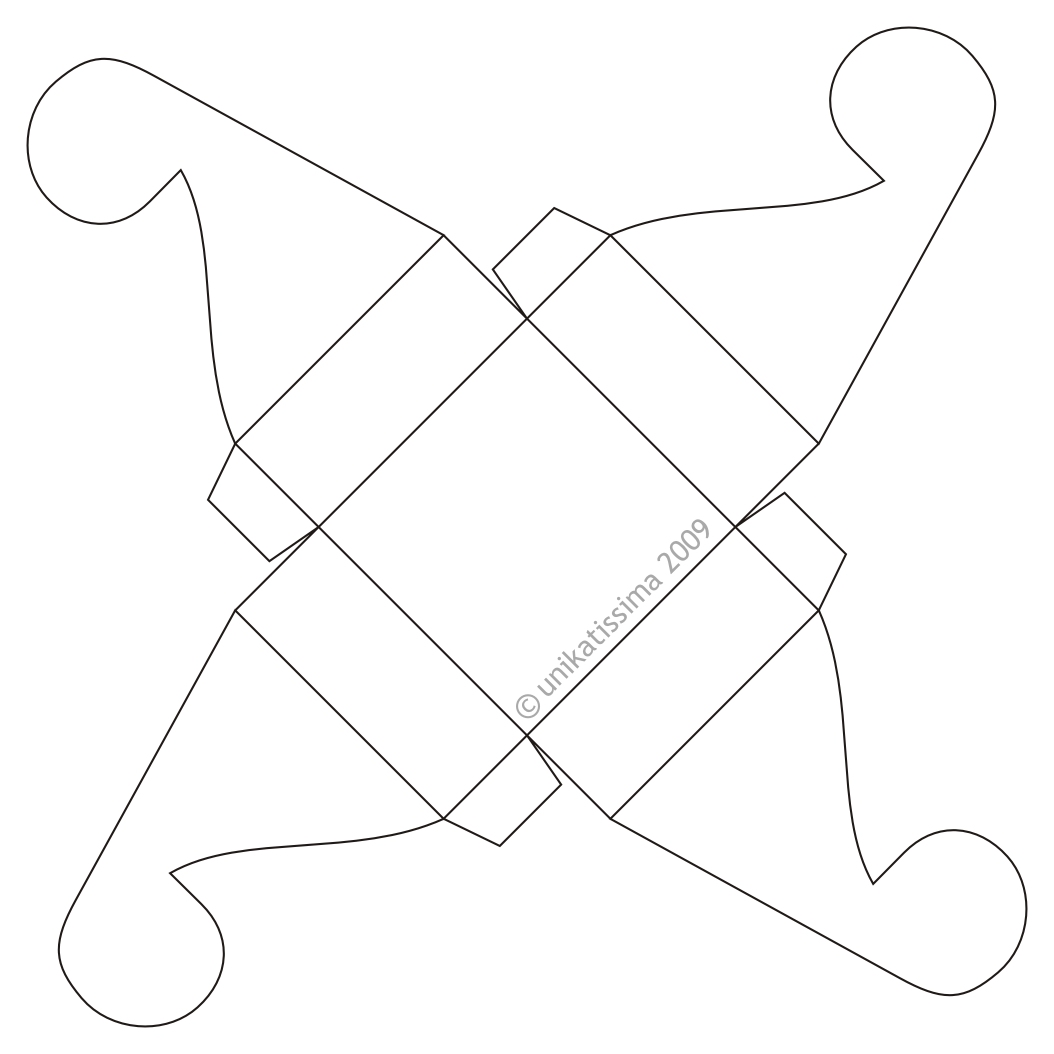 (Click to enlarge)
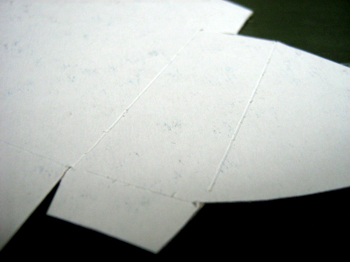
That is the template.
Instruction for first box: Pasted paper
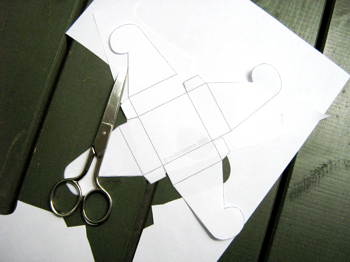
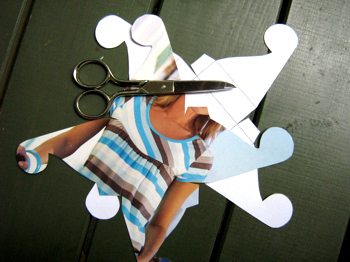
First print the template and cut it.
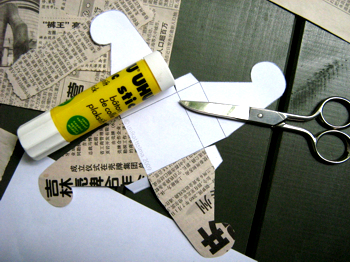
I wanted to have a Chinese box so I pasted the outside up with some Chinese newspapers that I stained with tea before (see links below).
Of course you can paste the paper up with gift wrapping, snippets from ads and so on, too.
I suggest to paste a second layer on the paper in any case to get it sturdier or to use thin cardboard.
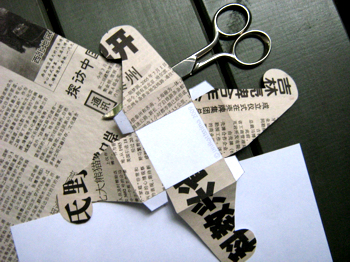
When having pasted up all four flaps you can pre-fold the box. This way it will be easier to glue the tags.
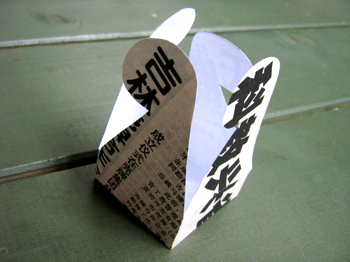
Here is the glue setting.
You can see that I didn’t paste up the inside.
And that is the box in its full beauty ;-)
I suggest to let the glue set well because there will be some strain when you close the box and the tags can get unfixed.
Instruction for second box: Thin cardboard
After the first box I felt like making a box from thin cardboard.
The cardboard is from the wrapping of a pair of trousers I bought and I liked the colours of the printed picture.
So I put my printed and cut template on the cardboard, copied it and cut the cardboard along the lines.
I pre-folded the folding lines to get better folds.
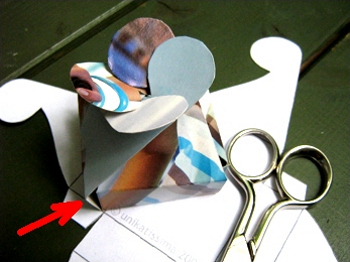
Then I simply folded the box without glueing the tags.
The red arrow shows that there originates a gap.
Depending on what you want you can leave the box at that, the tags make sure that in spite of the gaps nothing will drop ;-)
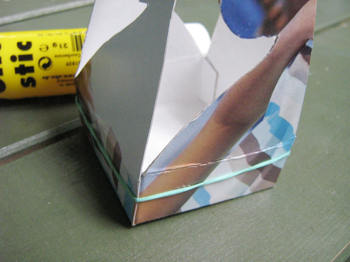
Here I glue the tags to see what happens.
The box always got apart until I fastened it with an elastic.
The glue could set this way better.
And that is my second little box.
You can see at the edges that it is a properly closed box now ;-)
Links:
Here on this site:
Instruction for first box: Pasted paper
Instruction for second box: Thin cardboard
Template to print
Stain paper with tea
Tea Staining Your Art Journal Pages
Tea Stain Paper
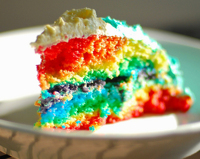
When I saw the cake for the first time I thought: ‘Good grief!’
But the more I look at it the more fun I find it ;-)
It’s only that I would never like the blue but I could easily omit it.
Perhaps after I have lost some weight… ;-)
(Although they mentioned the Weight Watchers points…)
Links:
how to make a rainbow cake!
via One Pretty thing

Somewhen I also want to try fabric printing and then the instruction on how to make a fabric print stamp pad will come handy.
I think that it should also be usable as ‘normal’ ink pad, I should try this sometime.
Links:
Self-made Fabric Print Stamp Pad (‘Tech’ update)
Here at unikatissima: Entries with the tag ‘stamping’
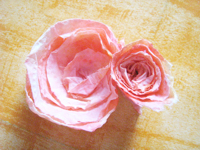
I found an instruction for a nice paper flower and thought that this should work with self-coloured paper, too.
It did ;-)
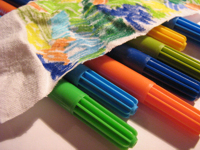
 First I painted on a sheet of toilet paper with some markers.
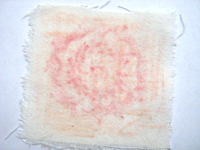
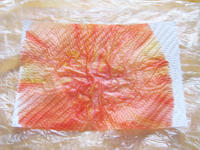 I dropped water on my ‘painting’, but it was a little too much water and everything swam.
In order not to get everything dirty I have put it luckily on an old little plastic bag.
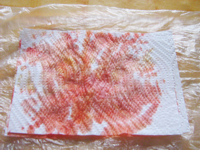 Therefore I put another sheet of toilet paper onto the first, the water and the dye dispersed on both.
I blow-dried everything to dry it faster ;-)
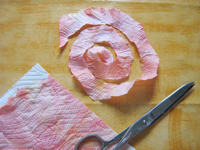 I cut my papers by guess and by gosh, that is to say without a pre-sketched spiral and my scissors were quite blunt.
That may be the reason why my little ‘roses’ look so beautiful ;-)
Links:
Paper Flower – the tutorial works backwards, you must always click the previous picture to get the next step
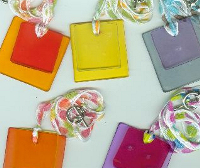
Aren’t those pendants beautiful?
I was totally thrilled when finding the instruction.
Now I must simply purchase some plexiglas, fabric dye and a saw as well as a drill to process them.
I’m sure I will ;-))
Links:
At craftster: Dyed Plexiglas Necklaces
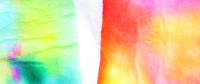
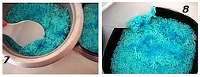
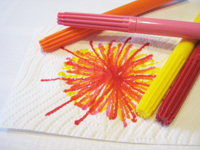
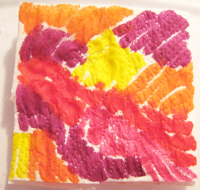
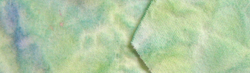
Accidentally I found a way of making beautiful coloured background papers from tissue paper or paper napkins and markers.
That’s what you have to do:
 First I cut the tissue paper in pieces of about 6×6 cm (roughly 2,5×2,5 inches).
I painted them (through all layers) with colour matching markers.
It doesn’t matter if there are little white areas.
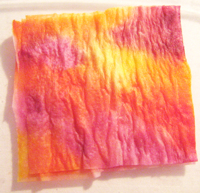 I layed the coloured pieces out on plastic foil (e.g. an unused garbage bag) and moisted them with water.
The water makes the colours bleed wonderfully.
It is best to add the water dropwise, this way you can determine best how much water you add (if it gets too wet, the colours bleeds too much and doesn’t stay on the tissue paper).
 In the end I let dry the coloured squares.
When using them for cardmaking, I mostly only use two or three layers, not all of them.
But you have to try this by yourself.
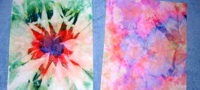
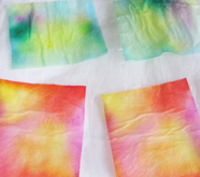
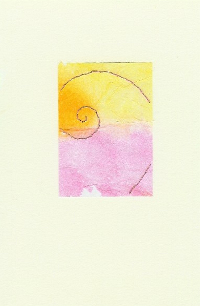
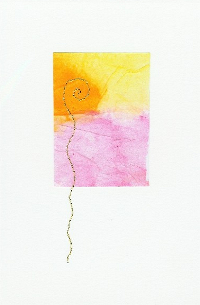
Here I show two hand embroidered postcard sized wallhangings (just like the Paper Crazy Quilt) I worked with self coloured tissue papers. Both tissue papers are layers of the same paper (you can see that they have the same pattern), but the different coloured background papers make them glow differently.
 Once I used the same technique on fabric (an old (clean! ;-)) bedsheet) and it worked.
The next time I added too much water and suddenly everything was of the same dull colour. ;-)
I think that this colour can be heat set just as the acryl coloured or the crayon tinted fabric, but I haven’t tried it yet.
Links:
Here at unikatissima:
Paper Crazy Quilt
I found a very interesting tutorial on how to tint fabric with crayons.
On the picture you see my first and up until now last (and not really successful ;-)) attempt at this technique: I laid a self crocheted flower underneath.
Better you try it by yourself ;-))
I preferred the acryl coloured fabric.
Links:
Tinted Linens
Let’s celebrate
Here at unikatissima: Acryl Coloured fabric
As I found the tutorial on how to dye fabric with acryl colours I was thrilled, because I think that this way I can colour my fabric just the way I want.
I tried it immediately, but I have to work on it some more (and I will! ;-))
In a second entry Debra showed what she did with the paper towels she used to clean her workspace: isn’t it stunning?
Links:
Hand-dyed Fabric Trims
Dyed Paper Towels for Paper and Fabric Arts