Box from woven PET stripes

Square Box from PET

On a brasilian recycling website I found a good tutorial on how to make a box from PET bottles (click there on ‘Tutorial – How to make a square box’).

I won’t do this because we don’t buy so many PET bottles and if we do we can give them back.
But I think that the tutorial can be used with other materials, too, I will once take a look.


Links:
Utsumi – Crafts with PET plastic, click there on ‘Tutorial – How to make a square box’

Ply-split

unikatissima Ply-split

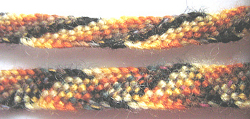
Ply-split is a kind of weaving, but the multi-plied threads are woven through in place of over and under each other (ok, I understand, that this description isn’t very good, best take a look at the links below ;-))
In my entry Freeform Embroidery you can see at the bottom of the photo, too, how ply-split can look.


unikatissima Ply-split
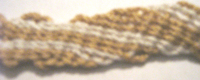
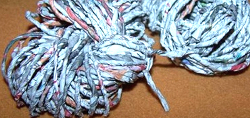
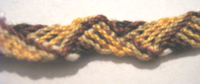
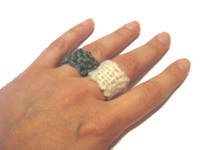
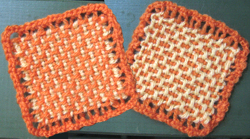
The photos show my attempts at ply-splitting, you can get a muuuch better idea by browsing the Google image search.


unikatissima Ply-split
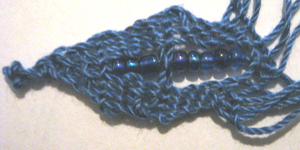
I once even tried to make a pendant with this technique, but it didn’t really work.
Anyhow I still like the combination of ply-split and beads.


Links:
Linda Hendrickson Tablet Weaving and Ply-Split Braiding: scroll down to ‘Ply-split braiding’
On the same site you can find articles about ply-splitting: click in the left navigational bar on ‘Links’, then click on ‘Ply-splitting’, then click on ‘Articles’, then you find 3 articles from Weaver’s

Ply-Splitting at weavershand: links to galleries, instructions and websites of ply-split artists

Gallery of star ornaments

Instruction: Ply-split darning Bookmark: click in the left navigational bar on ‘Ply split braiding’, then click on ‘Begin Braiding 2d Ply Split’

Instruction for a ply-split scarf as PDF (ca. 156 KB) – it looks to me that one have to have some experience with ply-splitting

Instruction for a beautiful snake – it looks to me that one have to have some experience with ply-splitting

Google image search result for ‘ply-split’

Weave a Ring

unikatissima Weave a Ring
As said before, I like to play around with weaving.
The other day I thought: Why not weave a ring?
I think that it worked out amazingly good ;-))


unikatissima Weave a Ring
Material:

  • Yarn
  • Needle
  • Finger replacement ;-)
    That is a roll of firmly rolled paper, it must be a little broader than your finger.
 

What to do:
unikatissima Weave a Ring
Wind the yarn around the finger replacement and knot.


unikatissima Weave a Ring
Then wind the next round, in doing so pass the yarn under itself.


unikatissima Weave a Ring
Repeat the last step as long as you reach the ring’s width.


unikatissima Weave a Ring
Now begin to weave: pass the yarn over and under the threads.


unikatissima Weave a Ring
And that’s how the rings can look.
You have now a ring that you can embellish, e.g. with buttons or beads.


This technique surely can be enhanced, but it is fun already :)
Have fun!

Hiragimi

Hiragimi

Once I found a tutorial on Hiragimi braid, but not only can’t I find it back, while googling for ‘Hiragimi’ I dind’t find anything.
Strange!
But at the tutorial the diagrams weren’t so good, so I sketched the diagrams again for myself.
And so you can download them now from here ;-))

Hiragimi braid is similar to Kumihimo braid, but the braid won’t be round but flat (see photo).
When making my braid I found it most difficult to get the tension right, I always pulled more to one side than the other so that the braid became curved ;-)


Links:
unikatissima’s Hiragimi (PDF, ~460 KB)
The PDF includes a template for a cardboard disk respectively card (at the end of the file) and a description for braiding the pattern that you can see on the photo

unikatissima’s entries:
Kumihimo
Kumihimo Beads
Kumihimo Edo Yatsu

Clothespin bobbins

Cardboard Weave II

Cardboard Weave II

While surfing I found mini or hand-held looms (see links below), which I find very interesting, because 1st I don’t have much place at home and 2nd I know that I don’t weave, I just try it once in a while ;-))
On the photo you see the front and back side of my little woven patch.


Cardboard Weave II 
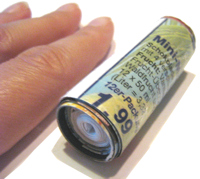
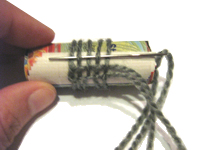
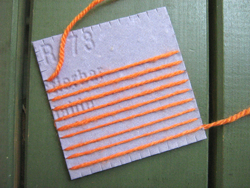
I would never actually buy a loom, therefore I made me one from – guess… – yes: cardboard! ;-)
On the photo you see me threading the loom in one direction.


Cardboard Weave II
Then I thread my cardboard loom in the other direction.


Cardboard Weave II 
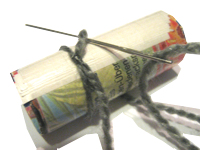
That’s the way my cardboard loom looks at the back side.


Cardboard Weave II 
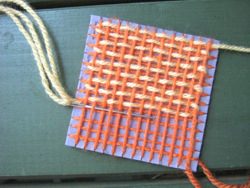
Now I’m weaving in one direction.


Cardboard Weave II 
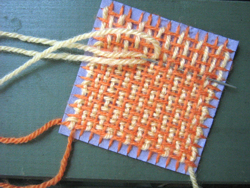
And here I’m weaving in the other direction.


Cardboard Weave II 
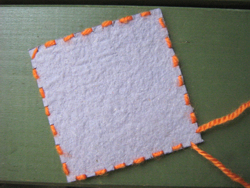
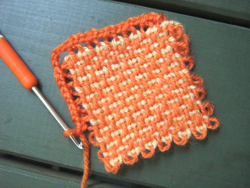
After having finished with weaving I crochet an edging to neaten the edge.

The first photo shows back and front side of the finished little piece.


Links:
At Weavettes:
How to weave on a mini loom (English) (via knitting-and.com)

The original site doesn’t exist any more and is now available through webarchive:
At Weavettes:
How to weave on a mini loom (English) (via knitting-and.com)

At eLoomaNation: Big Ideas from Little Looms:
Get ideas what to do with your patches

Get basic woman measurement charts for clothing patterns at the website of Jessica Tromp just as for the Clothes From Crocheted Medaillons

Peyote Bangles

Peyote Bangles

As I saw the tutorial on how to make Peyote Bangles tutorial on how to make Peyote Bangles I bookmarked it immediately.
It seems to be so easy (although this technique seems only to work with slender bangles) – just the right technique for me ;-))
There is another tutorial for stripes bangles tutorial for stripes bangles – looks also great.


Links:
Peyote Bangles
Striped Peyote Bangles

The original site doesn’t exist any more and is now available through webarchive:
Peyote Bangles
Striped Peyote Bangles