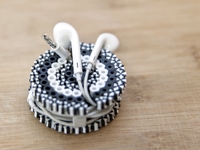
Doesn’t this black and white perler bead earbud holder look chic? :)
Links:
Perler Bead Earbud Holder (DIY Perler Bead Earbud Holders)
via: DIY Perler Bead Earbud Holders
…compilation of tutorials
Doesn’t this black and white perler bead earbud holder look chic? :)
Links:
Perler Bead Earbud Holder (DIY Perler Bead Earbud Holders)
via: DIY Perler Bead Earbud Holders

I like these fabric tribal necklaces very much :)
Links:
Fabric Tribal Necklaces (Scraps Of Fabric Into Tribal Necklaces)

If you still have leather scraps make yourself these beautiful leather feather earrings :)
Links:
Leather Feather Earrings (DIY: Leather Feather Earrings)
via: Leather Feather Earrings
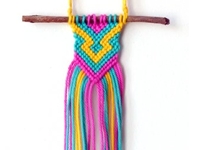
Doesn’t this macramé twig pendant look beautiful?!
Links:
Macramé Twig Pendant (Handwoven Twig Necklace)
via: Handwoven Twig Necklace

I have already presented the cute ear cats.
The polymer clay ear flower works in the same way.
Beautiful, isn’t it? :)
Links:
Polymer Clay Ear Flower (Fake flower gauge, Fake tunnels, Fake floral piercing, expander for her, fake plug lily, polymer clay)
Here at unikatissima:
Ear Cats

This Celtic braid bracelet looks great, doesn’t it? :)
Links:
Celtic Braid Bracelet (CELTIC bracelet) (Catalan, with photos)
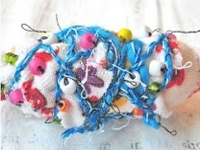
For the previously presented embellished fabric beads there’s also a video tutorial.
And if you like these embellished fabric beads II, also look again at the cotton ball fabric beads :)
Links:
Embellished Fabric Beads II (Video Tutorial: how to make fabric beads)
Here at unikatissima:
Embellished Fabric Beads
Cotton Ball Fabric Beads

I find this wire and bead ring most beautiful!
Links:
Wire and Bead Ring (DIY Bauble Ring)
via: Garden Green Bauble Ring
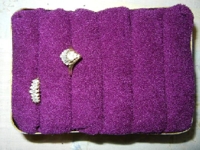
It seems to be really easy to make such a DIY ring holder :)
Links:
DIY Ring Holder (What a cute idea for organizing rings or brooches. According to a pinner, “DIY Ring Holder: Since all the tutorials I found meant a LOT of cutting, rolling and gluing, I decided to do it MY way. Repurposed materials: a cheap sponge, a discarded tin & fabric scrap. Actually used my fingers to tuck the fabric instead of the knife as shown. Didn’t bother with glue. Formula for fabric size: D+D+W+1″= fabric Width by D+D+L+(number of slits X 1″)+1″= fabric Length.”) (englisch)
=> unfortunately I haven’t found the original instruction
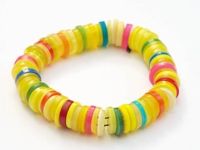
For the previously presented button bracelet the buttons were put on the elastic on top of each other, for this bright button bracelet they are close-packed side by side.
I like both styles :)
Links:
Button Bracelet (Ein Knopfarmband – sehr bunt und etwas anders…) (German)
via: Make a Button Bracelet
Here at unikatissima:
Button Bracelet