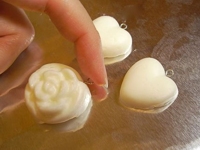
I presented an air-drying clay that was called cold porcelaine before, here is another, similar cold porcelaine recipe.
I have absolutely to try it!
Links:
Cold Porcelaine (How to Make Cold Porcelain)
Here at unikatissima:
Cold Porcelaine
…compilation of tutorials
I presented an air-drying clay that was called cold porcelaine before, here is another, similar cold porcelaine recipe.
I have absolutely to try it!
Links:
Cold Porcelaine (How to Make Cold Porcelain)
Here at unikatissima:
Cold Porcelaine
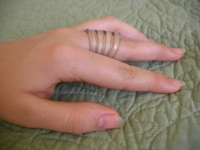
After you have transformed all your spoons to spoon pendants you want perhaps to work on your forks now?
Because what she’s doing here with the plastic forks must surely work with ‘real’ forks, too?! (Although not with a heat gun, I suppose ;-))
Links:
Clear Plastic Fork Ring
Here at unikatissima:
Spoon Pendants
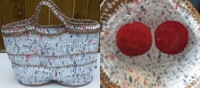
Recently I made the paper shopping bag for the ‘Craft Challenge #47 – Reusable Shopping Bag Challenge 2′ and one of the other (really great!) entries was the plarn and plastic lids shopping bag.
The idea is at first sight not so different from that of the plastic bag tote (there you can also find a link on how to make plarn (= plastic yarn)), the special thing is the bottom which she made from big round plastic lids and which gives the bag a sturdy bottom.
She attached the bottom like I did with my beverage carton crochet.
A great bag!
Links:
Plarn and Plastic Lids Shopping Bag (Question: What to do with all the plastic lids cluttering my cabinet???)
Craft Challenge #47 – Reusable Shopping Bag Challenge 2
Entries to the challenge
Here at unikatissima:
Paper Shopping Bag
Plastic Bag Tote
Beverage Carton Crochet
Still got some plastic bottles? ;-)
Then try to make some earrings or a simple yet striking necklace!
Links:
DIY Eco-Hip Accessories
Here at unikatissima:
Entries containing the word ‘plastic bottle’
At craftster started the ‘Craft Challenge #47 – Reusable Shopping Bag Challenge 2’ and I had the idea of making a shopping bag from paper (see also the other entries).
In principle I really like it, but some things didn’t work the way I wanted them to (see also below) so that I didn’t finish the handle but only show how it can be made.
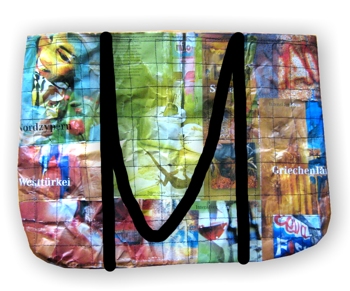
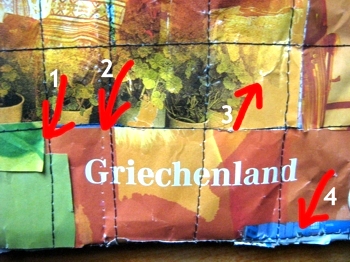
That’s how my shopping bag looks from one side…
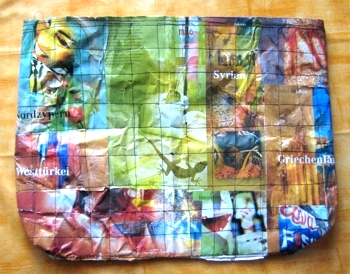
… and so from the other.
I used clippings from a travel brochure, so my bag is not only multicoloured but gives me even wanderlust ;-)
That’s what you do:
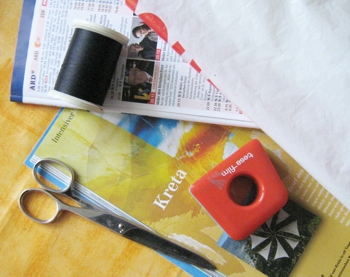
That’s what you need:
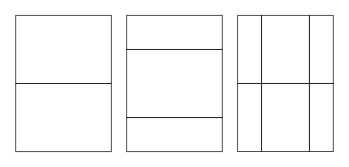
First I layered three layers of my TV guide pages.
I used them askew as shown in the graphic so that they don’t always touch in the same place (every large rectangle is a page from the TV guide, the smaller ones are pages cut into halves in one or the other direction).
I taped them rarely so that the whole doesn’t fall apart.
On the future outside I laid on the clippings from the travel brochure and glued them on rarely to fix them slightly.
Note: Don’t use too much tape or glue because you can get bad problems with your sewing machine.
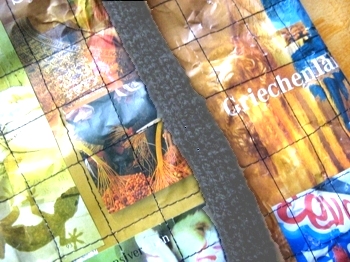
I laid the cut white plastic bag on the backside of my large paper rectangle with meanwhile four layers and begun to sew.
Note: It pays to fix the plastic bag somehow, too ;-)
Then I just started sewing (did I mention that I’m completely unexperienced in sewing? ;-))).
I wanted to sew (and have somehow sewn ;-)) lines but it was much more difficult than I thought.
Therefore I made a mental note of some points for the next bag:
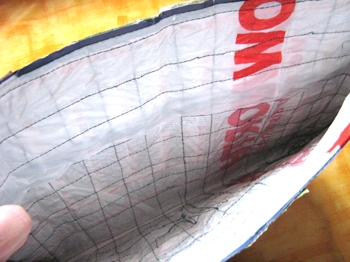
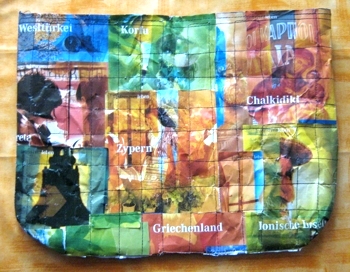
That’s how my bag looks at the inside.
Actually I wanted to make a shoulder-long black with plastic bags filled I-cord as handle (I post-worked the photo to show you the knitting, originally it’s been completely black just as in the next photo ;-)) …
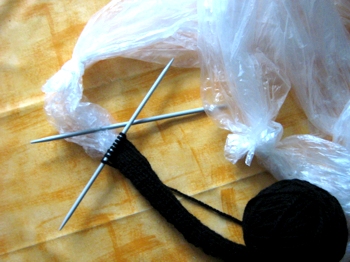
…but I don’t want to make it for a bag with lots of defects.
You can see here anyhow how I knotted the plastic bags together and knitted a little bit already.
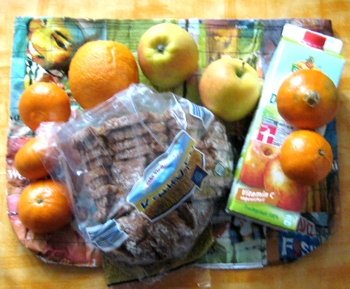
The bag seems to be quite robust and I wanted to try out what it can carry.
Therefore I stuffed 1 l juice, half a kilo of bread, 2 appels, an orange and 5 tangerines in – in short a little shopping ;-)
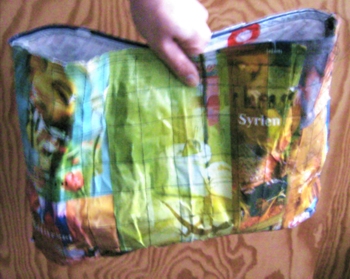
Here I’m holding the bag with the content of the previous picture – no problems at all ;-)
Links:
Craft Challenge #47 – Reusable Shopping Bag Challenge 2
Entries for the Craft Challenge #47
Here at unikatissima:
Clothesline Knitting or Filled I-cord

Mostly I’m unnerved by the shampoo, shower gel and detergent plastic bottles and throw them away – where I should have kept them all to make such a wonderful plastic bottle light chain.
Or a lot of other great things.
;-))
Links:
Plastic Bottle Light Chain (Colorful lights)
Here at unikatissima:
Entries containing the word ‘plastic bottle’
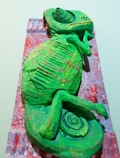
When I saw the chameleon I was totally amazed – especially because it contains also a secret compartment!
Well, it doesn’t go with my room, but who knows…
;-))
Links:
Foam Chameleon Wall Hanging (Ugly foam cooler and box to cool chameleon wall hanging w/secret compartment!)
via: [FINISHED] Craft Challenge #45 – Super Ugly to Super Awesome Rd 2 – Dc 1 – Dec 5
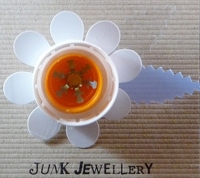
Such a pin from old plastic bottles and the like can look really cute, can’t it?
Now I’m debating with myself on whether I should collect these, too.
;-))
Links:
white brooch
via: Jewellery made from recycled stuff – a mini-round-up
via: art for housewives – pin cushions and junk jewellery

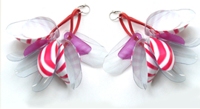
When I saw the drinking straw pin I thought: ‘Oh yes, I want!’ ;-)
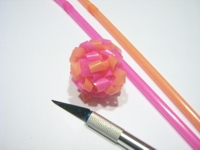 It is quite easy: I took two different coloured drinking straws, cut them (veeery carefully!) into spirals with an X-acto knife und knotted them (not too firm) together.
This way my little ball stays in form without glue, sewing or the like.
I wanted to cut them first with scissors but I got ugly edges, the cut must be made with a really sharp cutting tool.
I find it cute as well as jewelry as well as tree ornament ;-)
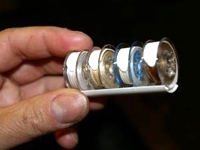
Ok, ok, today is Saint Nicholas, but here the show is already over, the boot wasn’t only filled but emptied already and life goes on.
And to let it go on neatly (at least concerning sewing) the bobbin holders from spiral binders can help ;-))
So in case that you still have to sew something for Christmas everything should go more easily now :)
Links:
Bobbin Holder (Bevy of Bobbins- corral your unruly bobbin thread! Pics, too!)
Saint Nicholas – Celebration in Central Europe
Here at unikatissima:
Entries with the tag ‘sewing’