Kolam

gokulmuthu Random Symmetrical Kolam Generator

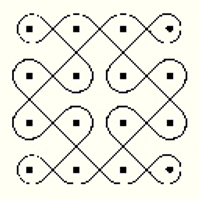
I discovered kolams (English Wikipedia entry for ‘Kolam’)!
They are beautiful patterns and I do like to play around with knots and the like ;-)

It all begun when I found a tutorial on how to design kolams.
Then I first checked what kolams are and via the Englisch Wikipedia entry for ‘Kolam’ I found a Random Kolam Generator Random Kolam Generator and an Interactive Kolam Maker. I wasn’t able to use the latter in an appropriate way, double click on the circles always brought different results.
I suppose that I only have to work on it a little bit more.
But I think that I will stick to the previously mentioned tutorial on how to design kolams, especially after I have seen the kolam images at Google and flickr.
And I guess that I won’t need the receipe for kolam rice flour colour (it is in German, but it is mainly one table spoon rice flour mixed with a pinch of colouring from plants or minerals and then painted with moist fingers), because I mostly use graphic programs (that’s because I can’t draw a straight line ;-)).


Links:
Tutorial on how to design kolams

Random Kolam Generator
Generator moved to: Random Kolam Generator
Interactive Kolam Maker

Kolam Rice Flour Colour Receipe (Kolam aus Reismehl) (German)

Google search result for ‘kolam’
Google image search result for ‘kolam’

flickr photos tagged with ‘kolam’

Wikipedia:
English Wikipedia entry for ‘Kolam’
German Wikipedia entry for ‘Kolam’

Here at unikatissima: Entries wit the tag ‘Image editing’

Easily Remove Pages From Books

unikatissima Easily Remove Pages From Books.jpg

If you want to make Altered Books or Artist Books, or maybe book purses, or you want possibly remove individual book pages to make a beautiful card, then the tutorial on how to easily remove pages from books may be helpful: you moist a thread, lay it into the book at the place where you want to remove a page, close the book firmly, so that the moisture can enter the paper and then you can tear the paper cleanly.
It’s the same principle as for tearing paper, but here the moist line is certainly straight and much thinner.
Ingenious!


Links:
At instructables: How to easily and cleanly remove pages from books

Here at unikatissima:
Artist Book
Notebook Purse
Tearing Paper

Self Coloured Tissue Papers

unikatissima Self Coloured Tissue Papers

Accidentally I found a way of making beautiful coloured background papers from tissue paper or paper napkins and markers.


That’s what you have to do:
unikatissima Self Coloured Tissue Papers 
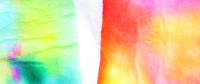
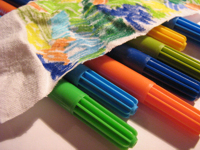
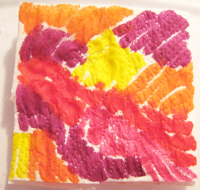
First I cut the tissue paper in pieces of about 6×6 cm (roughly 2,5×2,5 inches).
I painted them (through all layers) with colour matching markers.
It doesn’t matter if there are little white areas.


unikatissima Self Coloured Tissue Papers 
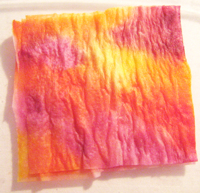
I layed the coloured pieces out on plastic foil (e.g. an unused garbage bag) and moisted them with water.
The water makes the colours bleed wonderfully.
It is best to add the water dropwise, this way you can determine best how much water you add (if it gets too wet, the colours bleeds too much and doesn’t stay on the tissue paper).


unikatissima Self Coloured Tissue Papers 
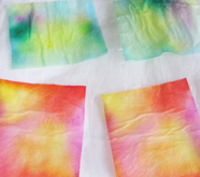
In the end I let dry the coloured squares.
When using them for cardmaking, I mostly only use two or three layers, not all of them.
But you have to try this by yourself.


Here I show two hand embroidered postcard sized wallhangings (just like the Paper Crazy Quilt) I worked with self coloured tissue papers. Both tissue papers are layers of the same paper (you can see that they have the same pattern), but the different coloured background papers make them glow differently.
unikatissima Card unikatissima Card


unikatissima Self Coloured Fabric Once I used the same technique on fabric (an old (clean! ;-)) bedsheet) and it worked.
The next time I added too much water and suddenly everything was of the same dull colour. ;-)
I think that this colour can be heat set just as the acryl coloured or the crayon tinted fabric, but I haven’t tried it yet.


Links:
Here at unikatissima:
Paper Crazy Quilt

Acryl Coloured Fabric
Crayon Tinted Fabric

DIY Fisheye Lens

unikatissima DIY Fisheye Lens

Another great idea: to make a fisheye lens for your camera with old glasses!
Because I had no suitable glasses I cheated just a little bit by creating the fisheye effect with my graphics program.

But one day…
;-)


Links:
At photojojo: The DIY Fisheye Lens — Using Nothin’ But a Pair of Old Glasses and Some Tape

At flickr: examples for photos made with the fisheye

Paper Flower Ornaments

unikatissima Paper Ornament

Soon you will need nice ornaments for New Year’s Eve and I find the paper flower ornaments cute.
On the photo you see a snap try (very fast, but not very accurate ;-)) with plain wrapping paper which is coloured at one side only: I suggest that you do no such thing!
First the paper is much too thin, therefore the ornaments don’t look so beautifully rounded as the originals.
Second is the fact, that the paper is printed on one side only silly: If you follow the instruction properly you get half a coloured and half a white flower.
Third it helps to work accurately, then the flower doesn’t look so messed up ;-))


Links:
Paper flower ornaments

Paperless Origami

unikatissima Paperless Origami

If you’re folding origami figures they often come undone, are collapsing or sagging.
That’s especially vexing if they were meant to be a holiday decoration.
But now I found a very good solution to avoid sagging origami figures: fold the origami figures from fusible interfacing.
I must say that I find the photos of the tutorial persuasive.
Something more to try one day ;-))
(P.S.: On the photo you can see my iron for a start, I still have to purchase fusible interfacing ;-))


Links:
Paperless Origami

String Decorated Ornaments

crealic String Decorated Ornament

A nice method to create beautiful Christmas tree ornaments (and much more) shows this tutorial on how to make string decorated ornaments (French).

It’s very easy:

  1. You choose the element to be decorated ((foam) sphere, box, paper bag etc.).
  2. Paint the pattern on with PVA glue (if necessary after sketching them with a pen).
  3. Put the string on the glue and fix with pins. The glue dries transparently.
  4. After the glue has dried, take away the pins and paint your ornament (or box or what ever you decorated). You can paint the string in another colour than the element. Additionally you can paint some little decorative patterns to lighten the background.

Best if you check the photos of the instruction, they explain every thing very well.


Links:
String Decorated Ornaments (Décors divers en ficelle) (French)