Recycled Gift Tags

unikatissima Recycled Gift Tags

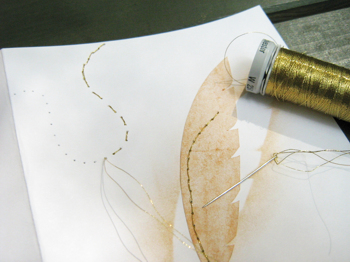
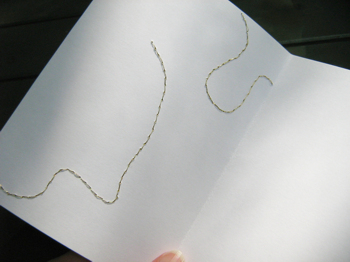
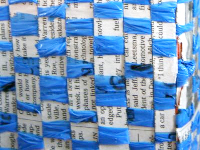
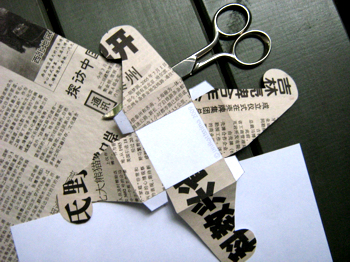
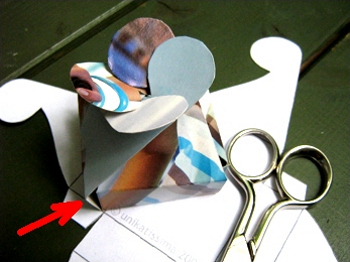
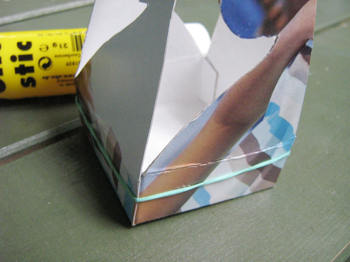
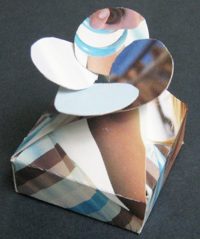
The gift tags on the photo aren’t ready yet: I simply can’t decide with which yarn I should wrap them.

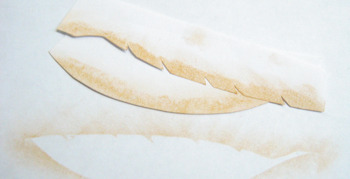
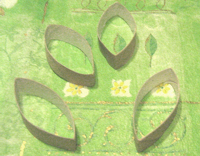
But I find the idea really great: flatten the cardboard tube, cut it in strips and wrap the pieces with yarn.
I think that it could look beautiful, too, when wrapped in a piece of beautiful polymer clay and worn as necklace, earring or pin.
Hm.

When reading the instructions for the gift tags I had to think somehow at the surprise ball gifts ;-)

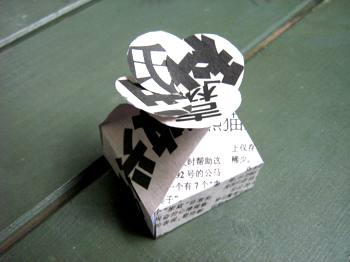
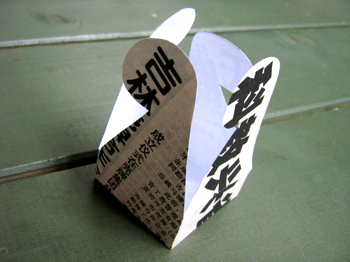
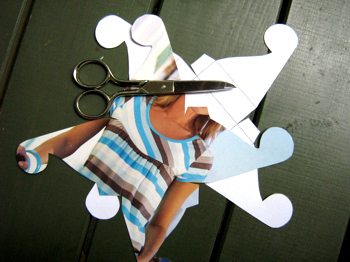
But she had other ideas, too, about what to make with these paper shapes, namely a cute tealight and an interesting lamp decoration.

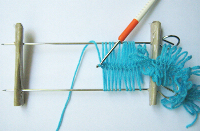
I presented before entries about recycled cardboard tubes here in this blog, namely the beaded amulet bag, the plaster photo holder and the knitting loom from a plastic bottle.
But there the cardboard tube was ‘only’ a tool.


Links:
recycling project no. 19 – yarn gift tag

recycle project no. 12 – tealight decoration
recycle project no. 16 – hurricane cover

Here at unikatissima:
Surprise Ball Gifts
Beaded Amulet Bag
Plaster Photo Holder
Knitting Loom from Plastic Bottle

Rhombic Dodecahedron Calendar

hbmeyer Rhombic Dodecahedron Calendar

I find this 12-sided calendar a nice idea for a gift.
It is made for 2009 but you can adapt it to 2010 from the blank template yourself, possibly even handwritten and embellished with funny sketches.


Links:
Rhombic Dodecahedron and Calendar 2009: paper strips for plaiting
There is also a German version.

Stencilled Card

unikatissima Stencilled Card

(Click photo to enlarge)
Recently I needed a birthday card and that is the reason why I played around with stencilling again ;-)


unikatissima Stencilled Card
I wanted to have a negativ stencilled feather and sketched and cut therefore a feather.
Here I’ve made my first tests already.


unikatissima Stencilled Card
I covered my feather with light brown chalk and smeared the chalk with my fingers outwards.
This way I got white areas around my stencil which made the quill of my feather much too broad for my liking (see arrow).


unikatissima Stencilled Card
Therefore I cut two half-stencils and used them.
It worked great!
Another advantage of this half-stencil method is the fact, that the really narrow quill of my feather can’t slip or even tear anymore.


unikatissima Stencilled Card
I glued a cut-out feather shifted on my stencilled feather and because I thought that something is missing, I embroidered some lines with golden thread.
I used a running stitch back and forth as I always do.


unikatissima Stencilled Card
That’s how the inside of the card looks – I left it this way and wrote on the right side of the card.


unikatissima Stencilled Card (Click photo to enlarge)
And that’s how the finished card looks: I liked it ;-) and the adressee liked it, too :)

Admittedly the card looks still a little bumpy here because I fixed the chalk with hair spray. After everything was (really!) dry I put it under a heavy book and afterwards it was beautifully flat again.


Links:
Instruction on how to make the Running Stitch (English)
Instruction on how to make the Running Stitch (Vorstich) (German)

Here at unikatissima:
Entries with the tag ‘stencil’
Entries with the tag ’embroidery’

Postcard Boxes

Craftster Postcard Boxes

Once I’ve seen pictures of beautiful postcard boxes (that I don’t find back, unfortunately ;-() and I always wanted to make some.
Up until now I haven’t found the time but now that I even have templates for them, it should work somehow ;-))


Links:
Postcard Boxes (Back The Day It Was Frugal – Today It’s Going Green)

Here at unikatissima:
Entries with the tag ‘box’

Juice Rack

Recyclart Juice Rack

I’m always fascinated of all those ideas that people have – just as of this juice rack: simply nail some beverage cartons to a plank and you get a coat rack.
Sheer lunacy ;-))

If you have a coat rack already or you find this one interesting but don’t want to have it at your home ;-), you can make a lot of other stuff from your beverage cartons: beverage carton crochet, a Marudai, a weaving loom, a coin purse or a vase.
I’m sure that in the course of time more will come ;-))
And if you’d like to have a coat rack but not especially from beverage cartons take a look at the Bookhooks (from my entry Recycle books).


Links:
Juice Rack
Bookhooks (from my entry Recycle books)

Here at unikatissima:
Beverage Carton Crochet
Links to self-made marudai in my Kumihimo entry
Cardboard Box Loom
Tetrapak Coin Purse
Woven Newspaper Vase
Recycle books

Hexagonal Box

papirklip og aesker Hexagonal Box.jpg

I always like to look for boxes and I like the hexagonal box very much – just as much as the Washi box because they have both this ‘extra box on the inside’.

Coming soon! ;-)


Links:
Hexagonal Box (Sekskantet papæske Hexagonal box) (Danish and Englisch) – the first text is always Danish, the English text follows in italic font

Here at unikatissima:
Make a Washi Box
Entries with the tag ‘box’

Self-made Hairpin Lace Loom

unikatissima DIY Hairpin Lace Loom

I found two tutorials on how to make a hairpin lace loom (see links below) and because I hadn’t the appropriate material at hand (in fact that’s strange seeing all the stuff I have lying here about ;-)) I did it a little different:
I took two toilet paper tubes, cut them lengthwise, rolled them up strongly and taped them all around.
Then I pricked two metal kebeb skewers through those thick cardboard rolls: my hairpin lace loom was done!
;-)

At last I could give hairpin lace a try and it – worked.


unikatissima DIY Hairpin Lace Loom
That is to say that I haven’t read the hairpin lace instruction at stichdiva thoroughly(!) and therefore it didn’t work in the beginning.
They write ‘Insert hook under thread of topmost loop’, but for me it isn’t the topmost thread (blue arrow) but the foremost thread (red arrow).
After I took the foremost thread everything worked fine.

At the moment I don’t have the time for it but in future I will play around with hairpin lace :)


Links:
Instructions for self-made hairpin lace looms:
Instruction at ehow – from metal
there you can find further down (Resources) links to hair pin lace tutorials
Instruction at Little Projects – from bamboo skewers and hot glue sticks
via: DIY Hairpin Lace Loom: the link isn’t available no more.

Tutorial for base hairpin lace at stitchdiva

Google search result for ‘hair pin lace’
Google image search result for ‘hair pin lace’
Google search result for ‘Gabelhäkelei’
Google image search result for ‘Gabelhäkelei’

Woven Newspaper Vase

The Creative Year Woven Newspaper Vase

I like paper weaving and recycling, too, but I like it even better if all come together ;-)

This happens here: they had the inventive idea to glue some newspaper on beverage cartons and weave them with plastic strips to make a (non-waterproof!) vase from.
What a great idea!


Links:
Woven Newspaper Vase

Here at unikatissima:
Entries with the tags ‘weaving’ and ‘paper’
Entries with the tag ‘recycling’
Entries with the tags ‘weaving’, ‘paper’ and ‘recycling’

Flower Flap Box

unikatissima Flower Flap Box

I saw somewhere (unfortunately I don’t remember where) such a box, but it was flat while I wanted the actual box (not the flaps) to be of about 2 cm height.
So I made me a template myself ;-))


And that’s what you do:
unikatissima Flower Flap Box Template (Click to enlarge)
That is the template.


Instruction for first box: Pasted paper


unikatissima Flower Flap Box
First print the template and cut it.


unikatissima Flower Flap Box
I wanted to have a Chinese box so I pasted the outside up with some Chinese newspapers that I stained with tea before (see links below).
Of course you can paste the paper up with gift wrapping, snippets from ads and so on, too.
I suggest to paste a second layer on the paper in any case to get it sturdier or to use thin cardboard.


unikatissima Flower Flap Box
When having pasted up all four flaps you can pre-fold the box. This way it will be easier to glue the tags.


unikatissima Flower Flap Box
Here is the glue setting.
You can see that I didn’t paste up the inside.


unikatissima Flower Flap Box
And that is the box in its full beauty ;-)
I suggest to let the glue set well because there will be some strain when you close the box and the tags can get unfixed.

Instruction for second box: Thin cardboard


unikatissima Flower Flap Box
After the first box I felt like making a box from thin cardboard.
The cardboard is from the wrapping of a pair of trousers I bought and I liked the colours of the printed picture.
So I put my printed and cut template on the cardboard, copied it and cut the cardboard along the lines.


unikatissima Flower Flap Box
I pre-folded the folding lines to get better folds.


unikatissima Flower Flap Box
Then I simply folded the box without glueing the tags.
The red arrow shows that there originates a gap.
Depending on what you want you can leave the box at that, the tags make sure that in spite of the gaps nothing will drop ;-)


unikatissima Flower Flap Box
Here I glue the tags to see what happens.
The box always got apart until I fastened it with an elastic.
The glue could set this way better.


unikatissima Flower Flap Box
And that is my second little box.
You can see at the edges that it is a properly closed box now ;-)


Links:
Here on this site:
Instruction for first box: Pasted paper
Instruction for second box: Thin cardboard
Template to print

Stain paper with tea
Tea Staining Your Art Journal Pages
Tea Stain Paper