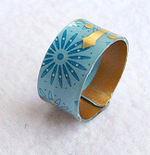
I didn’t know about those Starbuck cards but it seems to me that I should drink my café there in the future – lots of coffee ;-))
Links:
Starbuck Card Jewelry
…compilation of tutorials
I didn’t know about those Starbuck cards but it seems to me that I should drink my café there in the future – lots of coffee ;-))
Links:
Starbuck Card Jewelry
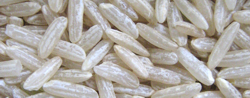
I found a tutorial on how to make rice glue to be used with paper crafts.
I’m always glad when I find non-toxic recipes so I immediatly bookmarked this one.
For the photo I took a picture of rice but I think that Sushi rice or rice pudding rice will work better.
Links:
Rice Glue

I knew about those moldable foam stamps, but I never realized how versatile they are and what great stamps you can make from them. You can even combine them into stunning collages.
I’m speechless again ;-))
On the photo you see my attempt at stamping a clothespins pattern. Because I don’t have no moldable stamp, I used my kneaded eraser. I think this is a great background for a card.

I like the so-called ‘Shabby Chic’ and tried some of the ‘Rough Your Papers Up’-Techniques. They make great backgrounds.
For the piece on the photo I took a gift wrap and sanded it very lightly (although it looks as if I worked hard on it ;-)). The scratches where spotless white, which was much to much contrast, but after I rubbed some ochre coloured chalk in, I like it much better.
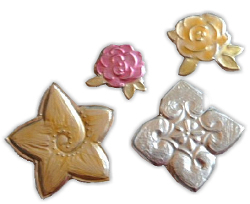
Once I found the suggestion to use the metallic lids of yoghurt cups for embossing (but I don’t know where). Some people use tomato paste tubes ;-)
The metal lid of the yoghurt cups is much softer and can easily be distorted, but they had a solution for this (unfortunately I don’t know anymore, who ‘they’ were): they filled the backside of the embossed metallic foil with PVA glue.
I tried it once and I like what happened.
On the photo you see my results: I put the foil on the mouse pad, embossed it, cut it with scissors, filled the back with PVA glue and waited (!) for the glue to dry. I coloured both roses with nail polish.
The items are lightweight and less bulky than the tomato paste tube embossed. They can easily be used for cardmaking.
Links:
Tomato paste tubes revealed

I love to imitate things, so I had to check immediately the tutorial on how to make faux silk for cards.
On the photo you see my results: I took one of my self carved eraser stamps, coloured it with a marker and stamped on tissue paper (the left flower). Then, just to see what happens, I stamped two more times. The photo isn’t so good, but the pale stamps look elegant. On the third I didn’t smooth the paper to allow for more crinkles.
I will use this technique more often.
Links:
Faux Silk
unikatissima’s Eraser Stamps how-to
unikatissima’s Stamping With Markers how-to
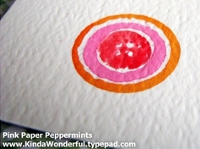
Pink Paper Peppermints has a beautiful project: 31 Crafty Flowers.
I checked them all and I wanted to present one of them, although I haven’t tried it yet, because I dont’ have the right markers: the Watercolor Button Garden.
Aren’t they beautiful?
And be sure to check the other flowers too :)
Links:
Watercolor Button Garden
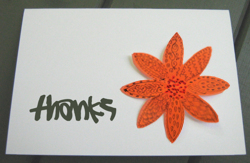
While browsing Origami links I found a tutorial on how to cut Kirigami flowers, a technique we used when we were children for cutting snowflakes.
I hadn’t realized that this technique is so widely usable and brings so beautiful results.
On the photo you see a flower I cut in very short time for a greeting card and suddenly I felt the urge to doodle on it ;-)
Every petal looks different now.
The photo is bad, but I hope that you can see what I am talking about.
Links:
Kirigami Flower

I found an ingenious way to make my own Airbrush tool.
I haven’t tried it yet, but I think of using it with the cut-out letters from my letter stencils.
(The picture is a mock-up, made digitally to show what I am aiming for.)
Links:
Pocket Graffiti Pen (with explaining photos)
Here at unikatissima:
Letter stencils

While working with polymer clay I found a tutorial on how-to make items with a Bargello-look.
Then I made a little research to know what Bargello is (links see below):
It seems, that the first ‘Bargello craft’ was embroidery, but then the quilters worked Bargello-looking quilts, the polymer clay people made those items with a Bargello-look and the stampers and cardmaking people use this technique on paper. And I made my Bargello digitally as you can see on the picture ;-)
What a versatile technique ;-)
Links:
Embroidery:
Wikipedia: English entry for ‘Bargello’
How-to make Bargello needlework:
Bargello Work
Bargello needlepoint
Quilting:
How To Make Bargello Quilt
Polymer Clay:
Tutorial on how-to make items with a Bargello-look
Bargello Swap
Tutorial on how to make a Bargello pattern as cane and as sheet
Stamped Paper:
Bargello (English) (with explaining pictures)