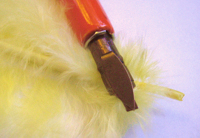
I like to write with pens, but never had a ‘real’ quill pen. With the tutorial on how to cut quill pens I can try it – as soon as I get to know a swan or a goose personally (poor me, being a city kid! ;-))
Links:
Cutting a Quill Pen
…compilation of tutorials
I like to write with pens, but never had a ‘real’ quill pen. With the tutorial on how to cut quill pens I can try it – as soon as I get to know a swan or a goose personally (poor me, being a city kid! ;-))
Links:
Cutting a Quill Pen

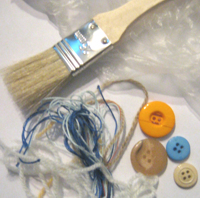
Via one of my most preferred check-this-out blogs art for housewives I found a website with homemade paint recipes.
I liked best that they are made with stuff from household and tempera paint or food colouring.
On the photo you see some of the ingredients I already gathered, but unfortunately I don’t have no tempera paint nor food colouring at home.
Still to purchase :)
Links:
Homemade Paint Recipes
via art for housewives
Once again I found a tutorial about something I really want to try once: Collograph Printing.
I think it could be fun: to glue stuff onto cardboard, to ink it and to press a sheet of paper onto.
The paragraph where they wrote, that you can use moistened watercolour paper and get some embossed paper was most interesting to me.
I will ;-))
Links:
Collograph Printing

I found a tutorial on how to make cute, fast, self-made packages. They are self painted, respectively self stamped boxes like the recycled card pillow box I presented some time ago.
Concerning the stamping I even found an instruction on how to mass produce greeting cards (it is no real mass production, but she’s making a good many beautiful greeting cards ;-))
I had no reason yet to make this, but it is not soo long until Christmas ;-))
On the photo I already arranged my (for a good deal self carved) stamps ;-)
Links:
Decorating Boxes for Special Occasions
Pattern Paper & Mass Produced Cards
At unikatissima:
Recycled Card Pillow Box
Eraser Stamps
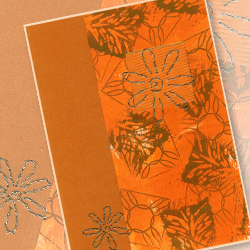
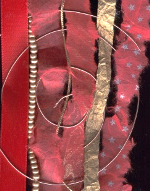
Pages of the heart presented once weekly a card sketch for making cards. Together with the beautiful cards made by others it is always an inspiration for card making.
On the photo you see a card I made following the weekly sketch #9 (but I turned it around).
The card background is stamped with bought as well as self-made stamps and the daisies are hand embroidered just as the paper crazy quilt.
They are re-vamping the website, so it is a little more laborious to reach the articles: Go to the articles site and search there (left navigation bar) for ‘Weekly Sketch’ in the categorie ‘Cards’.
The result will compensate for the trouble :)
Links:
At Pages of the heart: Card sketches
Browse them by going to the articles site and search there (left navigation bar) for ‘Weekly Sketch’ in the categorie ‘Cards’
Here at unikatissima:
Eraser Stamps
Paper Crazy Quilt
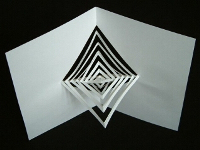
I found a tutorial for a great pop-up card! The center spins apparently when opening the card.
There is even an animation.
Unfortunately I haven’t had the time to make this card yet, but I will ;-)
Links:
Popup Spinner
Animation showing how the popup spinner works
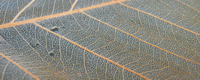
I found a tutorial on how to make leaves skeletons.
You must use the leaves of the ‘peepal tree’, unfortunately I didn’t find out what this tree is called in German.
I tried different leaves, but it didn’t work, alas.
And those leaves skeletons are soo beautiful!
Links:
Make a Card of Webbed Veins

If you’re making altered books or cards, you often use single, meaningful words.
I have found a good proposal on how to illustrate words.
On the picture I tried to put the word ‘Glass’ onto the photo of the tesselation as if it was made of glass (not bad for a first try? ;-))
My inspiration was a tutorial on how to create a gel button.
It was fun ;-)
Links:
Illustrate Words
Gel Button
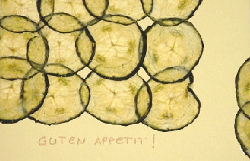
Once I found a tutorial on how to make paper from vegetables, but I don’t find back the tutorial (it was at ARD-Buffet, but it seems to be too long ago).
On the photo you see a card made with cucumber paper for a friend for the end of fast.
How to make cucumber paper:
Repeat steps 2 – 5 until the tissue paper stays nearly dry.
Lay between new sheets of tissue paper and between several layers of old newspapers and put some weight on it.
About once a day you must replace the moist tissue paper and newspapers by dry ones.
After 2 – 3 days your cucumber paper is ready for use.
Cucumber seems to be one of the easiest vegetables to be used for paper. You can also use other vegetables, but I haven’t tried them and can’t say, how thick the slices must be and how long it takes.
The paper is real paper: You can write on it, you can cut it and so forth.
Although I like it, I always considered paper weaving a bit dull. Then I saw Paperweaving Plus (scroll down until ‘Paperweaving Plus’) and found the results fascinating.
I liked especially the not-only-paper-weave which I have to try as soon as possible.
Links:
Paperweaving Plus (scroll down until ‘Paperweaving Plus’)
Weave paper stripes into a sheet of paper (English) (With explaining pictuers)
If you also think, that paper weaving is a little dull, take a look at the flickr results for ‘paper weaving’